Hi! I’d love for you to follow me on Pinterest Her Tool Belt and if you love instagram, you can keep up with me there too!
Another day, another challenge 🙂 ! Today’s challenge is the power tool challenge and the theme for this month is Fall! I like these challenges, they take me out of my comfort zone and it’s fun to see what the others come up with.

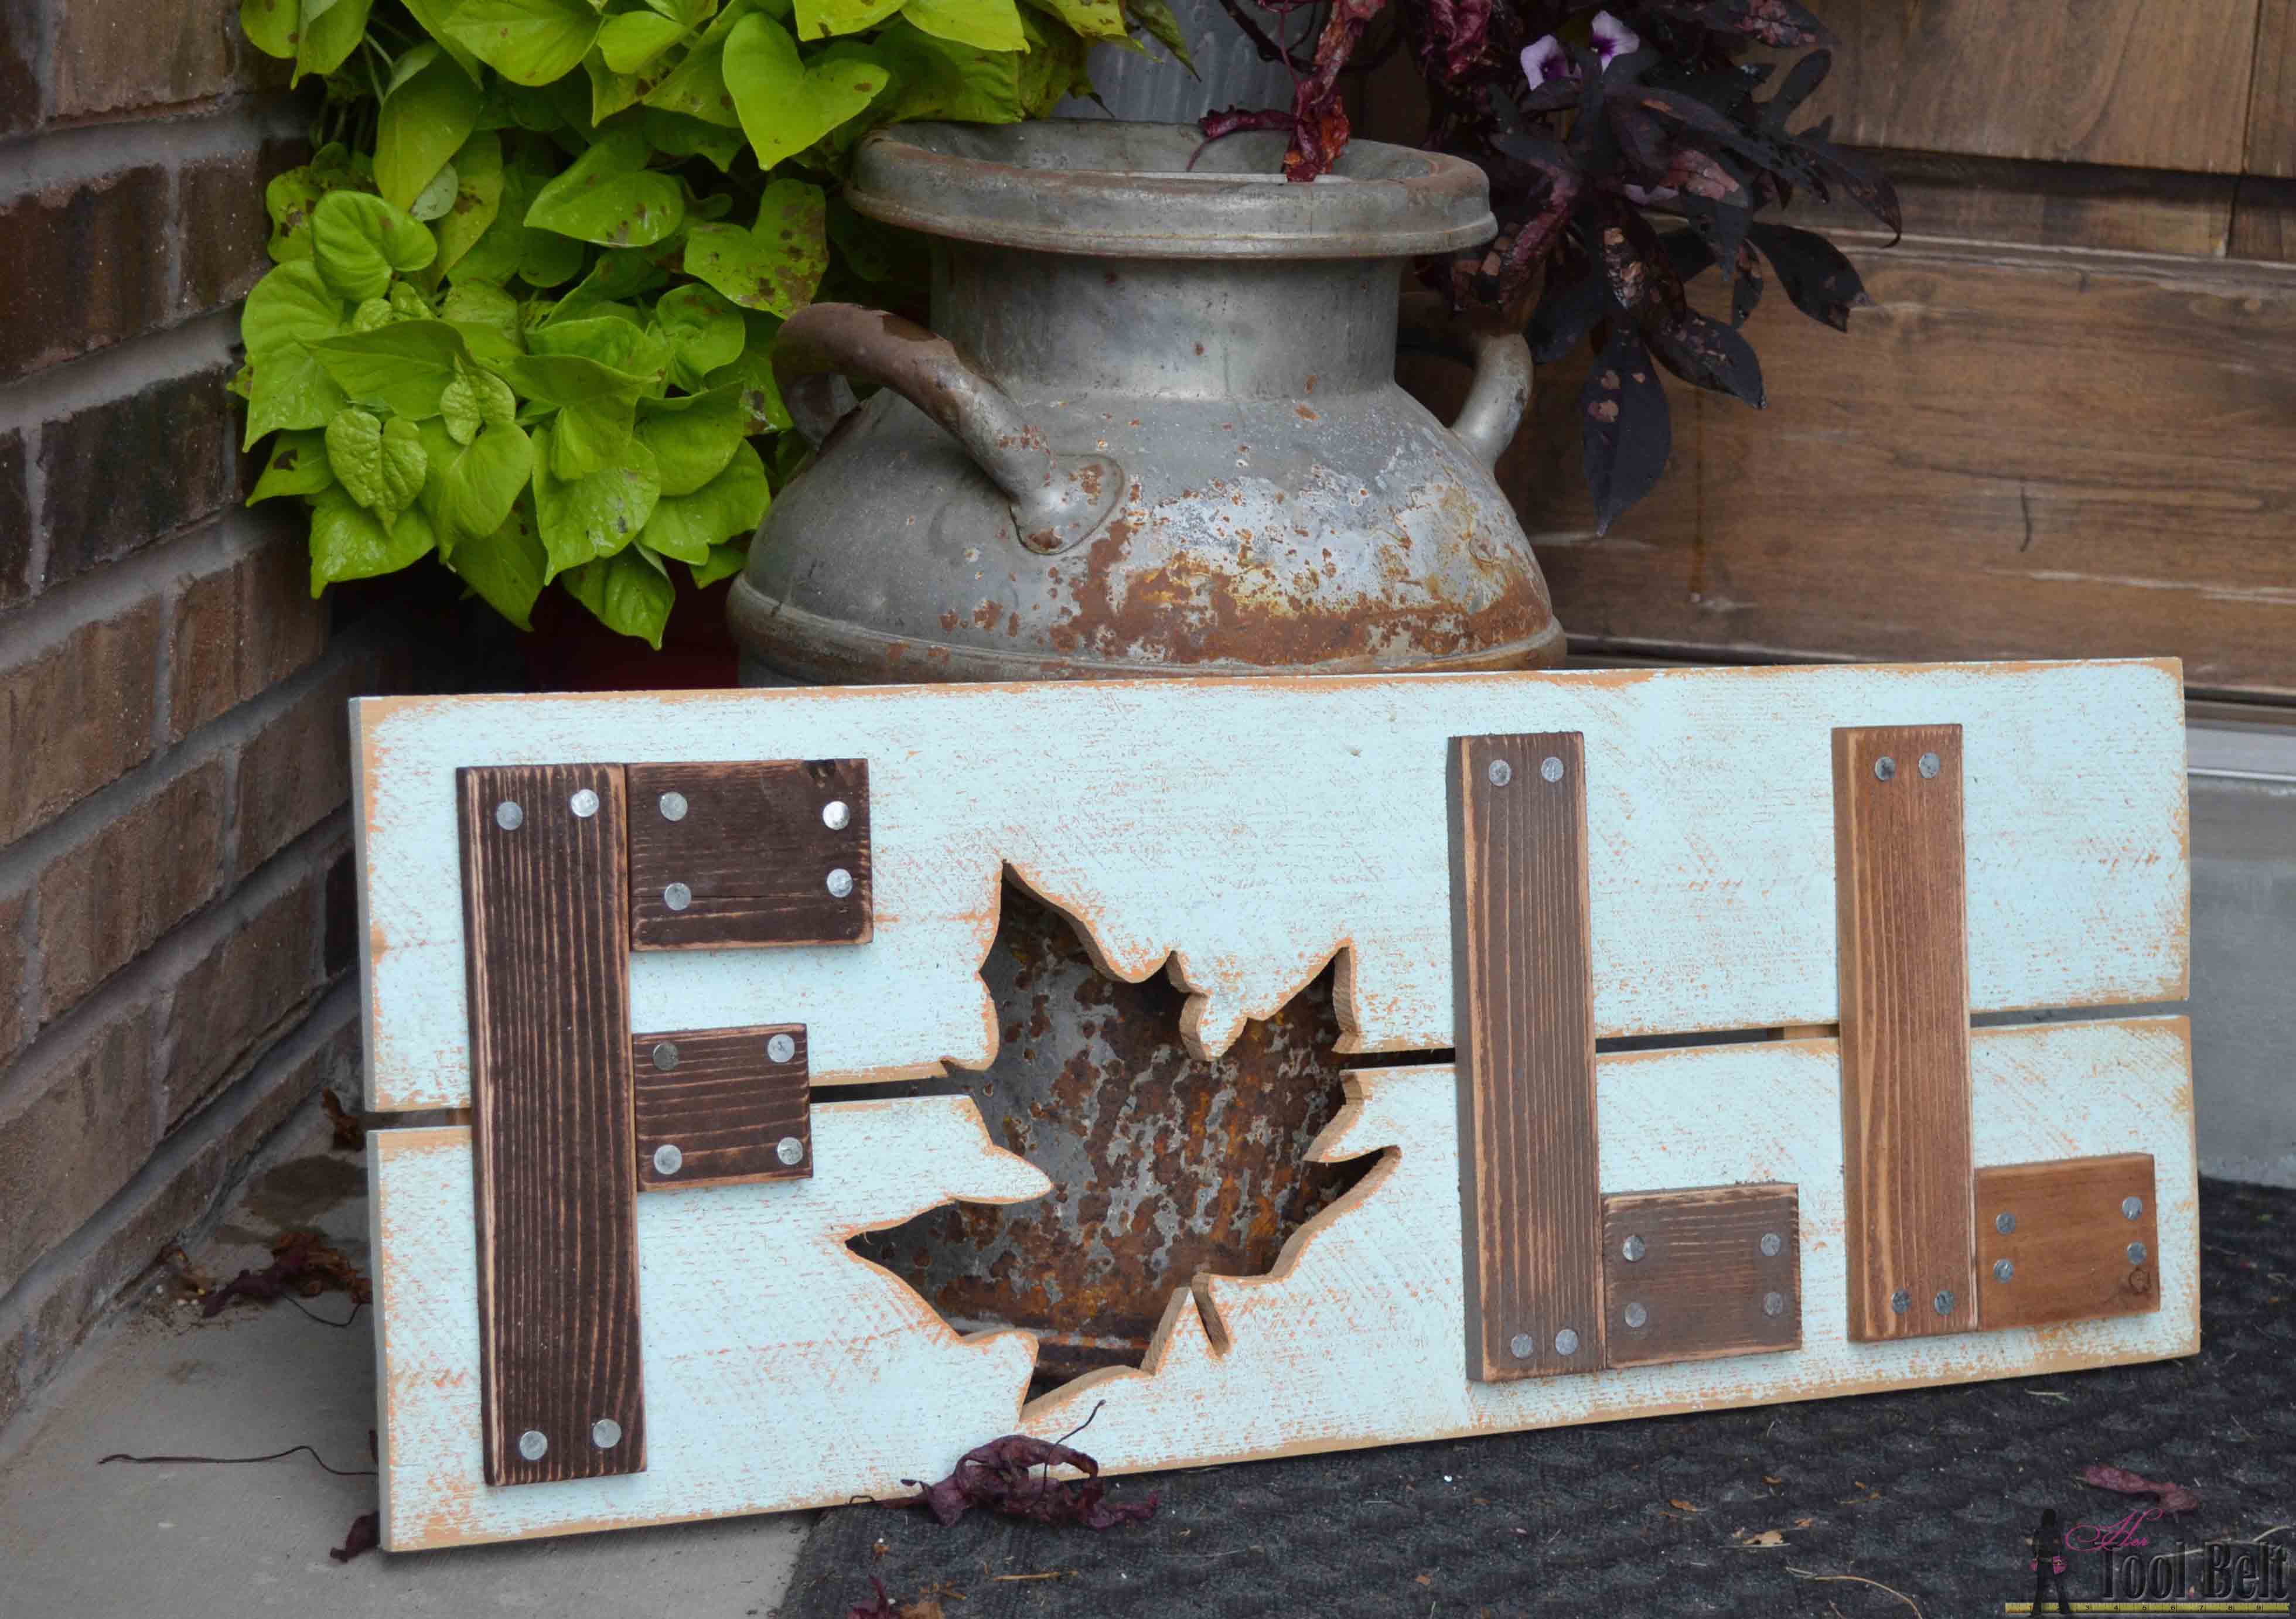
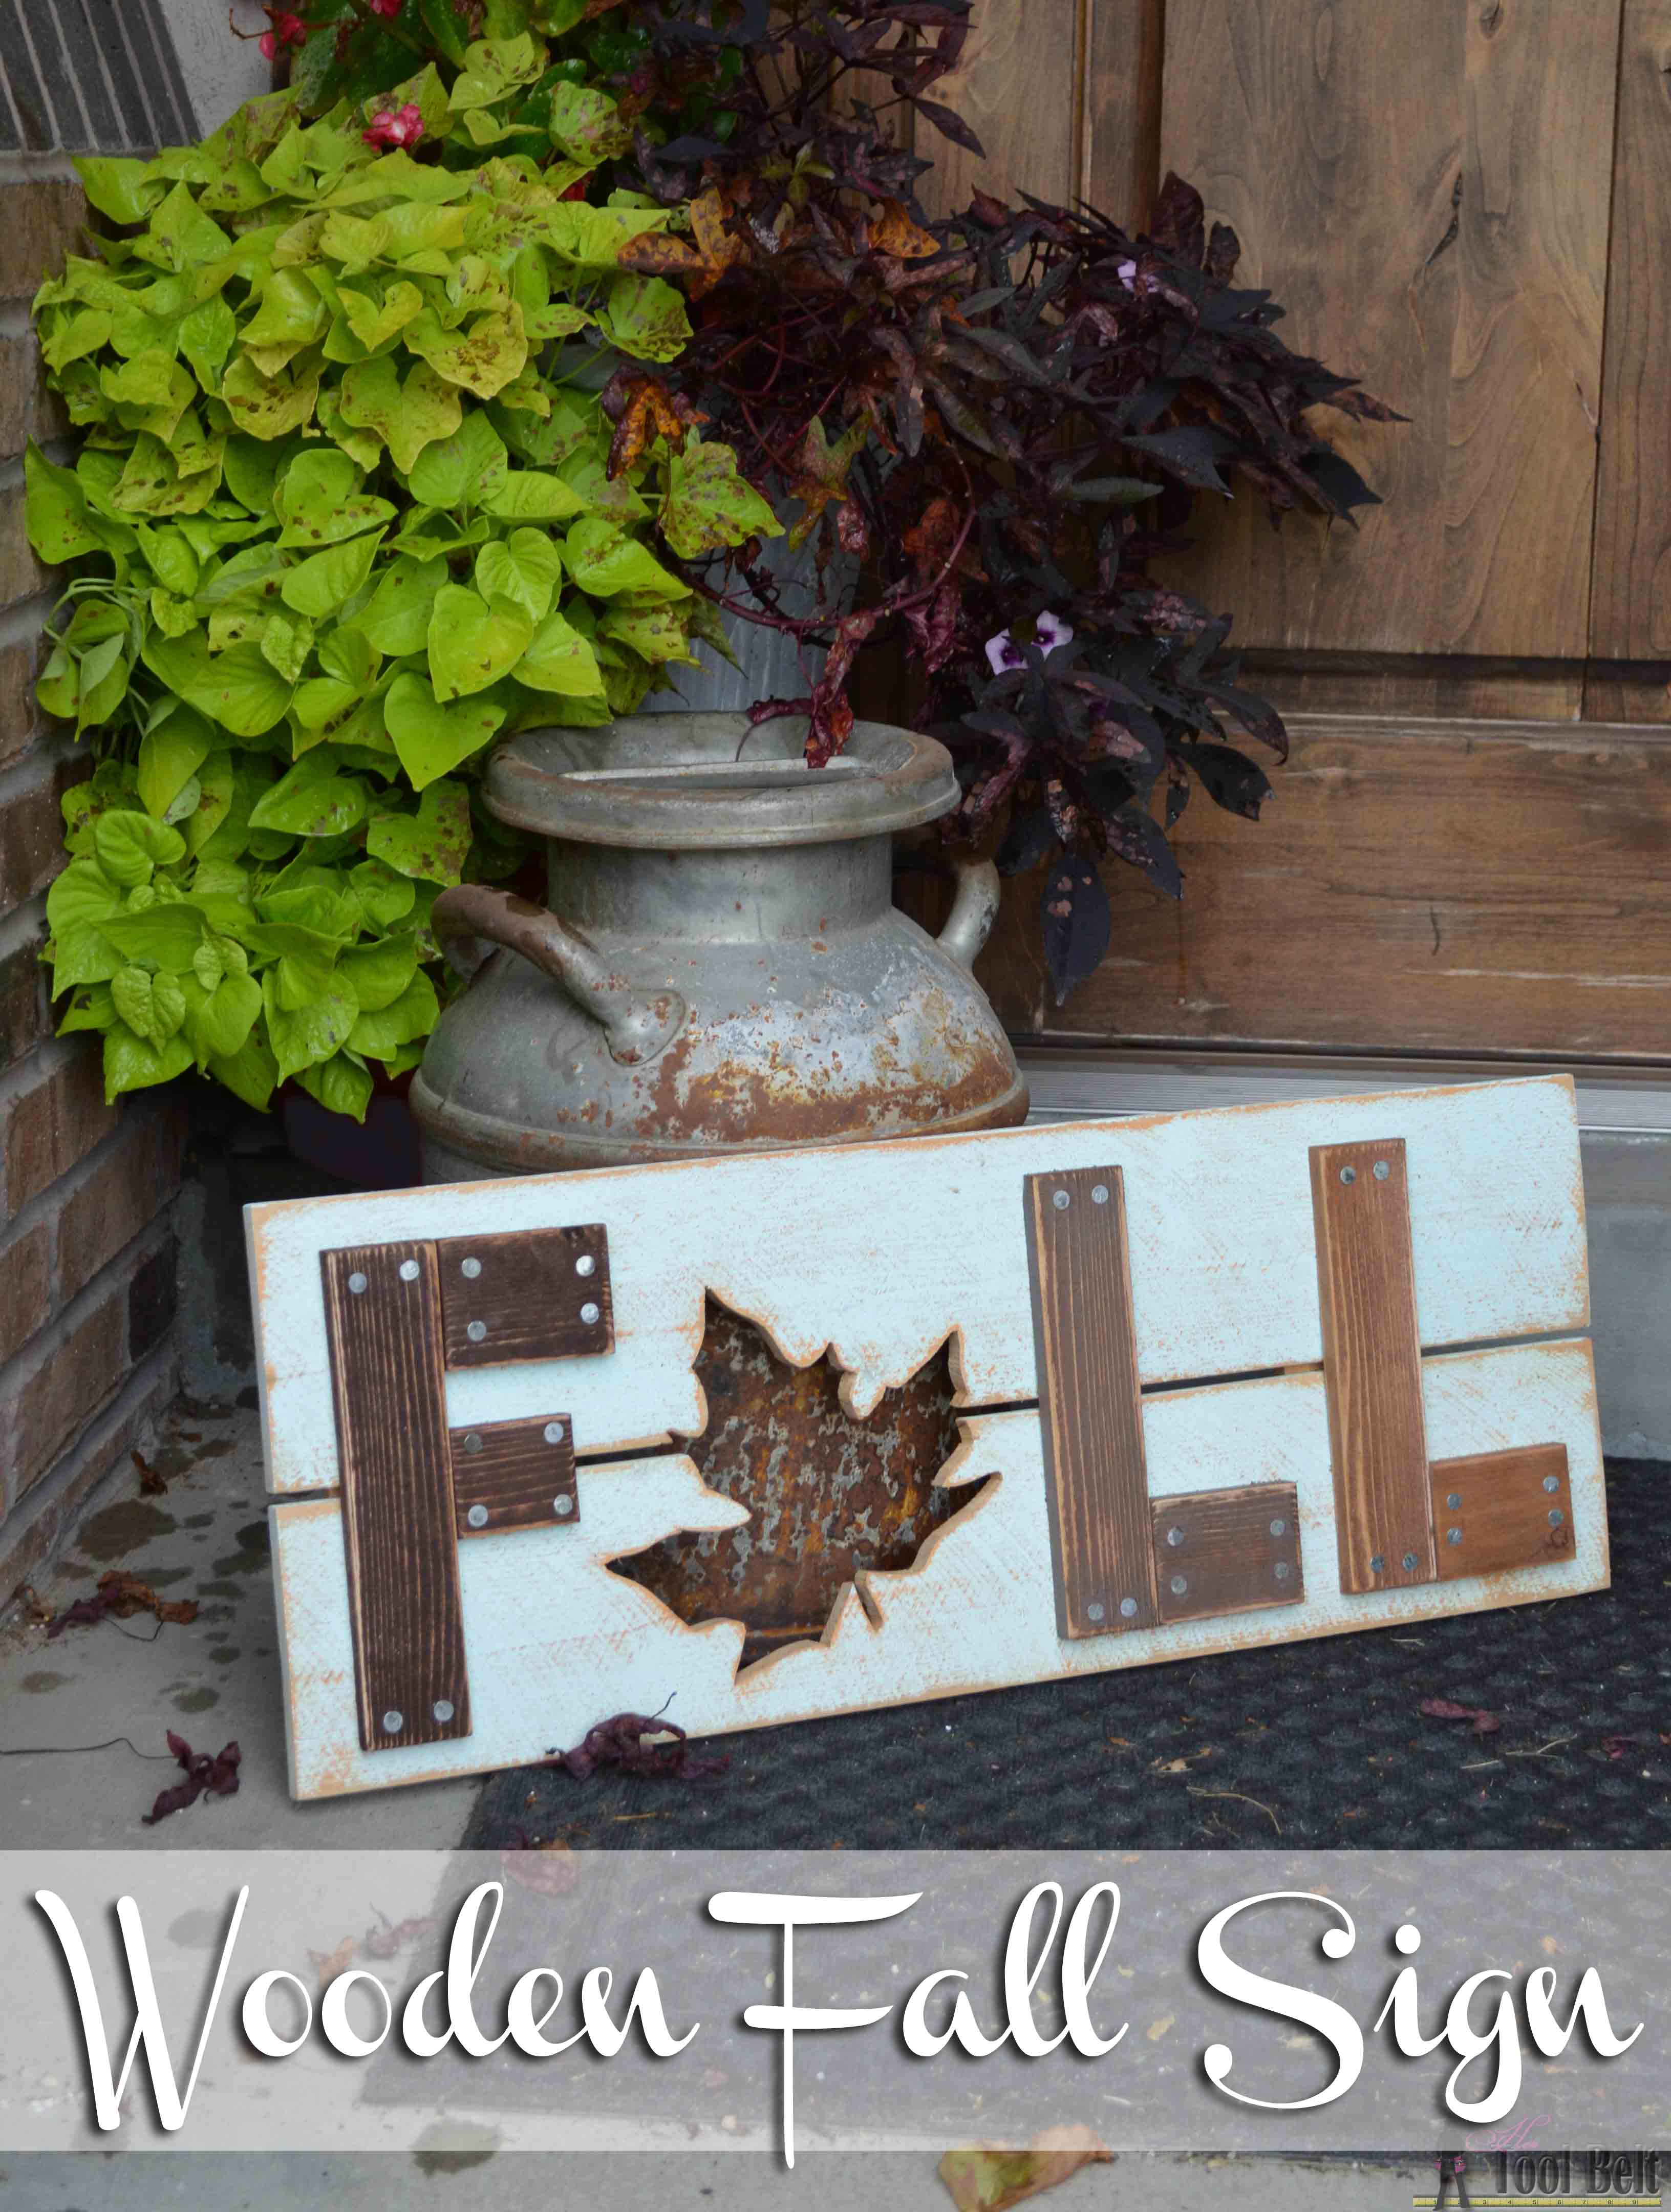
I went to Swiss Days a few weeks back, this is the Mecca for craft booths in Utah. It is fun to browse through the booths, see all the neat stuff and buying wrapping paper is a must every year. My kids were with me this year, so I spent way to much money. 🙂 A few decor items caught my eye though. One shop had signs with really primitive letters of LOVE or HOME, and they replace the ‘O’ with a heart or a house shape. The other one was a very simple shutter using 2 slats and they cut out a shape in the middle and used square wire mesh behind the cut out. I knew I had to come up with a Fall project, so I combined the two. As soon as I saw the LOVE signs, I thought that would be fun with FALL, hoping the maple leaf would resemble an ‘A’.
Materials
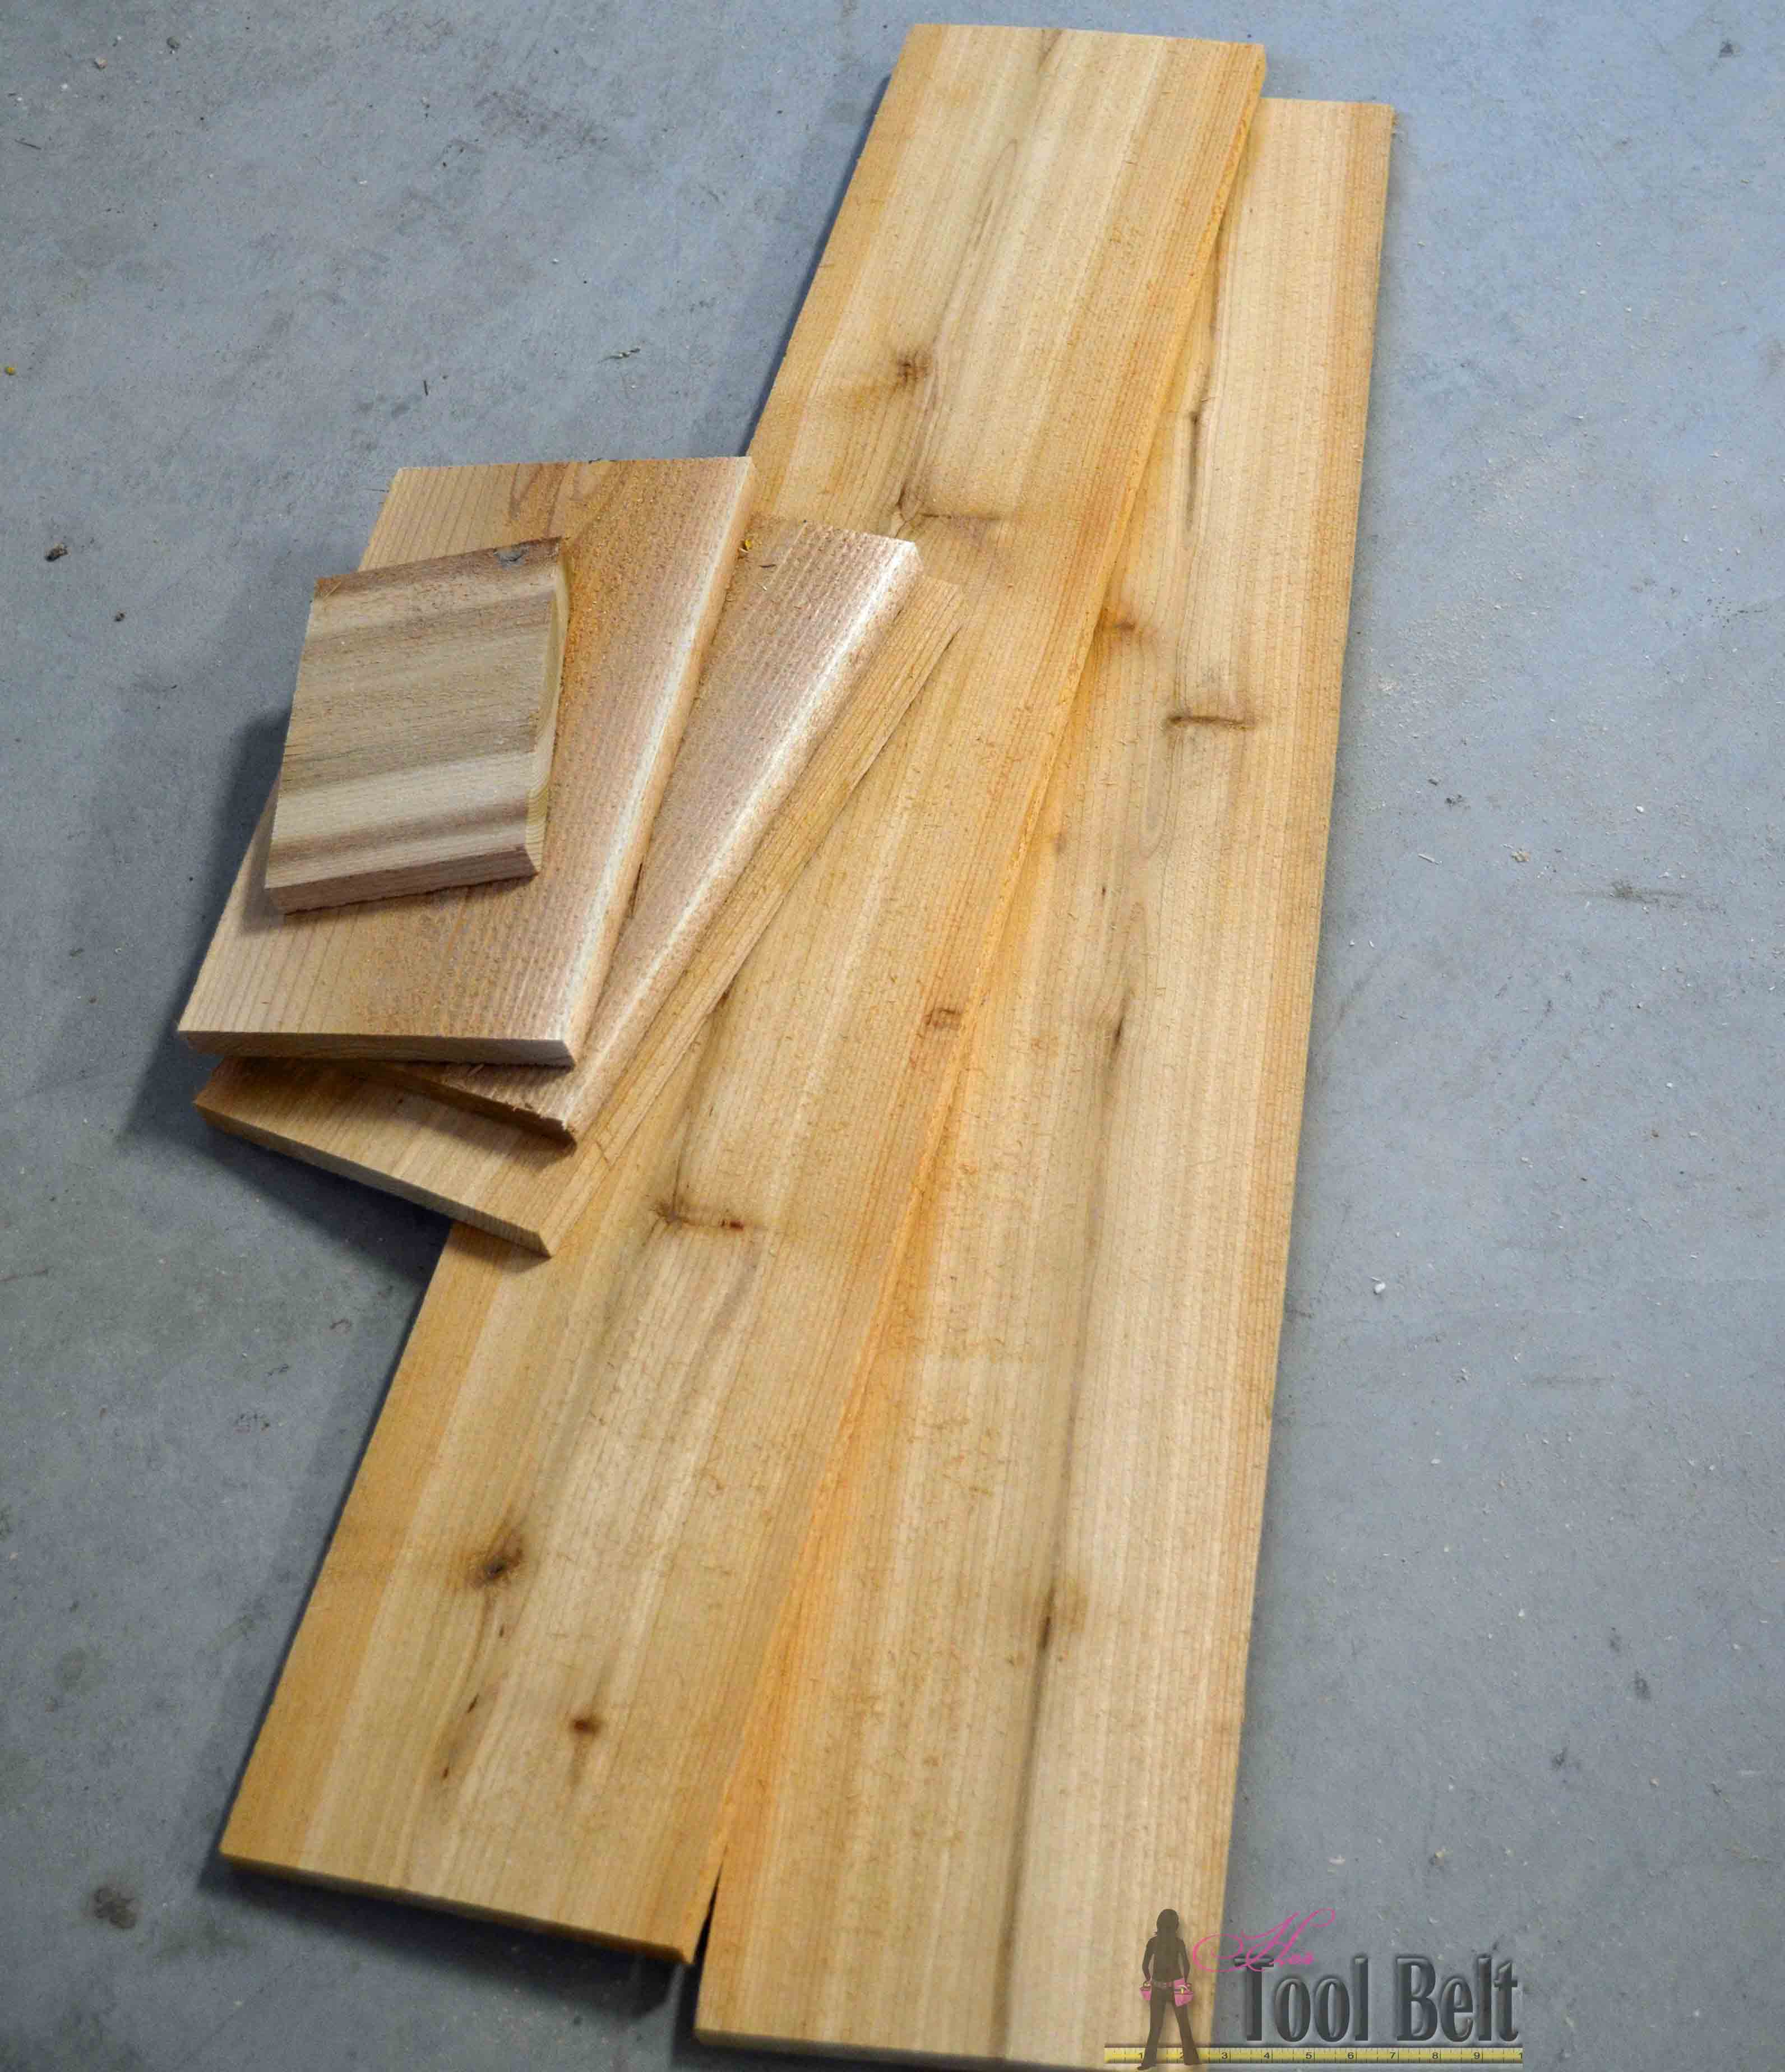
- 2 – 5/8″ x 5 1/2″ x 6′ Cedar Fence Pickets ($2.45)
- 1″ Large flat head roofing nails ($2.98/lb)
- 1″ brad nails
- wood glue
- sandpaper
- Paint/Stain
- My project cost: $7.88
Cut List
- 2 – 5 1/2″ x 30″
- 2 – 2 1/2″ x 10 3/4″
- 3 – 2″ x 9 1/2″
- 3 – 2 1/2″ x 3 1/2″
- 1 – 2″ x 2 1/2″
I like the old looking signs with layers of paint. I started off painting a really light coat of orange tole paint over the 30″ rough cedar planks and let that dry.
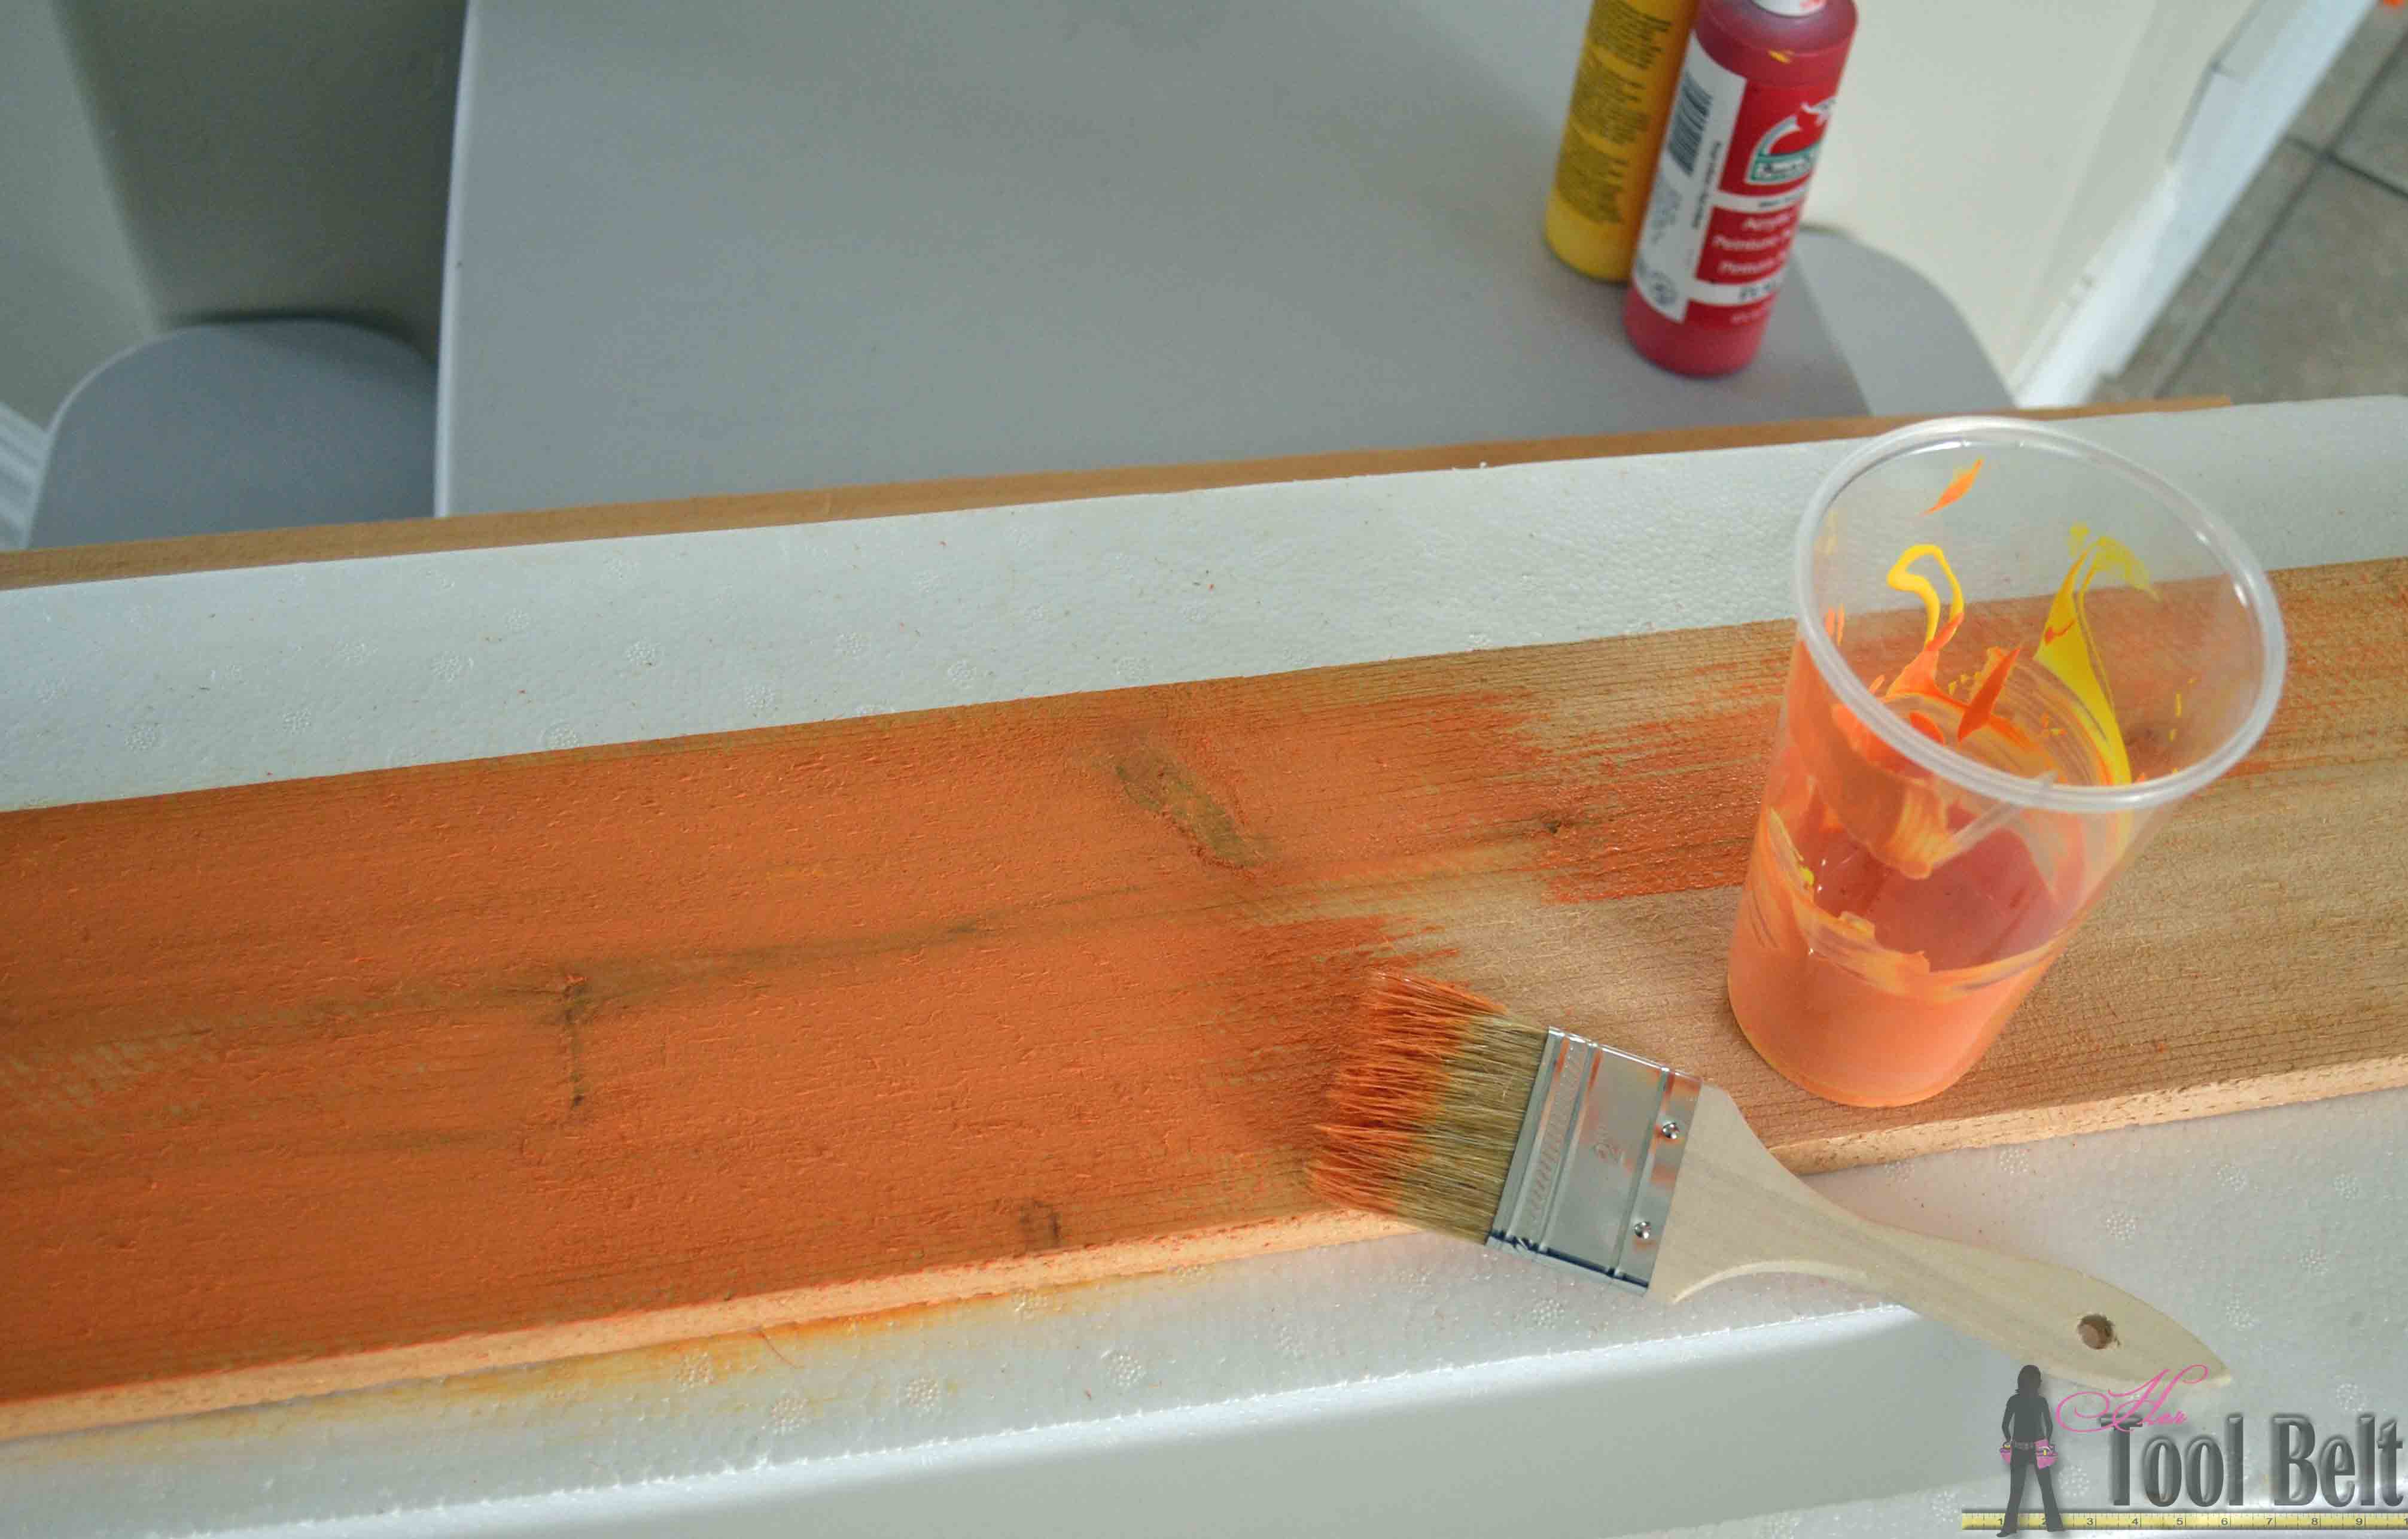
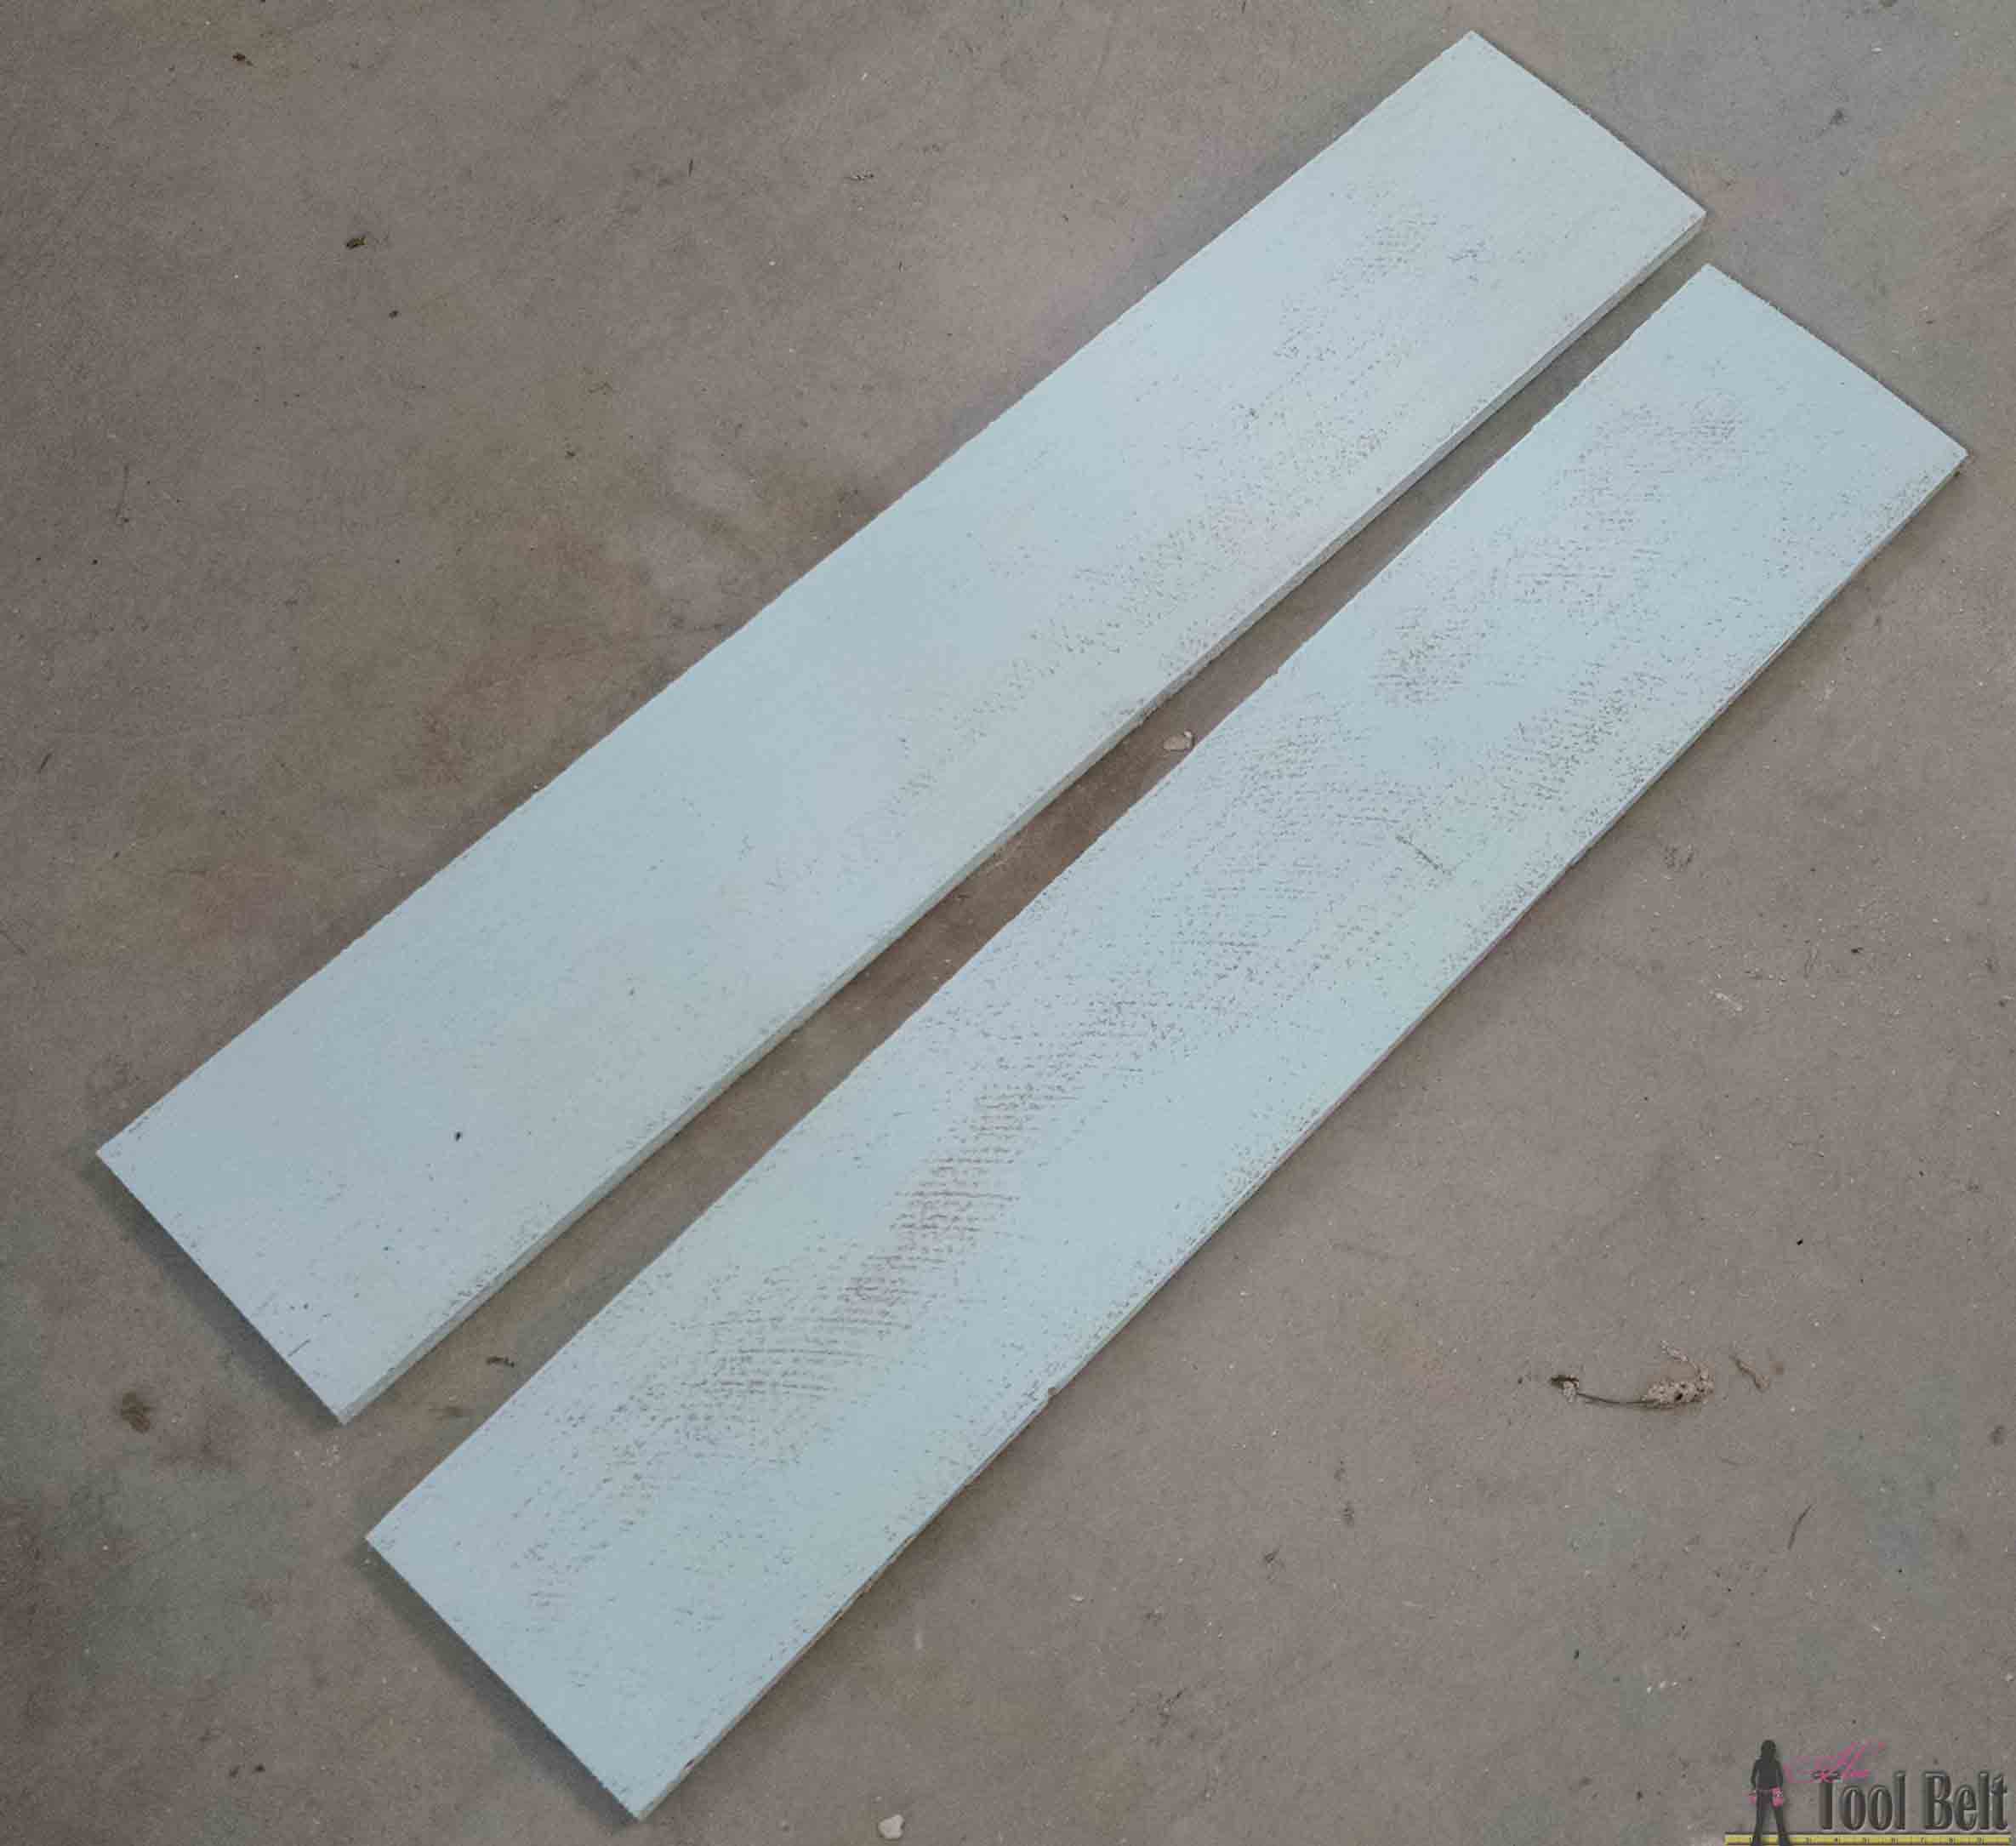
Then I painted a really light coat of aqua latex paint, and let that dry really well.
I stained the letters. I decided it might be fun to try varying stain colors???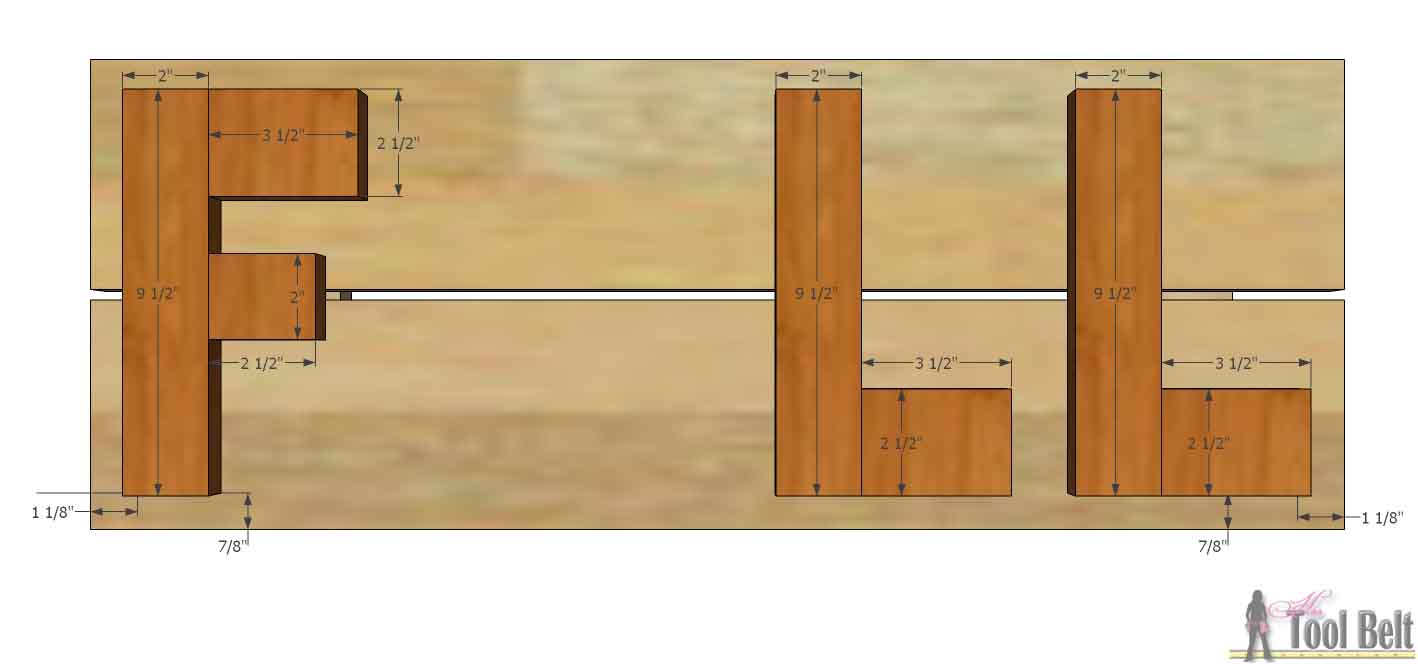
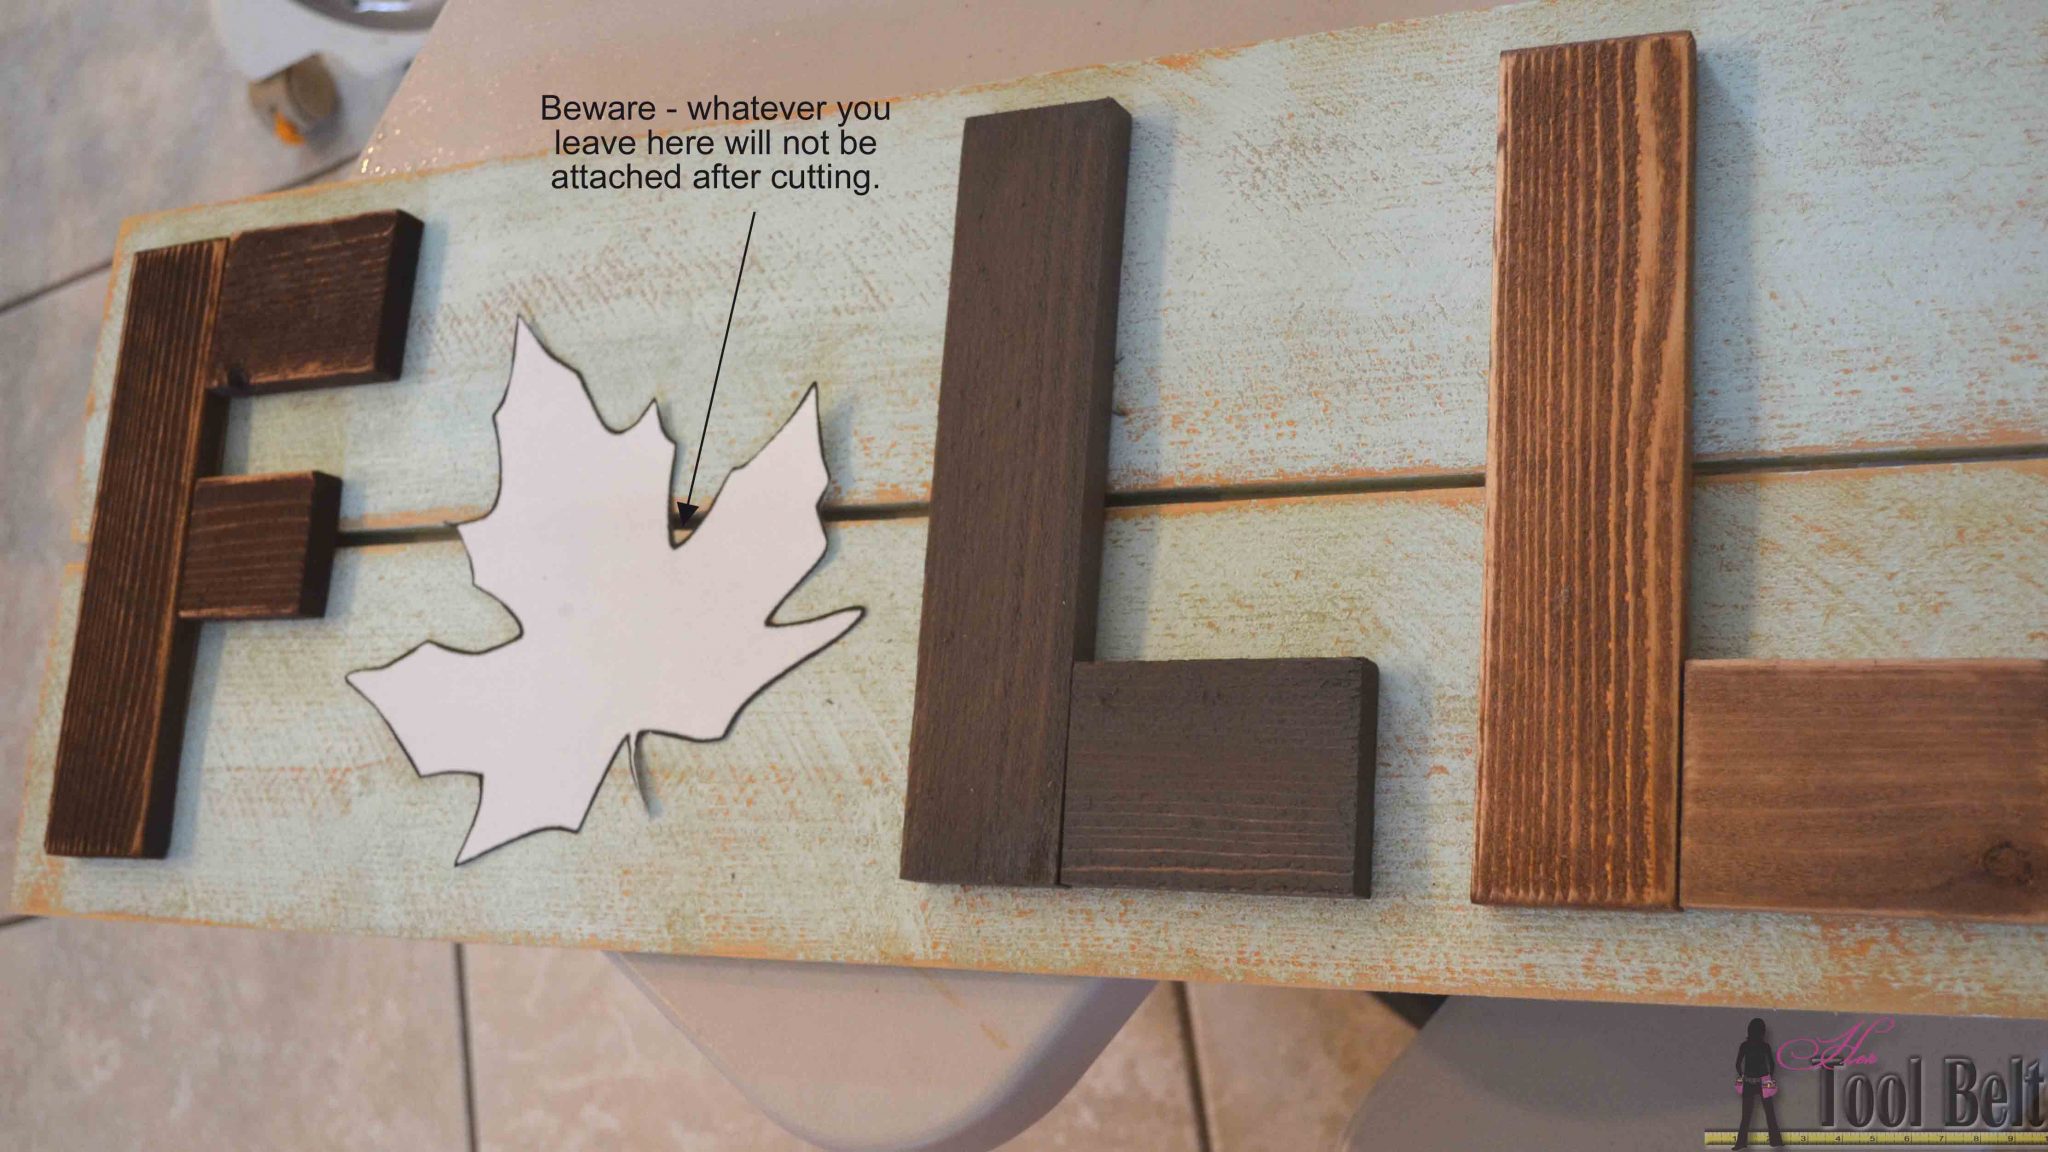
You can use whatever leaf you want, but here is the Leaf I used. Once the paint and stain dried, I laid out the F, L, L approximately with the above dimensions. Trace the maple leaf pattern onto the wood.
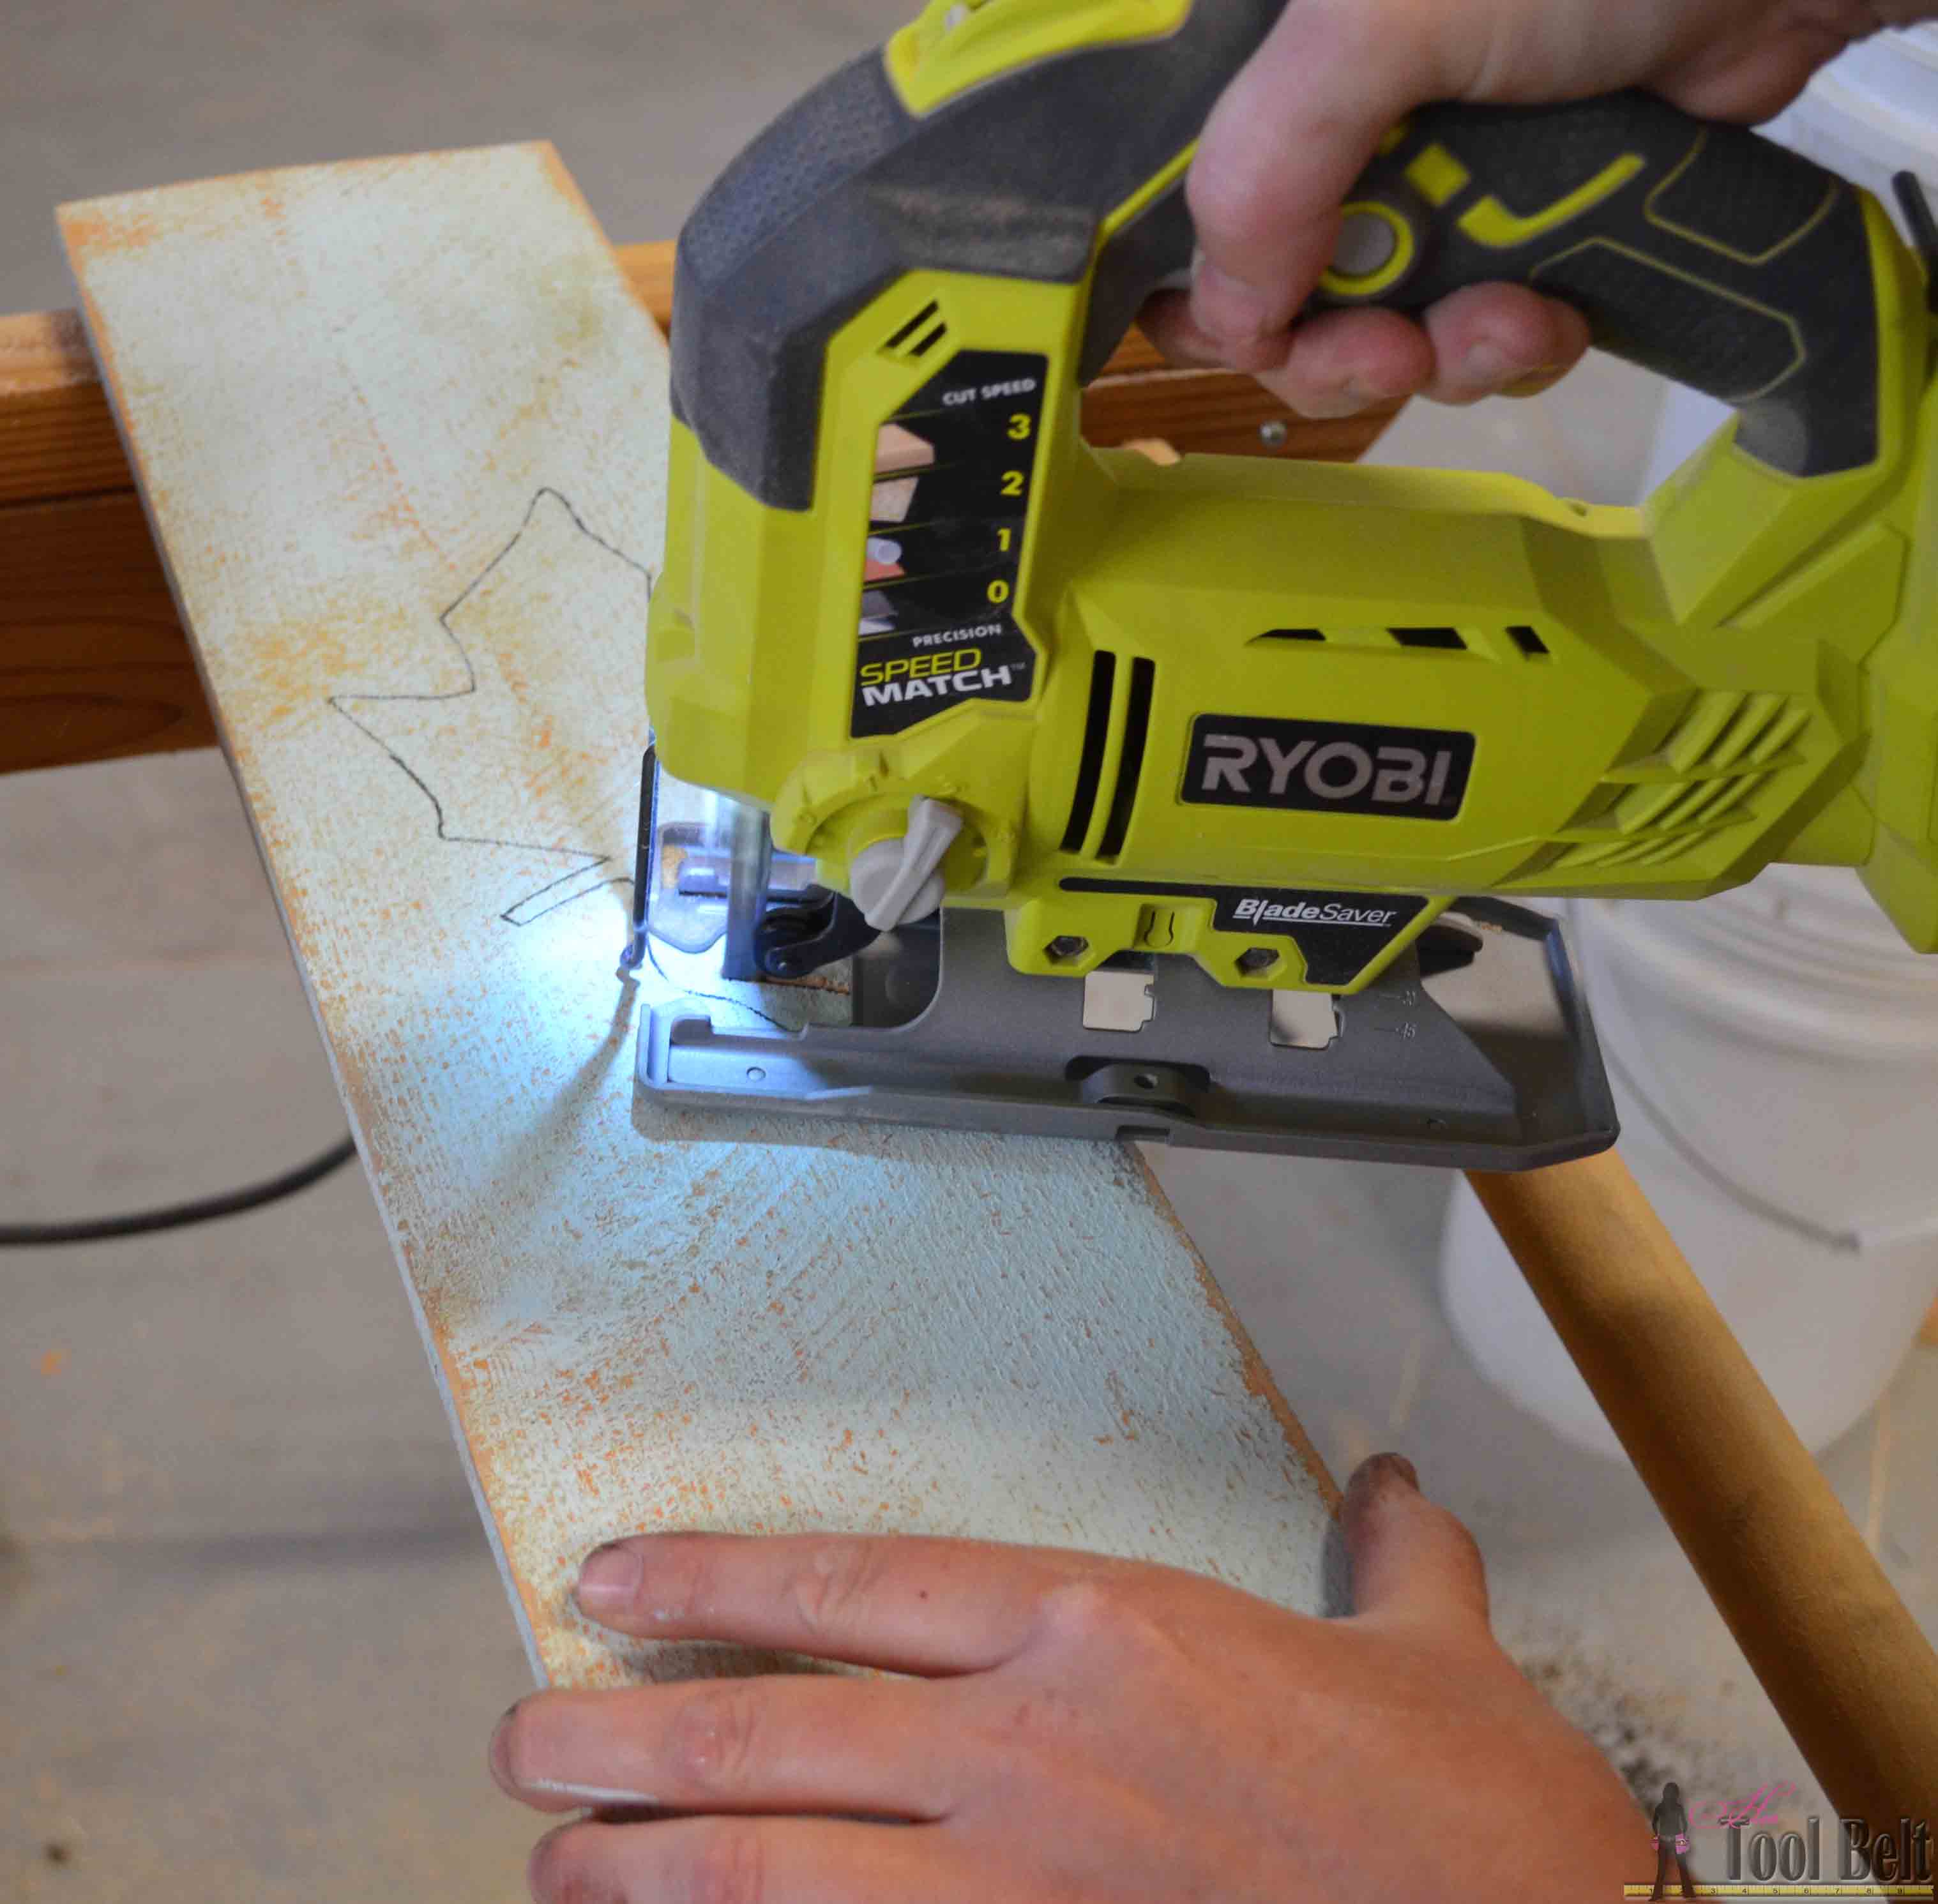
Use a jig saw or scroll saw to cut out the leaf shape.
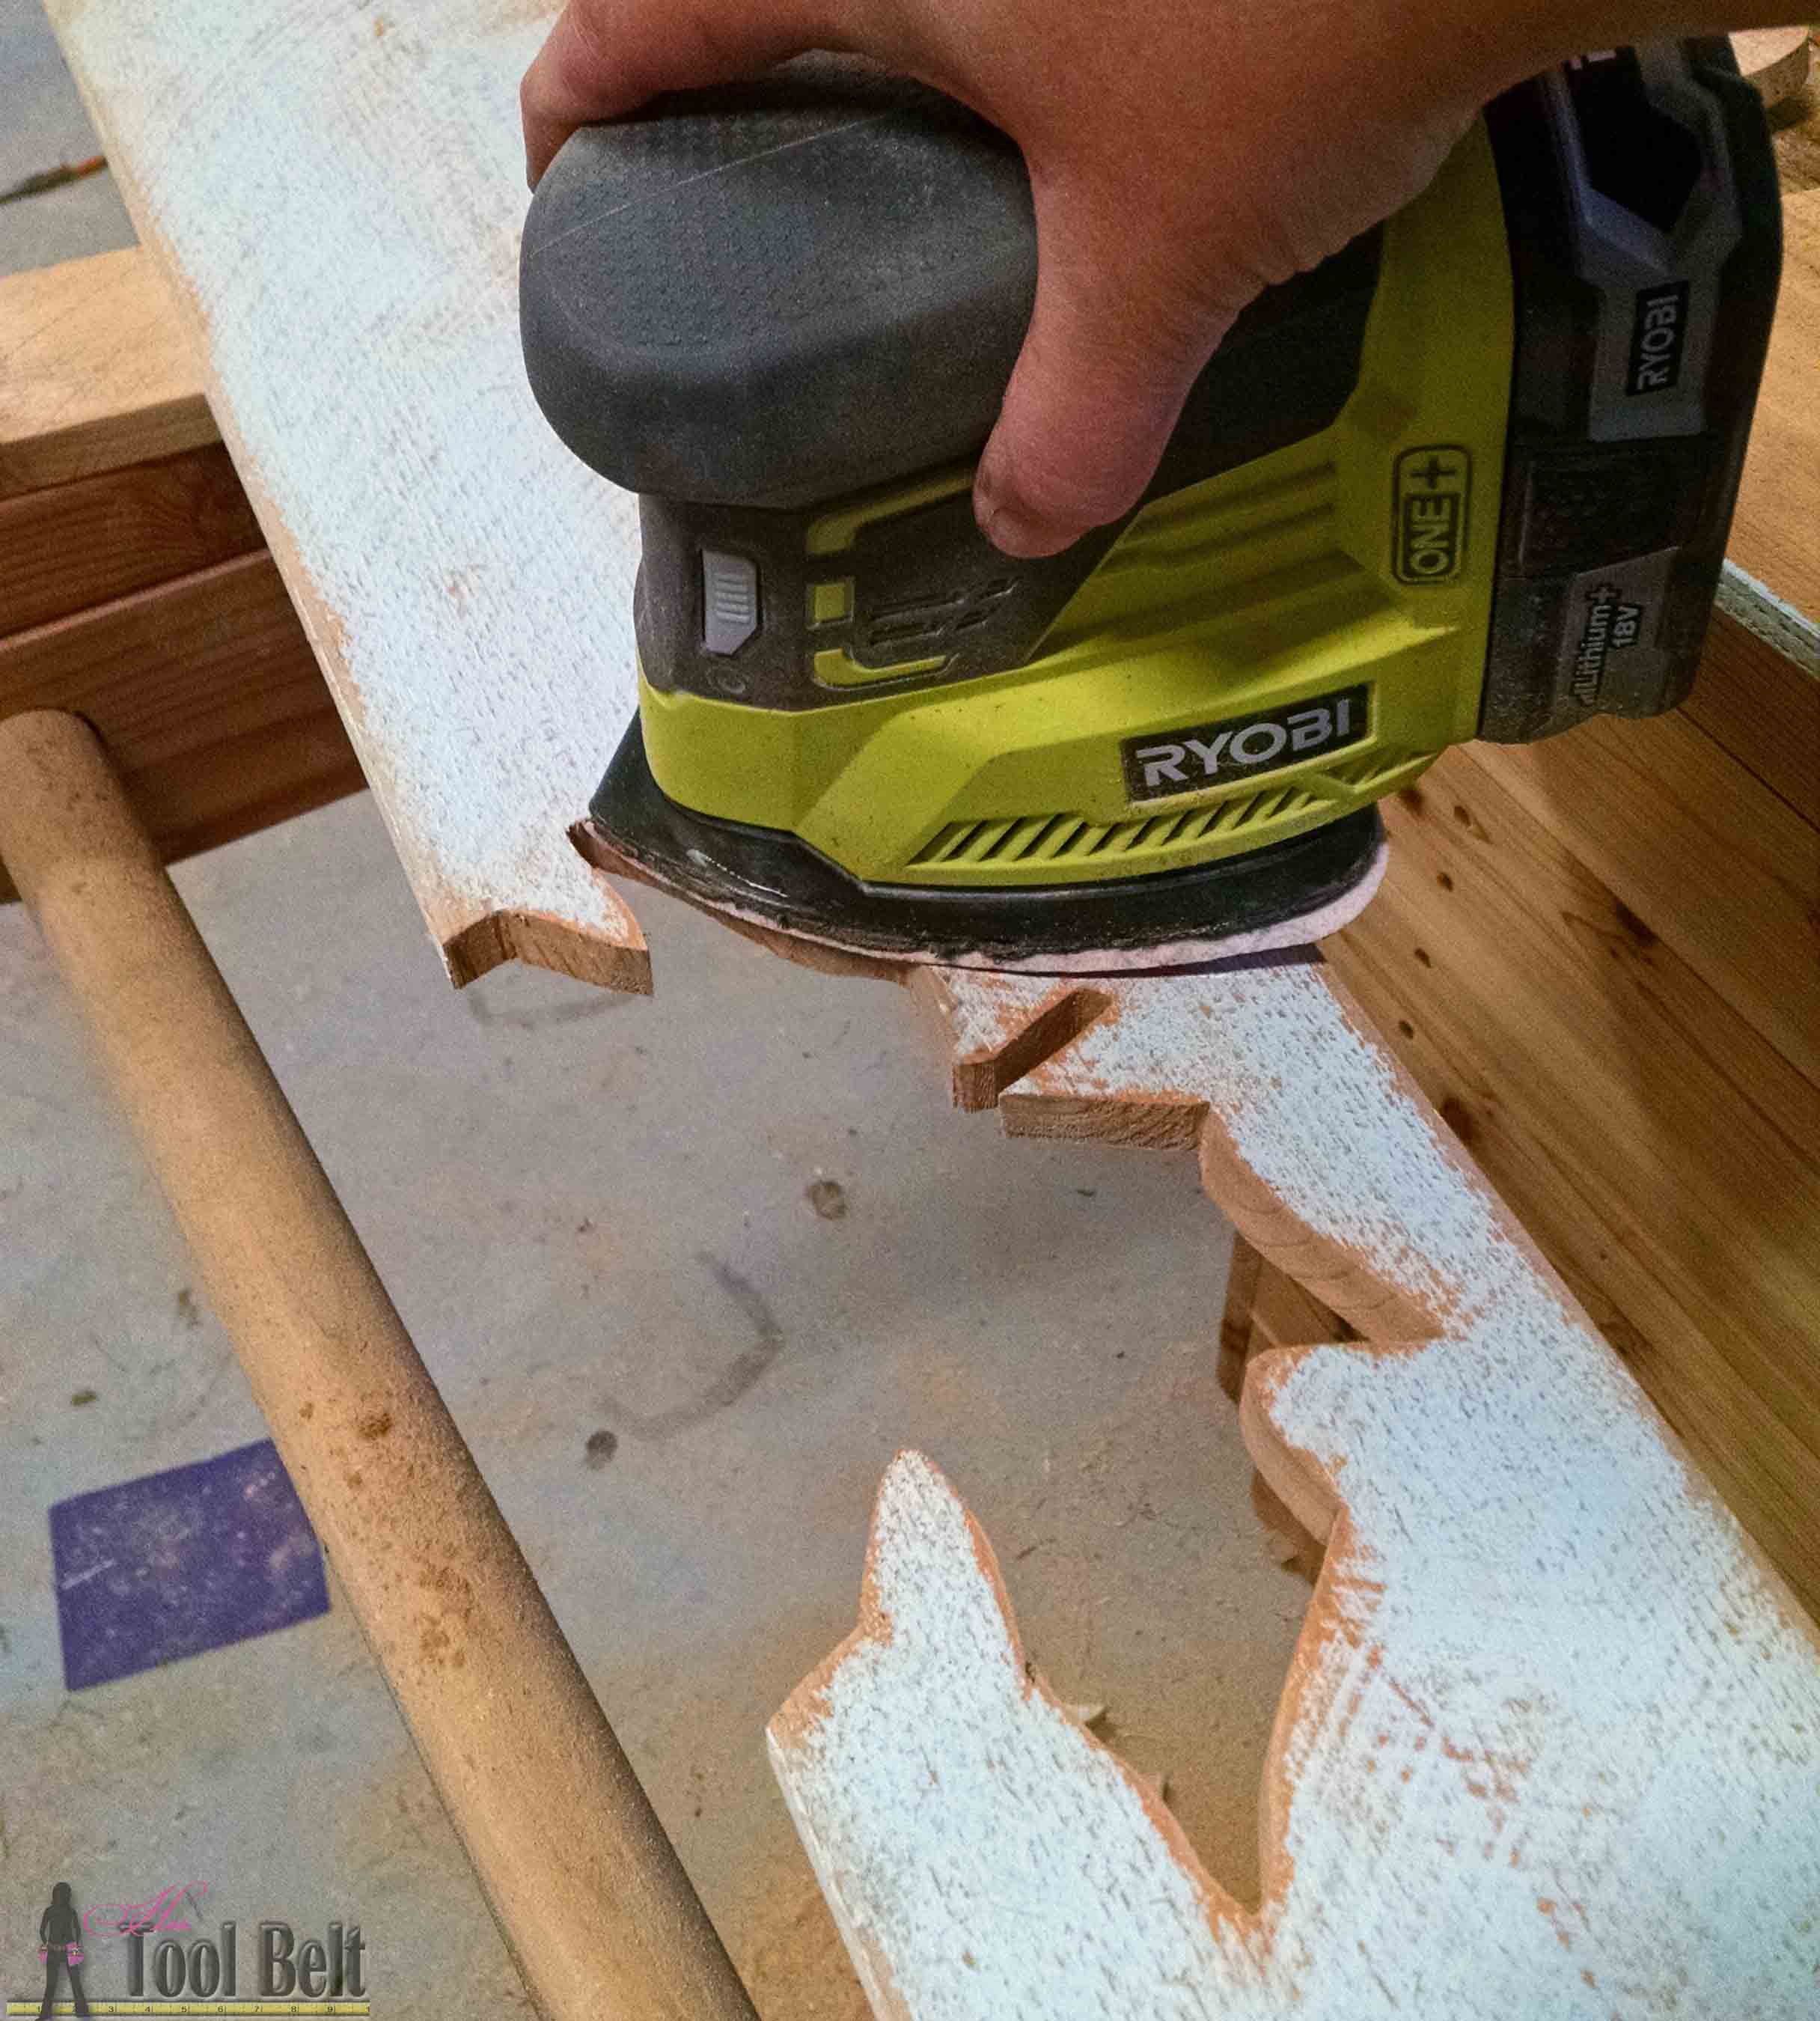
Lightly sand the plank to remove as much of the aqua paint as you want. I know it doesn’t look like it, but there really is some orange under there! The corner cat worked fabulous for this.
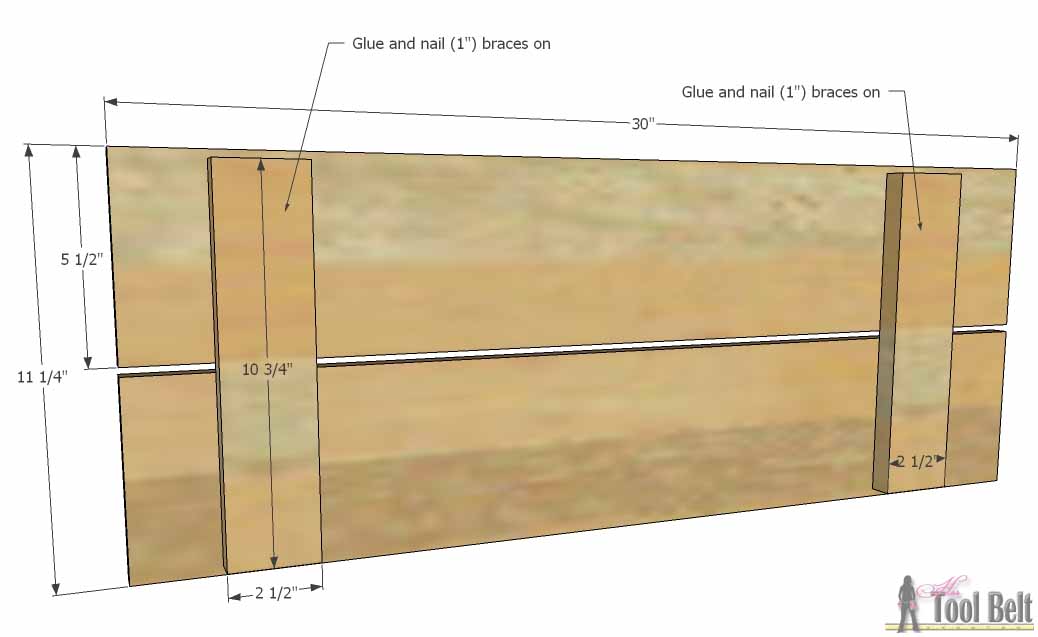
To attach the slats together, glue and nail the 10 3/4″ boards to the back of the slats. You can either use the roofing nails, or brad nails.
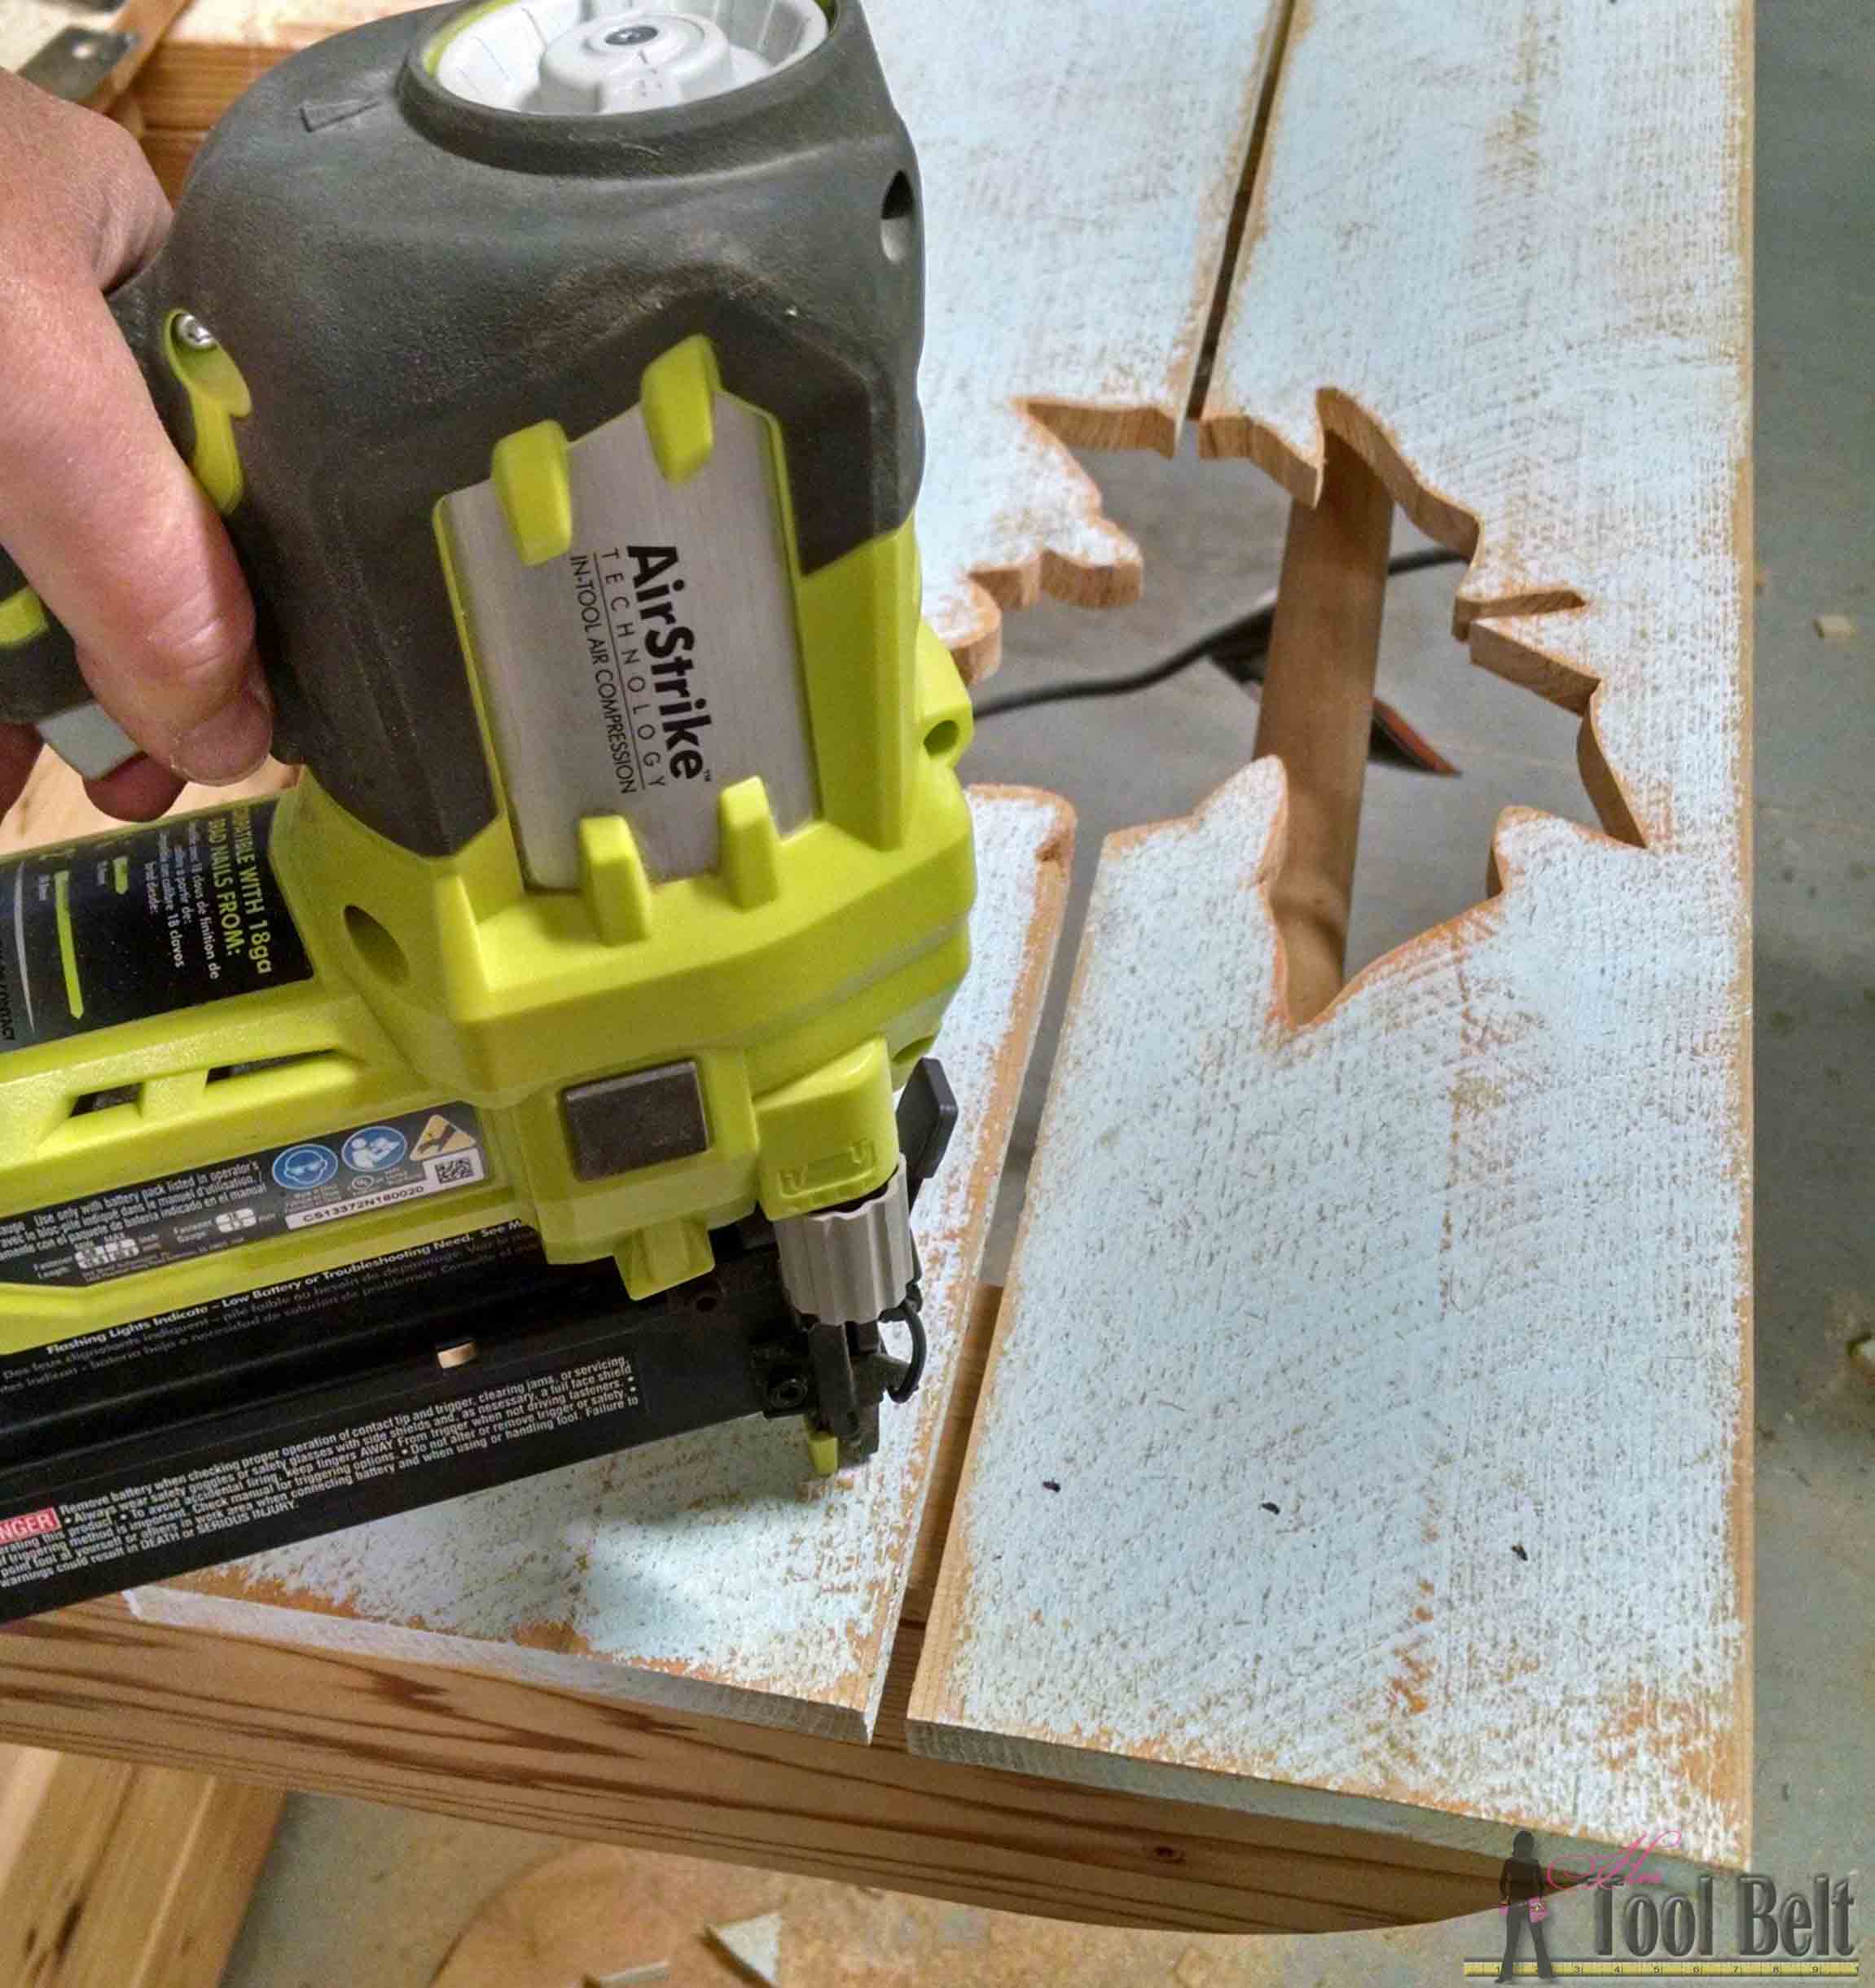
Nail the letters onto the sign with 1″ large flat head roofing nails. The nails were splitting my letters, so I pre-drilled the nail hole just thru the letter, then hammered into place. 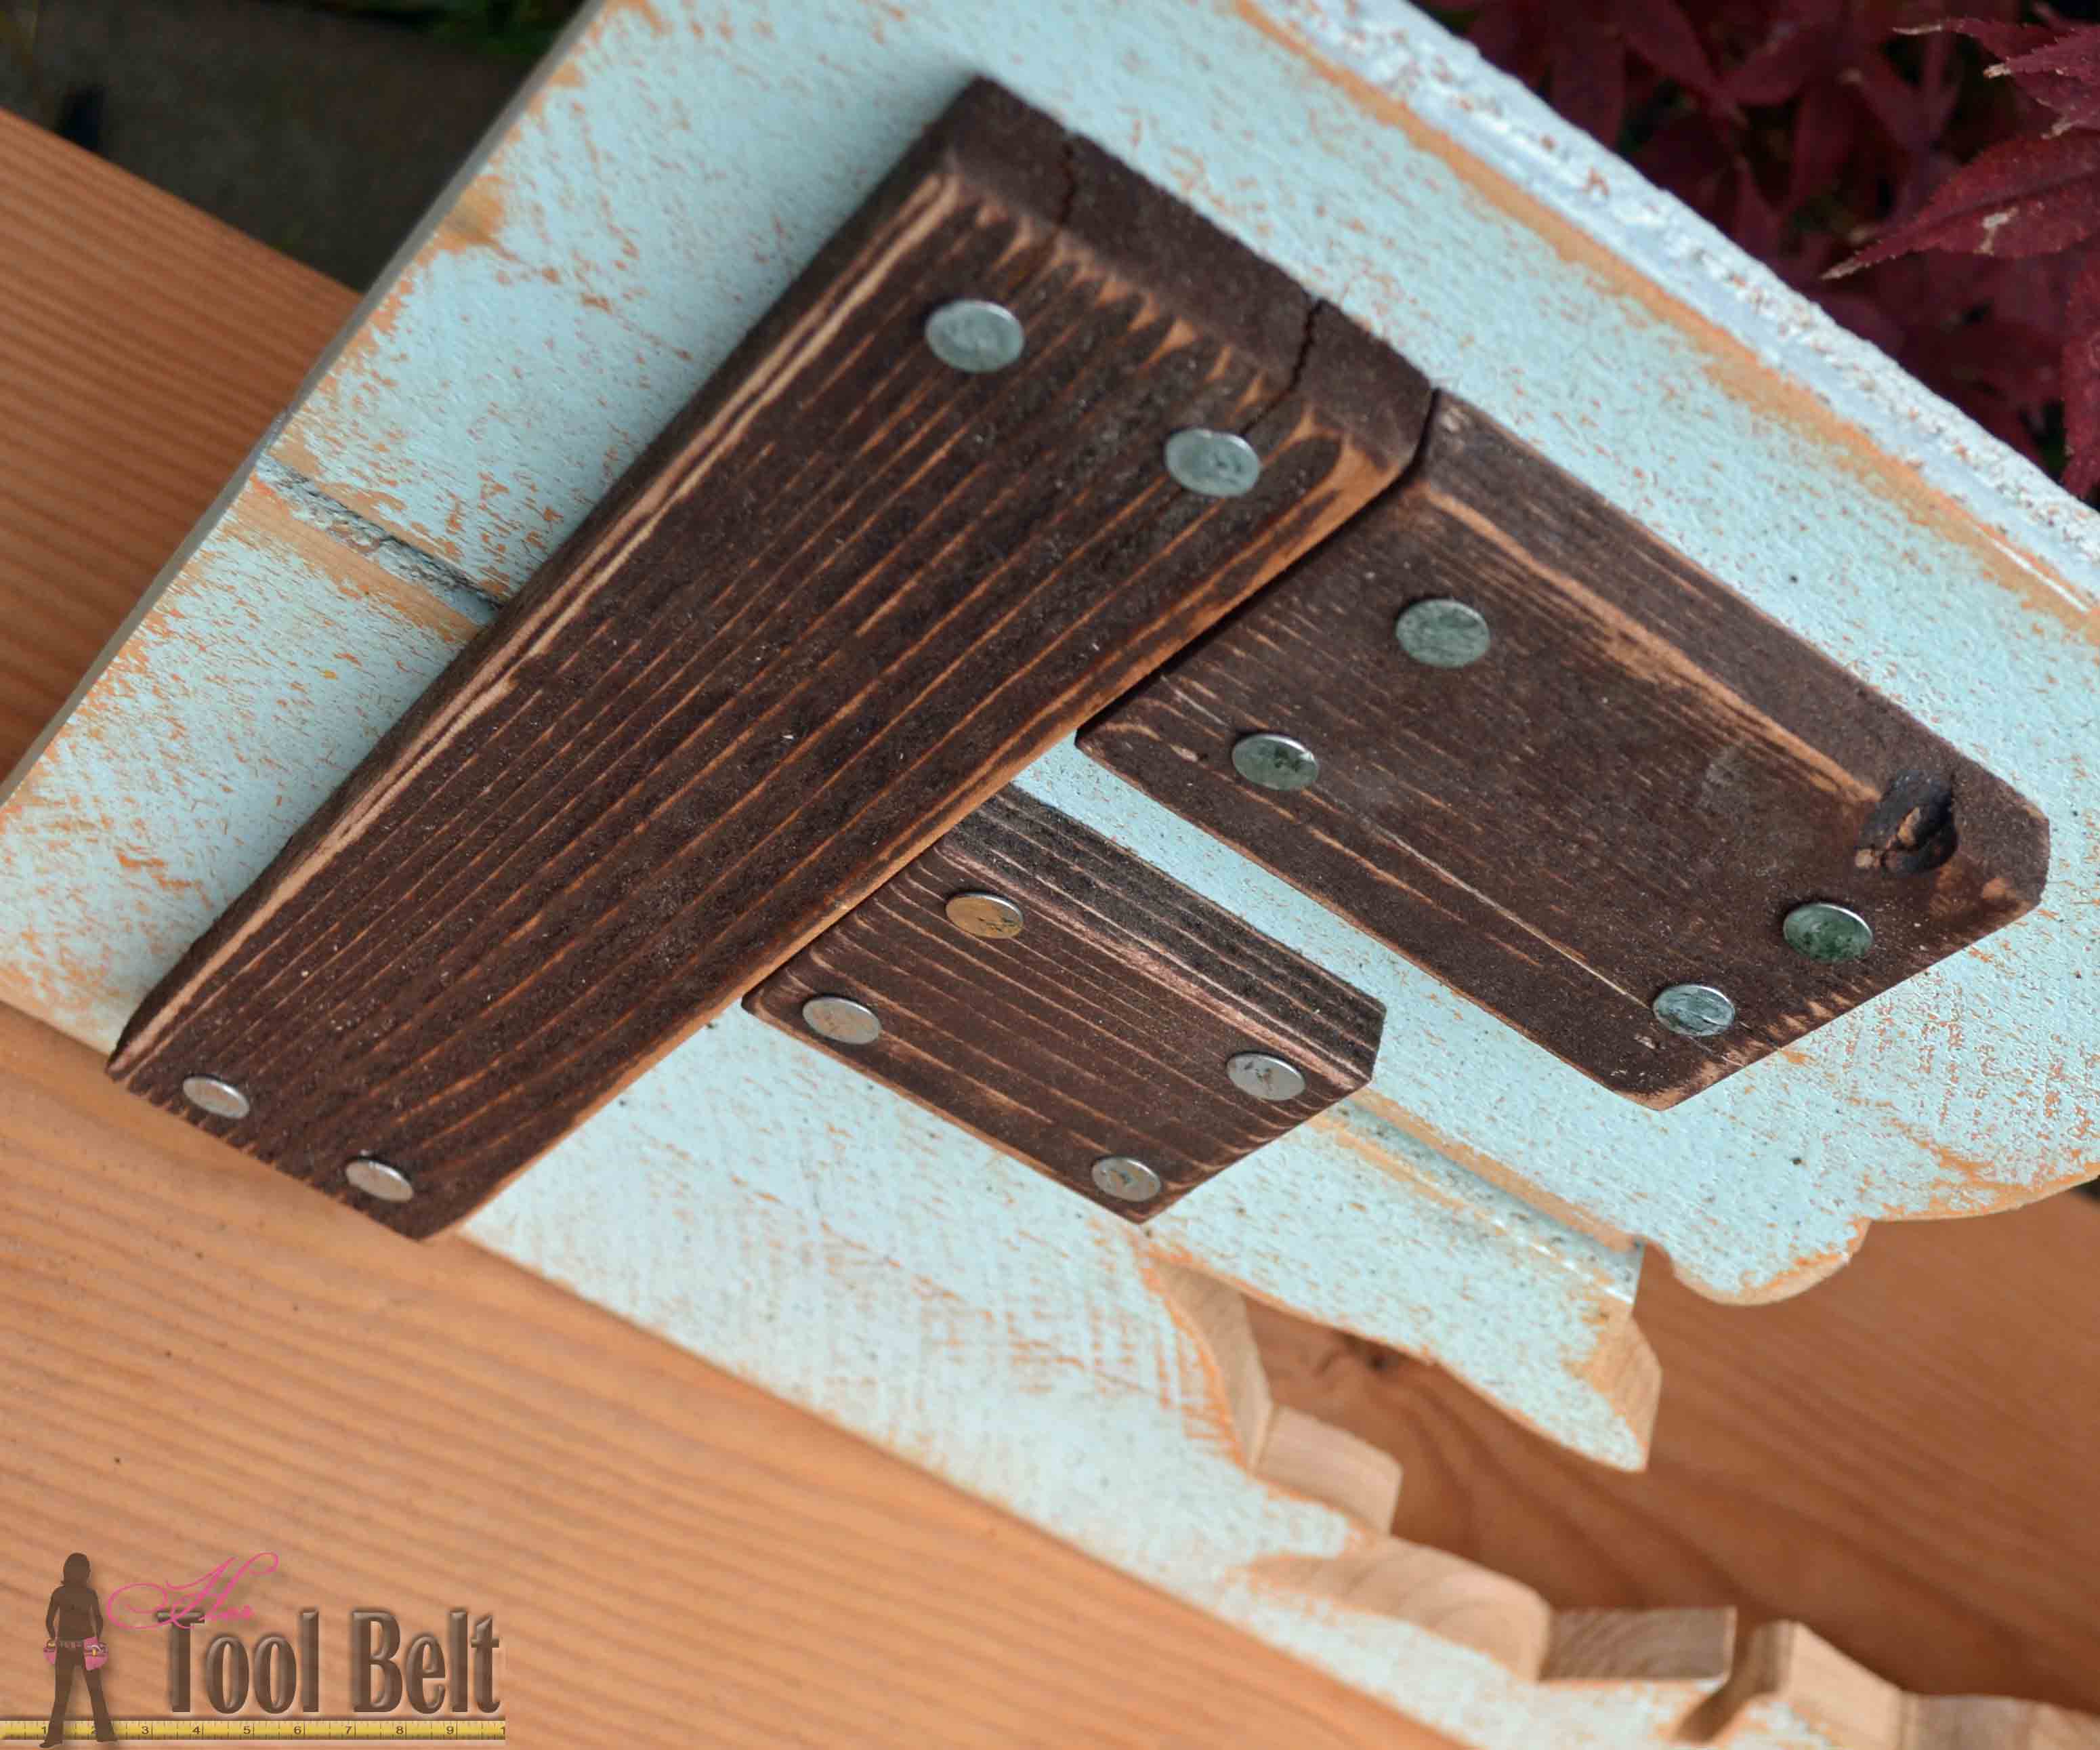
I think it turned out kind of fun! It would be neat to try it out in different colors.
Thanks for pinning the wooden fall sign!
Be sure to check out the other projects on this Fall hop.
 Loading InLinkz ...
linked to: link parties, remodelaholic, savvy southern style, homestoriesAtoZ
I didn’t realize until I read the end of your post that your leaf shape is cut from the wood. When I admired your first picture, I thought that the leaf was metal and wondered how you made that cool metal shape. 🙂
I absolutely love this project and appreciate your easy to follow directions.
Thank you, yes that picture is deceiving, the leaf is a cut out.
I love this! So rustic and simple with an easy to follow plan. Thanks for the DIY, Amy!
Amy, This is awesome! Love… LOVE your sign and the cut out leaf is perfect!
This is the coolest Fall sign I have ever seen! Love Love Love this project!!
Love it! Came over from ProdicalPieces and now subscribing. I think I need to make one of these. 🙂
Cecilia
I love this sign! I especially love the leaf cut-out!
How unique and fabulous! I love your creativity. This fall sign really stands out from the rest!
I love this sign, it is gorgeous….
This is super cute! I love it!
Love, Love, Love this!!
I’m a new follower!
Sandi
Now that is one fabulous Fall Sign – definitely on the top of my fav list! Being Canadian, I’m establishing fond of the maple leaf. You rocked this challenge girl!!!
This is gorgeous! I saw it on instagram and now I want to go build it 🙂 Thanks for the plans!
I love this! So creative! I want one now!
This is so fun Amy, I love it, the leaf is perfect and it looks so rusty!
hi amy! this is so creative! are the letters holding the back 2 boards together? i also love the flat head roofing nails, great details!! =)
Thanks Ananda, There are a couple pieces of wood on the back holding the planks together.
What a great project! Love how it turned out! Have a great week 🙂
such a unique sign! I wonder if I could make it….
So stinkin cute! I love it. Thanks for sharing. Found you on Show + Tell Link Party!
WOW this is super cool!
LOVE iT! I too thought the leaf had a rusted metal backing, but it’s a cut out!!!! So cool and what an impressive tutorial with plans! Great job!
Thank you!
Hello cute lady! I’m just stopping by to let you know that we are featuring your Fall sign at our party that starts on Monday at 7 pm. Happy Dance Time! Pinned and tweeted! Lou Lou Girls
I love that sign! I wish I could cut wood so well… Thanks for sharing
Wow! I’m impressed with your power tool skills! I’m following your blog now. Love this sign and yes, the leaf does look like metal. This is a fabulous sign! I want one but don’t have the skills to make one. You should sell these! I’d buy one.
Love this sign! And I’m so jealous of your tools. We would love for you to share this project at Your Inspired Design link party to possibly be featured on 6 blogs!
https://gloria-fox.squarespace.com/potentiallychicblog/2015/9/30/your-inspired-design-5
Stopping in to pin. In fact I pinned it twice on two different boards.
Thanks!
Your projects are so inspiring! Honored that you stopped by Your Inspired Design and hope you come back every Thursday at 8 a.m. For a chance to be featured on 6 different blogs. See you next week.
You are one creative gal. And very talented with the power tools. Great sign. You can join our Your Inspired Design Link Party anytime.
Uhhhhh, (mouth drops to floor) love this. That maple leaf cut out is perfection. Thanks for linking at Your Inspired Design 🙂
Thank you
I’m in love with this sign! I, too, thought the leaf was cut metal. I have some of my own tools, and now I’m going to have to add in a jigsaw.
the reason the leaf is rusty is because of the rusty item behind it . what are some other options ?
The original idea was that the leaf be whatever was behind the sign, but the rusty look became popular. I’ve seen some people find a metal leaf to nail to the sign. Another idea would be to paint a leaf cut out to look rusty, instead of cutting the leaf from the sign.
Hi Amy . This is an adorable sign . Do you prefer to use a jigsaw and if so which one? I’m needing something to cut shapes but I prefer smaller tools that our more feminine hands and wrists can handle. Looking for a recommendation here.
Hi Michele,
What kind of shapes are you cutting out? Either a jigsaw or scroll saw are handy for that, both are really easy to use. If the shapes are more detailed and smaller, a scroll saw can be a better choice.
I’ve only used a Ryobi jigsaw and it works good if you buy the Bosch jigsaw blades, I’ve heard others say they like the Bosch jig saw too.
If you look into scroll saws, I’ve really liked my Delta Scroll Saw.
Let me know if you have any other questions!
Thanks,
Amy
just wondering what you used for the letters – didn’t see in the materials list. Strapping?
The letters were cut down from the cedar pickets in the materials list. 1×3’s would work too.