Oh I am so excited for Spring! Nothing says Spring like hearing the birds chirp, keeping the windows and doors open because the temperature is perfect, the blossoms on the trees, and everything turning green again. Ahh how I love Spring. A fun way to celebrate spring is to build a birdhouse with the kiddies.

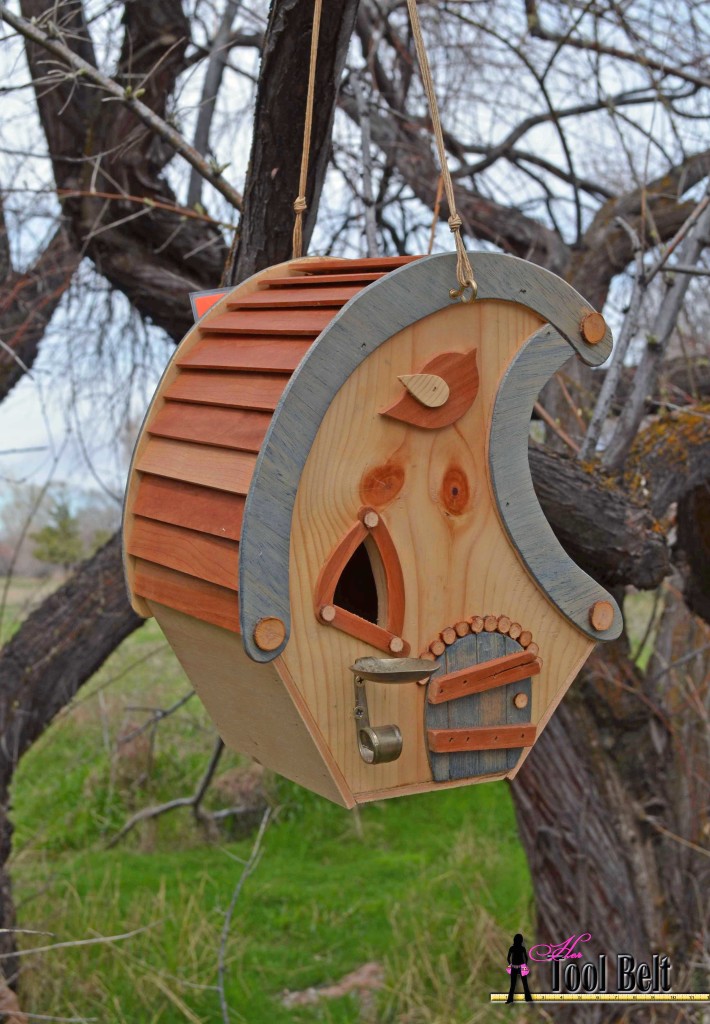
I’ve made a pattern for a fun little whimsical birdhouse. It was inspired by this super cute birdhouse that I saw on Pinterest, it was sold in an etsy shop and is no longer available. Mine is definitely simplified, but it still carries the fun curves and whimsical appeal.
First cut out 2 of the front and back pattern whimsical birdhouse pattern 1 from 3/4″ pine wood. Use 1/4″ plywood for the bottom and sides (or substitute with whatever you have). Bottom piece cut 3 5/8″ x 6″, left side piece cut 3 7/8″ x 6″, right side piece cut 3 5/8″ x 6″. Cut out the window and door from the front piece only. Cut out one of each piece (except 2 of each swoop) on the whimsical birdhouse pattern 2 from 1/8″ or so plywood (or whatever you have).
The birdhouse is 6″ deep, if you would like a different depth adjust the bottom and sides accordingly. Attach the bottom piece to the front and back. Use wood glue and brad nails to secure it. Attach the two side pieces the same way.
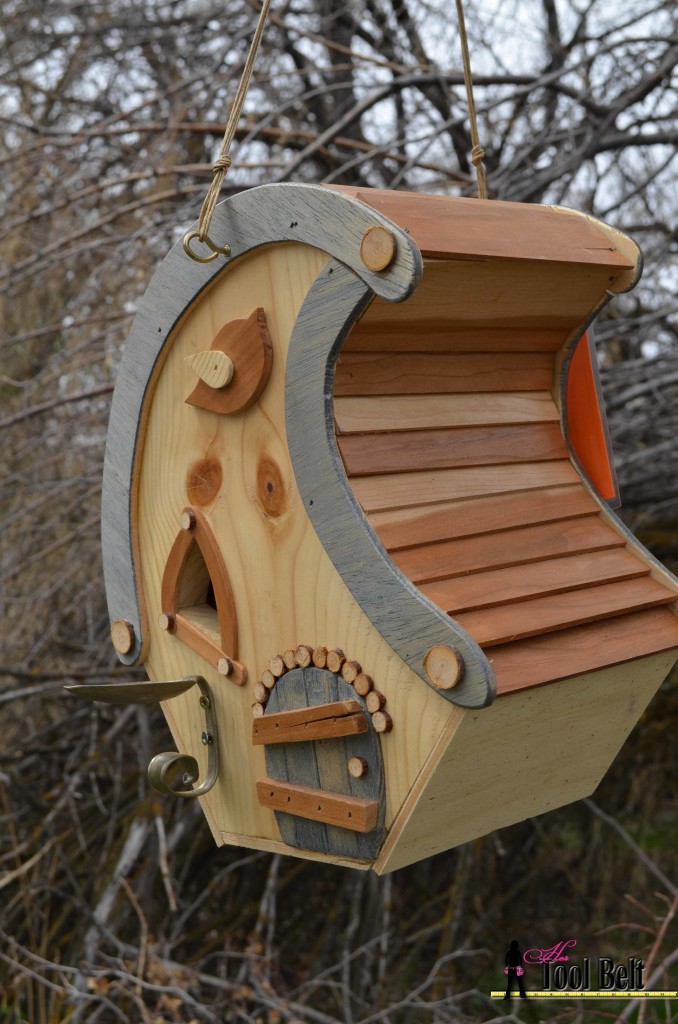
 For the roof, I used some leftover cherry pieces that I had. The strips are about 1 1/2″ wide and around 1/8″ thick and 6″ long. You can use whatever you have, but paint stir sticks would be great. Another option, I noticed lath sticks at Home Depot were $.55 for a few feet of them. To attach the roof, start at the bottom and use wood glue and brad nails in the 2 upper corners of your wood strip. Carefully nail the piece in place. Next strip, overlap covering about 1/2 of the previous strip and glue and nail in place. Repeat until you get to the peak. Repeat for the other side roof. Use the swoops to cover the ends of the roof strips, glue and nail the swoops in place.
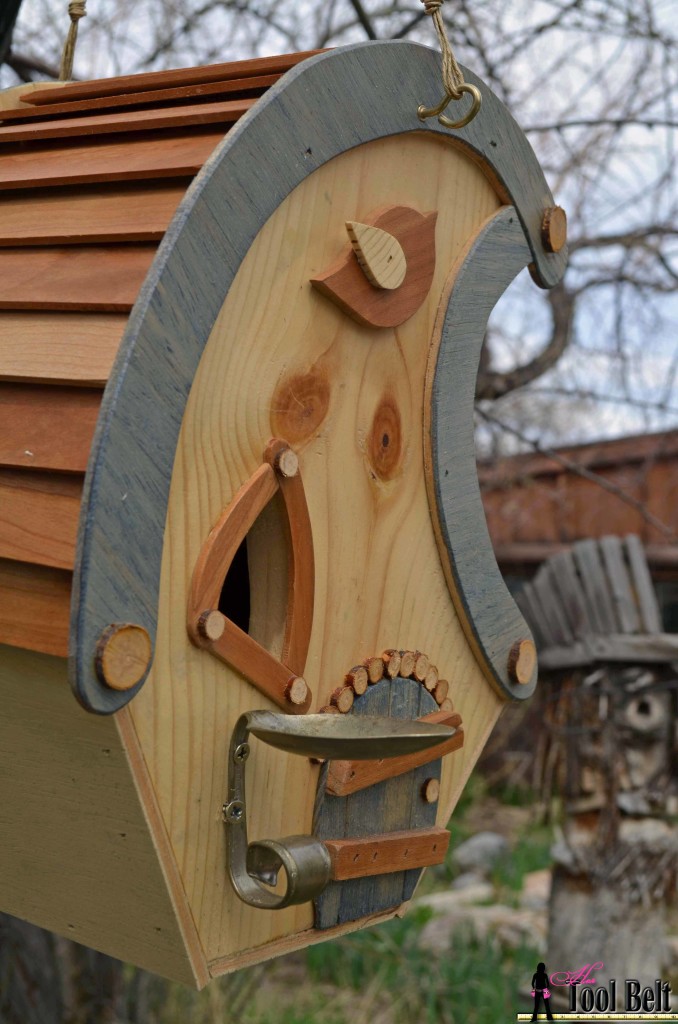
To make the door look like it has planks, use thin stips of 3/4″ boards. Glue and nail onto the door cut out previously, and glue the door into the birdhouse. Glue and nail the rest of the pieces from the whimsical birdhouse pattern 2. Add any extras that you’d like. I used some twigs and cut little slices to add decoration.
 I wanted to add a little perch for the birds to land on. I found an old spoon and turned the handle into a swirl, and bent the head to 90 deg. Drill a couple little holes in the handle and screw it onto the birdhouse.
Drill 2 pilot holes for eye hooks on the front and back of the birdhouse. Screw in eye hooks and tie a string to the front and back to hang the birdhouse.
I used a little blue stain to accent the birdhouse and gave it a light spray of polyurethane to help preserve the wood. Aren’t birdhouses so fun! I know your kids will adore them. Enjoy.
Here is a guide of recommended dimensions for birdhouses Ogden Nature Center birdhouse size requirement
Linked to Get your DIY on
This is adorable Amy! I’m visiting from the Get Your DIY On Party and I’m so glad I clicked your link because I love your blog and the name is awesome! Looking forward to following you 🙂
Thank you Marie!
i love this house i am male 61 would like to hang this at our golf course by the snack shack see what kinds of comments i get, i like your web site just getting into bird houses made about 10 put them around golf course blue bird and purple martin two storie with satilite dish lots of laughs
This is incredibly creative and beautiful ! I LOVE it!
My blog offers non-toy gift ideas for kids and bird feeder is on my list and I just recently posted about a DIY bird watching kit (http://nontoygifts.com/gifts-for-kids-diy-bird-watching-kit/). With your permission I would like to include a link to your DIY project on my list.
btw, I found you through the Lou Lou Girls link party
Yes, I’d love to have the link on your list. Thanks
This is so stinkin cute! I remember this from last year…perfect for this month’s party theme! Pinning! XO
Whimsical is a great building genre because there are no mistakes, it is “whimsical”. Use any colors of paint available and each one becomes a “one of a kind” Fun stuff.
Totally agree!
The bird house look lovely .I think kids would love it.Really good sharing.Thank you.
So cute! Adding to my Pinterest queue.
I made one exactly like it and used valley tin ,tounge depressors over that then sprayed with flex-seal. Guaranteed to be dry birds. I’m going now to a consignment shop to find a brass spoon if possible if not I’m sure I can make something work. And after that it’s time to hang it..Next project birdfeeder then on to who knows what. Thanks for the cool pattern. It’s the first thing I built out of a new really nice workshop filled with tools that were my father’s who was an excellent woodworker. I’ve been away for 25 years so I cleaned up some tools older than myself. we owned and operated a hardware/lumber business so he had the best of everything. I’ve played guitar for 30 yrs and have way too many but that is going to be my goal. To build the perfect acoustic and electric guitars
Great Design, time consuming which is good and cant take your eyes off of it
Amy,
Thanks for sharing the plans for this beautiful birdhouse. I had a lot of fun making it and can make 2 suggestions.
1) the bird pattern does not include his beak.
2) I modified the design to use 3/4″ wood for the sides that are on the inside of the front and back. The bottom, which is also inside the front and back, is on a hinge with a simple dowel through the back into the bottom to hold it closed. This allows for easy cleaning out at the end of the season.
Does anyone know where i can purchase whimsical type hardware to put on a birdhouse ?