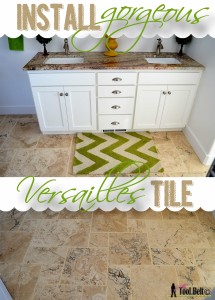
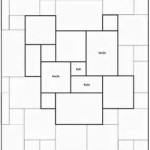
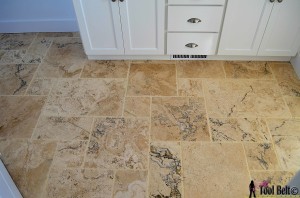
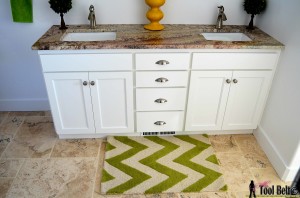
 Want to try something new in your house, practice on your sisters’ houses. That seems to be my motto lately 🙂 The Versailles Tile pattern is my favorite tile pattern. 4 1/2 years ago when we bought an unfinished home, I wanted to install it in our master bath. However I was working full-time, had a brand new baby, and had just sold my current house so I didn’t think I’d have time to lay that ‘difficult’ looking pattern. Little did I know it comes in a kit and is very easy to lay. My sister wanted me to lay travertine in the Versailles pattern in her master bath. I was excited to… ahem ‘practice’ it on her house 🙂 It turned out great and was so easy to lay once I got the pattern going.
How to install Versailles pattern
First item of business – determine square footage (sq ft)
You need to measure the square footage of the area that you are laying tile. Area is measured by Lengh x Width = Area. If your room is a funny shape try and visually break it up into squares and add your area squares together. When dealing with tile, we mostly use square foot. Here are some helpful equations:
lengh in inches x width in inches = area in square inches divide that by 144 to get square feet.
When buying your tile, you’ll want to order about 15% extra to account for cracked tiles, edge pieces, etc. Multiply the square footage of your room by 1.15 to get the amount of tile that you should buy. My sister bought her travertine Versailles tile at Containers Direct, I believe she paid around $3 sq/ft.
Materials needed:
- Tile (room sq-ft x 1.15)
- thinset (between tile and backerboard)
- Backerboard (room sq-ft)
- 1 1/4″ Rock-on cement board screws (drilled in every 8″)
- Thinset (between backerboard and plywood)
- Tile saw
- trowel (1/4″x1/4″x1/4″)
- trowel (1/4″x3/8″x1/4″)
- no notch margin trowel (spatula)
- 5 gal bucket
- thinset mixing paddle
- 1/2 hp drill
- knee pads!!!
- grout
- rubber grout float
- extra large orange grout sponge
- level
- 1/8″ tile spacers
- Natural stone and grout sealer
- chalk line
- measuring tape
- 2″ backerboard seam tape
- impact drill
- Backerboard scoring knife
- straight edge
- optional: grinder with a tile blade
You can pick most of these items up at Lowe’s or Home Depot. You don’t need a fancy tile saw, although it would probably be easier, I have a cheap ($80ish) saw that I’ve used for years and it has done the job. If your saw blade gets dull, it is easy to switch out.
You should clean and seal the travertine with a natural stone sealer. Let the sealer dry according to the instructions.
Install the cement bed
An important part of any tile floor is the cement bed, under the tile. There are a number of different products out there for the cement bed. For my sister’s floor we went with 1/4″ Hardiebacker cement board (wonderboard is a little cheaper, but Hardiebacker is easier to cut and has the 8″ screw pre-marked). Cement board is a fairly easy to use product for the DIY-er. A note: 1/2″ cement board is usually used for walls where you are installing tile.
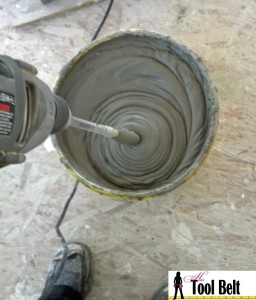 Before laying the cement board, scrape your floors removing high spots, and leftover plaster from the drywall guys, sweep and clean the floor as best you can. For the thinset between the plywood floor and cement board, I use the cheapest thinset I can buy at the hardware store. Mix the thinset in a 5-gal bucket according to the directions on the bag.
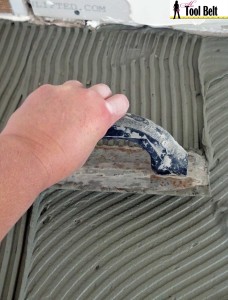
Use the 1/4″x1/4″x1/4″ trowel and spread the thinset out. Hold the trowel at a 45 deg angle on the last pass. Set a piece of hardiebacker on the thinset.
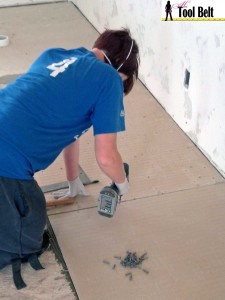
It helps to have a second person for this part. Screw in Rock-on cement screws every 8″, trying to get the screw heads flush with the cement board. I’ve done this with a regular drill, but it is 100% easier with an impact drill. I love the Ryobi’s with the lithium ion batteries from Home Depot.
You need to stagger the cement boards when laying them. You should never have 4 corners meet, and never lay a seam of cement board on a seam in the plywood. If this is going to happen, cut your cement board to miss the plywood seam. Leave an 1/8″ or so gap between cement boards and between wall edges.
Continue spreading the thinset, laying cement board and screwing it down until you cover the whole area that will be tiled. The thinset needs to cure for 24 hrs until you start laying tile.
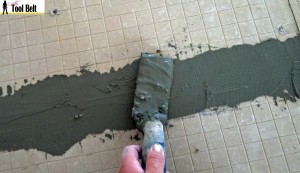
Fill the cement board gaps with thinset, then apply the 2″ glass seam tape over the joint.
Cover the seam tape with thinset, and smooth the joint. Try not to leave high points. For more info about hardiebacker consult the installation guide.
Layout the Versailles pattern
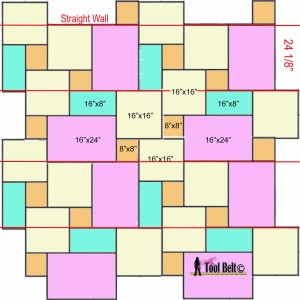 Next determine how you want the tile to be laid out in your room. In my sister’s room I started with the longest straight wall. Then make guides with a chalk line. I made mine 24″ + grout line thickness (for me 1/8″).
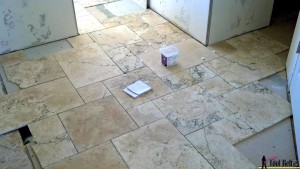
Layout the tiles in the versailles pattern. Measure and cut edges to fit into place.
Tile cutting tips
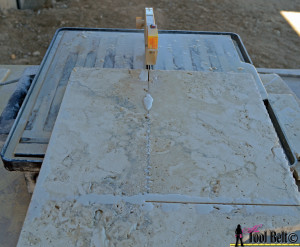
Always wear safety glasses when cutting tile. Measure and mark on the tile with pencil where to make your cut. Gently feed the tile into the tile saw blade, follow the line with the tile saw. Use clean water and rinse the cut tile off.
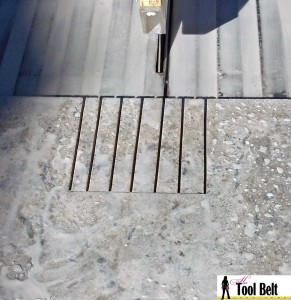
If you have to cut holes for vents/toilets etc, there are a few ways to get’er done. If you don’t have to cut the hole inside of a whole tile, you can make multiple cuts (fingers) within the area that needs to be cutout. (this is for 1/2 of a vent hole)
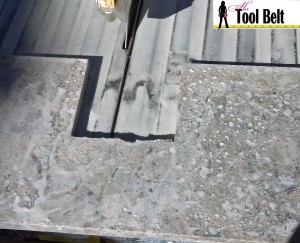 Knock the ‘fingers’ off and they will generally break at the line that each of the cut stopped at. File down the rough edges.
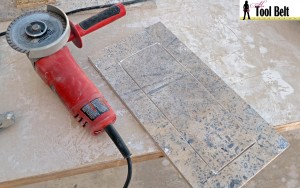 Another option to make a hole cut is with a hand-held grinder and a tile saw blade. This method generally will make nice clean edges.

To drill a hole through tile for a water pipe, measure and mark the placement on the tile for the hole. Use a 3/4″ masonry bit, and slowly drill through the tile, let the drill bit do the work. Clean off the tile and slip it other the water pipe for a nice fit.
How to create a chiseled edge on travertine
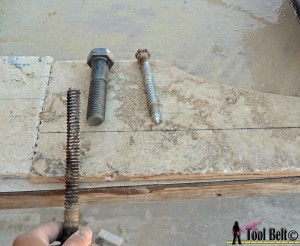 If you have an edge that has been cut and will show, you’ll want to chisel the edge. Grab a couple of large bolts or lag screws. Roughly drag the bolts across the edge of the tile at a 45 deg angle. This is a great job when you need to let off a little steam. When you’re tiling there seems to be plenty of that. Continue chipping along the edge until you match the chiseling on the other edges.
Set the Versailles pattern
Pick up the dryfit tiles, and place them in an order. I like to nicely stack the tiles along the wall within arms distance of where they’ll be laid. Sweep the floor and make sure there aren’t any high spots, scrape them down if there are, and remove as much dust as possible.
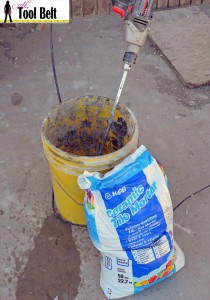 Mix a batch of thinset according to the instructions on the bag. I like to use the Mapei brand of thinset. They sell it at Lowe’s and many tile supply stores.
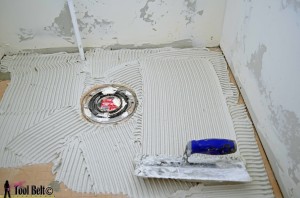 Spread the thinset with a 1/4″x3/8″x1/4″ trowel at about a 45 deg angle.
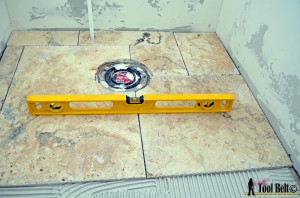
Check to make sure your tiles are level and even. Slightly wiggle the tiles back and forth. If you have an edge or corner that is dipping too low, sometimes I’ll lift the corner with the spatula and add a little more thinset, Bring the tile back down and level it.
If you are laying natural stone and it has a quite a few holes and grooves on the backside. Scrape a very thin layer of thinset on the back with the flat side of the trowel. This is a type of back buttering. It will make laying the tiles flat and level much easier.
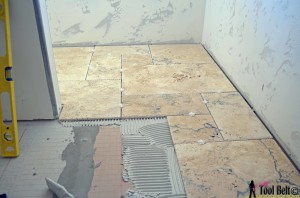 Continue with the versailles pattern adding 1/8″ spacers and following the guidelines.
It looks great, doesn’t it. 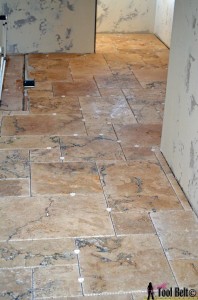 As you move along, make sure to check your tile levelness and that the tops of the tiles are even.
As you lay the tiles, your thinset may start getting dry. The thinset it too dry when you lay the tile on the troweled thinset and lift it up, if the thinset doesn’t leave lines and adhere to the tile bottom don’t continue to use it. Make a new batch.
Let the tiles dry/cure for 2 days. Then it’s time to grout.
Grouting tile
Grouting is fairly simple. We used Polyblend Butter Cream non-sanded grout from Home Depot. The general rule of thumb for grout is lines larger than 1/8″ use sanded grout and lines 1/8″ and smaller use unsanded grout. Mix the grout according to the instructions on the bag. However I like to do smaller batches of grout, like 1/4 of the bag at a time. When mixed the grout is a pasty texture. Use your spatula or a rubber float and pack the grout into your grout lines between the tiles. The grout bag shows smearing the grout over the whole tile. I don’t do that on big tiles, because it just wastes the grout. Fill the grout line very full of grout. Let the grout lines dry for a while 30 min to 1 hr. Then with your extra large orange grout sponge and a bucket or large bowl of clean water, wipe up the excess grout. Keep wiping until the grout is at the height that you prefer, generally just below the top of the tile. Change your water often and wipe all of the residue from the grout off of the tile. Let the tiles dry for a couple of days. Clean the tiles again really well with water and a sponge. Let the water dry and a apply natural stone and grout sealer according to the instructions on the bottle.
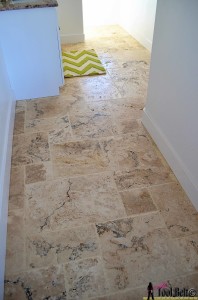 Once your base molding, cabinets, toilets, etc have been installed. Run a bead of caulking around the room wherever anything permanent (molding, cabinets, etc) is to give is a finished look. The caulking also keeps dirt, mop water, etc out of places that you don’t want it to go.
Now you can spend hours admiring the gorgeous Versailles floor that YOU laid and saved thousands of dollars DIY’ing.
linked up to Remodelaholic, skip to my lou, daisy cottage design, homework, the makers, savvy southern style, DIY dreamer

Looks fantastic! I don’t know that I’d have the patience for all that, but the finished result is gorgeous. I’d be thrilled if you’d link up at this week’s Off the Hook!
such a gorgeous pattern! It looks gorgeous in that room….. 🙂
“hugs” Crystelle
Crystelle Boutique<
Beautiful! Your awesome project is being featured today at Your Designs this Time! Thanks for sharing with us!
Emily & Erin
Oh this looks so nice – something I need to do in my bathroom – thanks for the tutorial! Thanks for linking up to The Creative Exchange linky party!
I am removing old floor covering to get ready for installing the versailles travertine in our condo. I got the carpeting up already no problem, and now am removing 12×12 vinyl tiles in the dining room, kitchen and hall way. They were laid over an old cheap linoleum floor. THe tiles and old linoleum flooring are coming up without much trouble, but there is a sticky glue like residue left on the concrete slab. Can someone tell me what I should use to clean that sticky residue off before starting my travertine tile install ?
Thanks much for help.
I’m not sure, but this is what google said:
“Once the surface layer is gone, use a paint scraper to remove the glue. You can also use a heat gun to soften the glue as you scrape it away with the paint scraper. Some old linoleum has tar-based adhesive, which can be softened by applying mineral spirits.”
On my first floor remodel the linoleum was very attached to the particle board it was laid on. So we pulled up the 3/8″ particle board with linoleum and replaced it.
How did you match up the tiles when you had different sizes and spacers? eg. if you have two 8″ pieces of tile abutting a 16″ they wouldn’t match as two time 8″ plus 2 spacers is more than one 16″ tile and one spacer.