Hi! I’d love for you to follow me on Pinterest Her Tool Belt and if you love instagram, you can keep up with me there too!
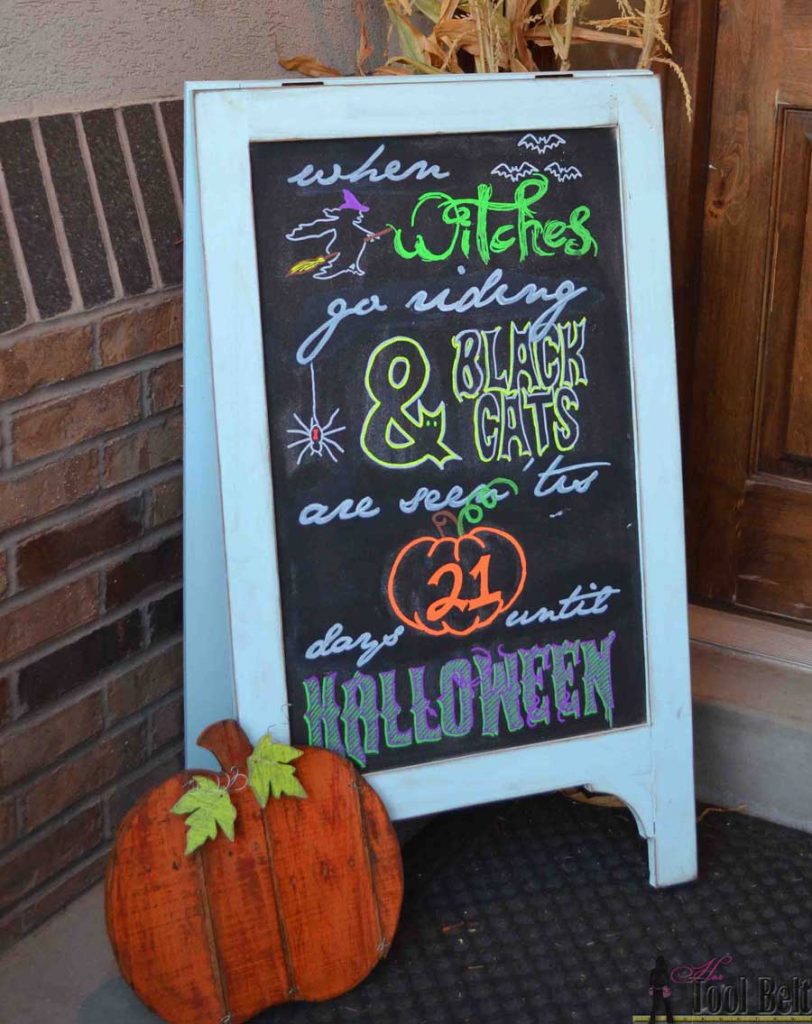
I think I’ve mentioned this before, but I have amazingly bad handwriting. It stems back from having one of those palm pilot PDA things from way back in the 2000’s, and the single stroke alphabet using the stylus. Ha ha…the good ole days. 🙂 I’ve seen this cute saying on Pinterest, ‘When Witches go riding and black cats are seen ’tis XX days until Halloween.’ I thought it would be fun to use my chalkboard easel for a little advent countdown to Halloween. Of course I can’t freehand something like that, so I’ll show you my tips for creating and writing word art on chalkboards.
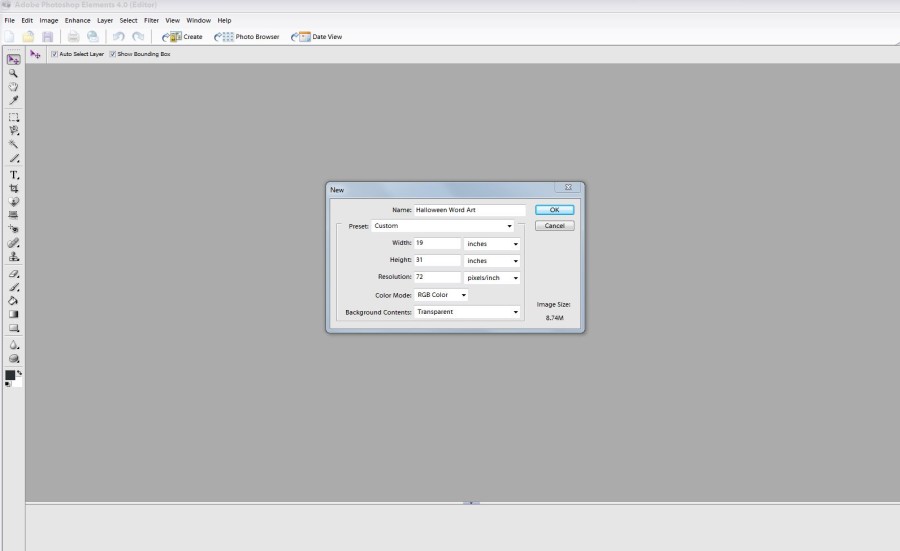
First I measure the surface size (large chalkboard 19″ wide x 31″ tall). I use Photoshop elements to re-create the surface size, then I know it will print out the correct size.
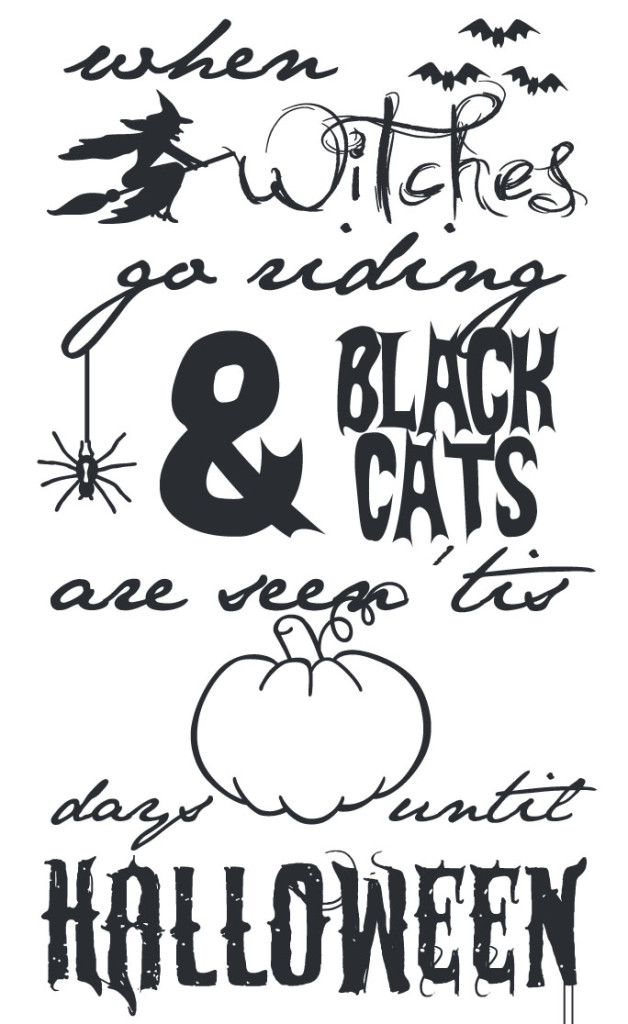
I create the word art using various fonts. This word art uses Jane Austen, Jellyka Castle’s Queen, Batfont, VTKS SABONETE and Trick or Treat 2.
I’m sure there is a better way to do this next step, but this is what I do. I save my finished word art as a .jpg. Then I open a new file size that is the size of paper 8 1/2″ x 11″. I open the word art .jpg in the 8 1/2″ x 11″ blank file. Then I move the word art to start in one corner of the 8 1/2″ x 11″ file and save it as a .pdf file. Move the word art to the next section and save that as a .pdf and continue the process until I’ve captured the whole word art. I print out the .pdf files and tape together the pattern. If you want to use my pattern you can download them here. halloween 1 halloween 2 halloween 3 halloween 4 halloween 5 halloween 6
Or if you’d rather a smaller chalkboard 12 1/2″ x 20 1/4″, here is the resized word art: Halloween small 1 Halloween small 2 Halloween small 3
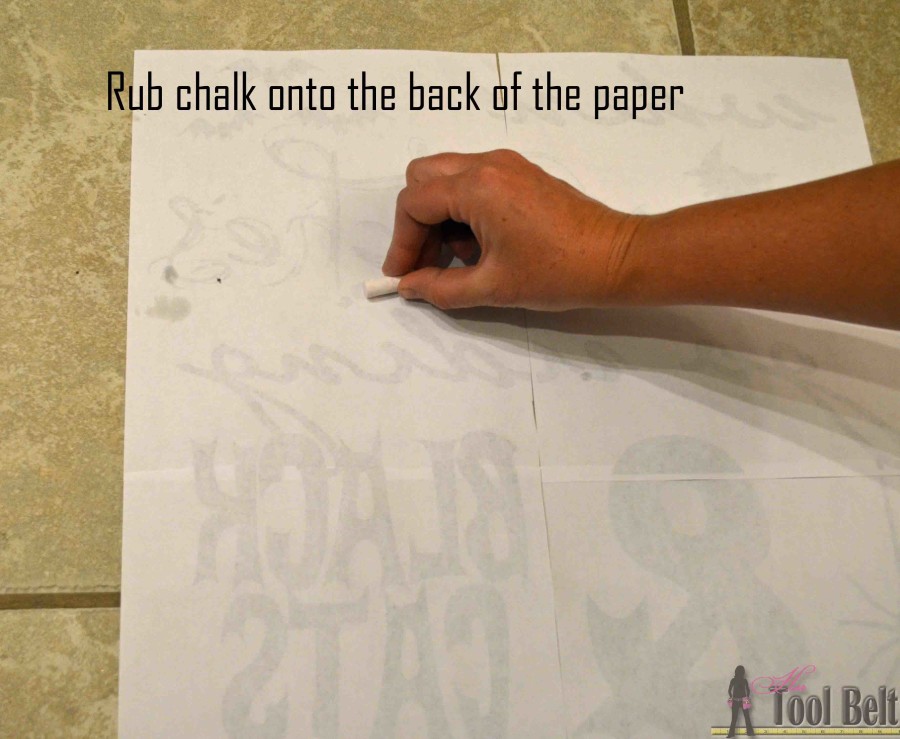
Once the pattern is taped together. Rub chalk on the backside of the paper. You really just need the chalk on the backside of words/drawings, you can skip the white space.
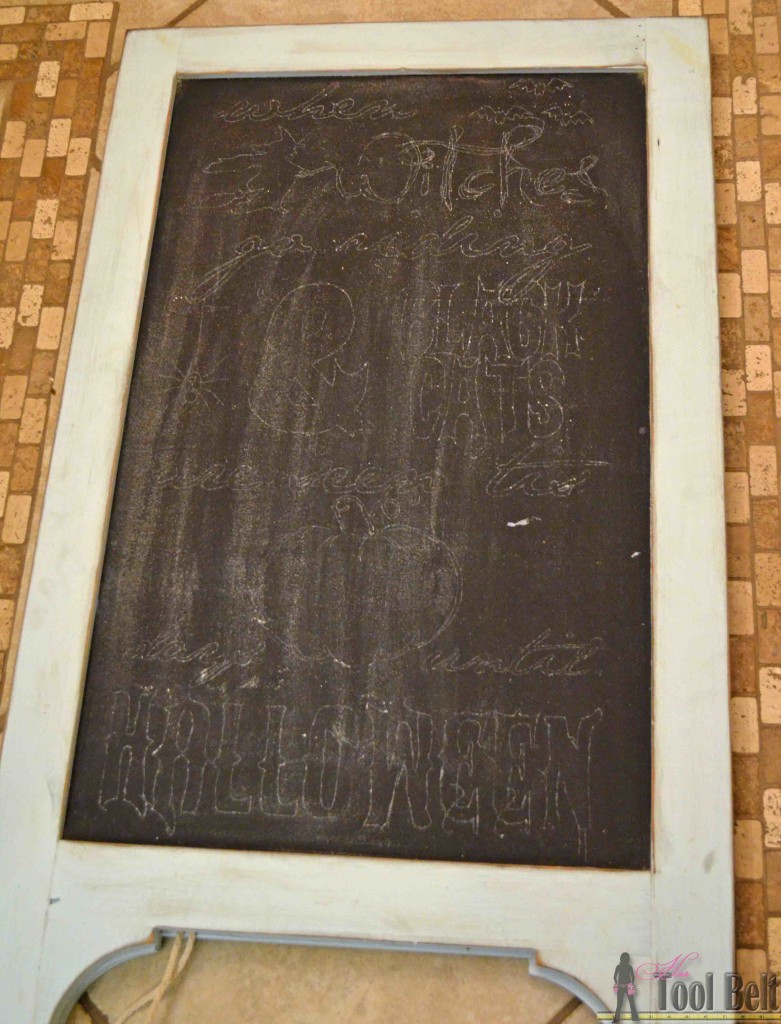
Place the word art pattern onto the chalkboard. Use a pencil/pen and trace the letters/drawings. This will leave a fine outline on the chalkboard to trace.
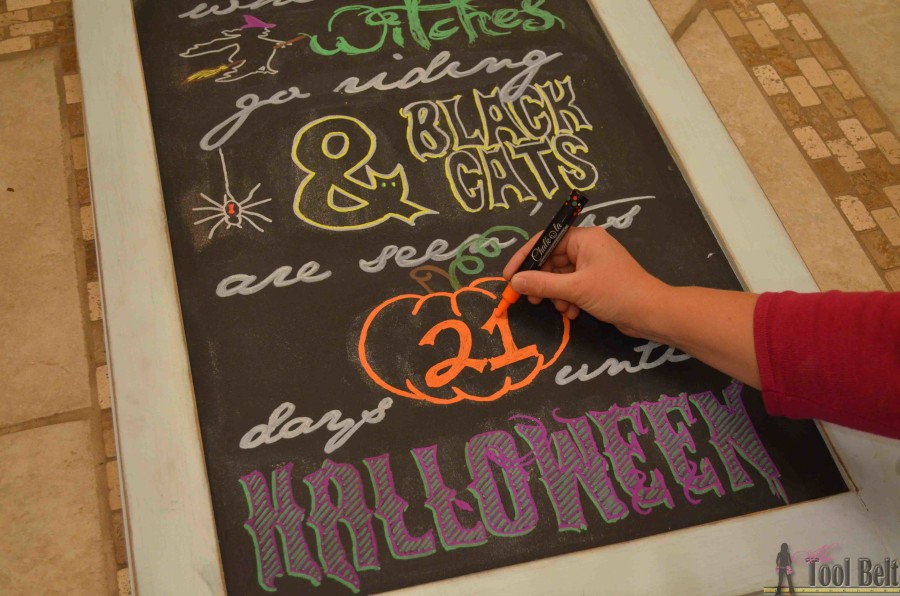
Now just fill in the outlines with chalk or chalk markers.
I really like the look of the chalk markers (amazon affiliate) use Amazon discount code CHALK20A for 20% off, the lettering is much more defined and vibrant. For this sign I was able to review the Chalkola chalk ink markers. The fun neon colors are perfect for this Halloween word art. When you first use the markers, you have to do a couple of steps to get the ink flowing. First shake the markers horizontally with the lid on, then take the cap off and put the tip on a surface and pump the marker up and down until you see the ink come down to the tip. After that the markers are ready to go.
The other nice feature is that if you mess up, just grab a wet wipe and wipe off the mistake. Which I did many times trying to decide what colors to use where. It also makes it slick to change the number each day, simply wipe off yesterday’s number and write today’s.
For more Fall Craft projects check out:
Linked to Link Parties, savvysouthernstyle


This is such a awesome tip Amy!! I wish is had better handwriting too, I need to do this! Pinned!
Thanks Mindi!
This is so smart.. I always try freehanding it and it looks like Drunk Monkeys attacked my chalkboard! Thanks for linking up BTW! <3