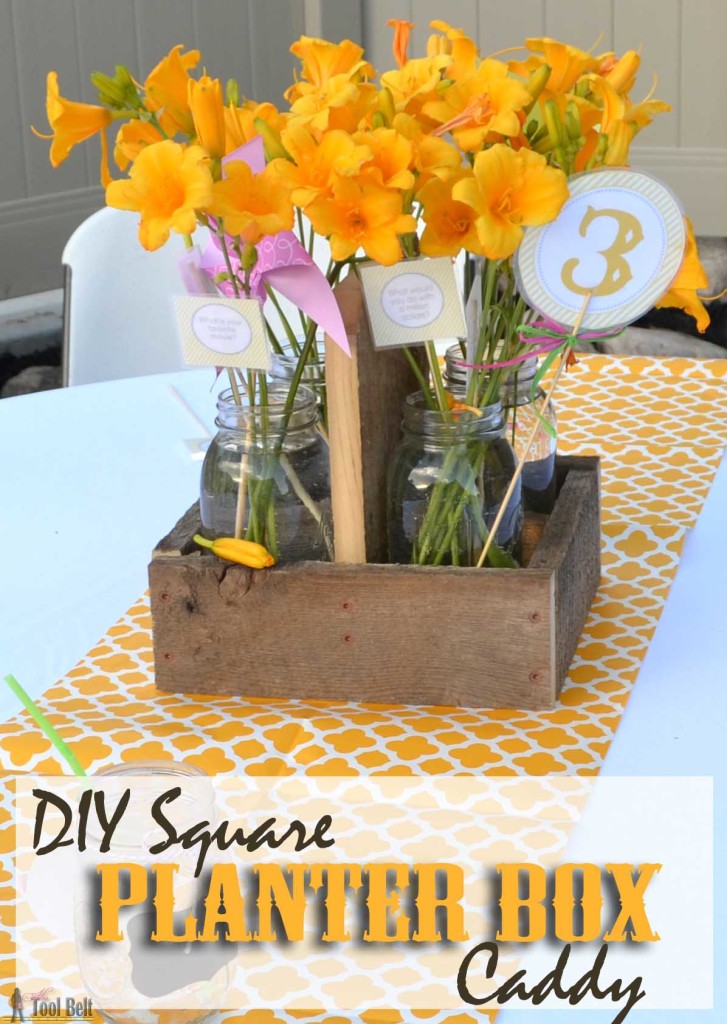
It’s part of my nature to be cheap and get a great ‘deal’, it might even be a sickness :-). When I can put together some decorations for basically nothing, it makes me happy. We recently had a lemony themed summer social party with the ladies in the neighborhood, that’s where the Lemonade Stand made it’s debut! For the table centerpieces these rustic mason jar caddies and bright flowers added the perfect touch and the best part they were free to make. The barn wood came from the old hay barn, the quart mason jars are sitting around waiting for Fall to be filled with peaches, and the bright yellow daylilies are from my yard! I totally lucked out with the timing and that the daylilies were in full bloom. They’d be cute for a rustic wedding too!
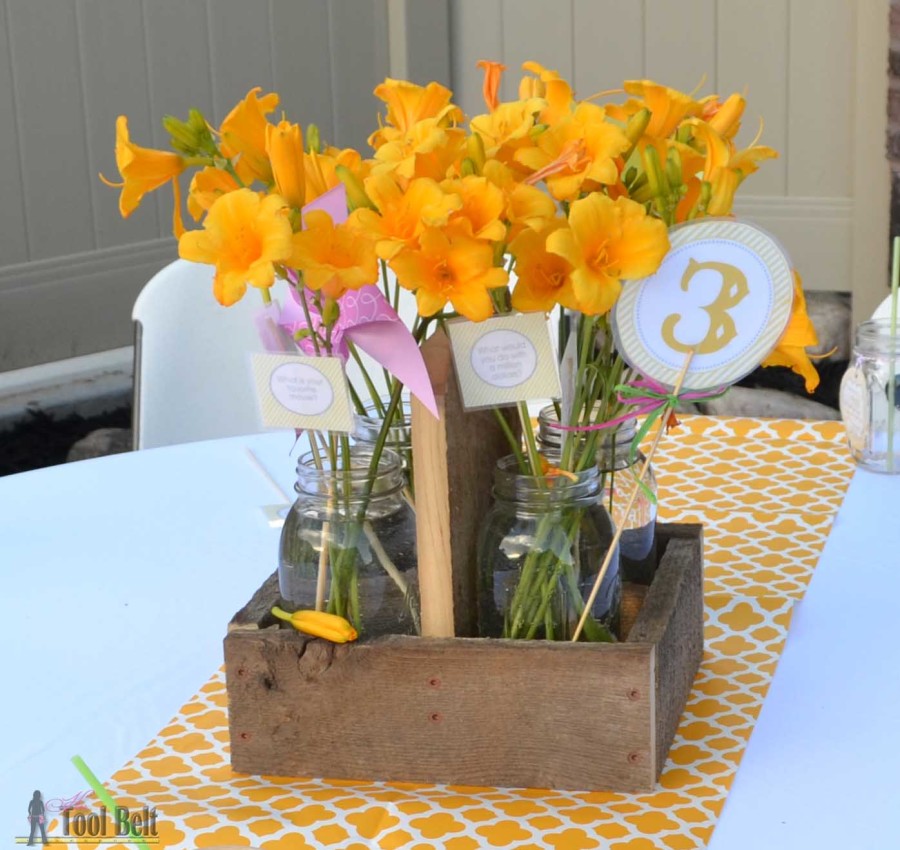
How to Build a Square Planter Box Caddy Centerpiece
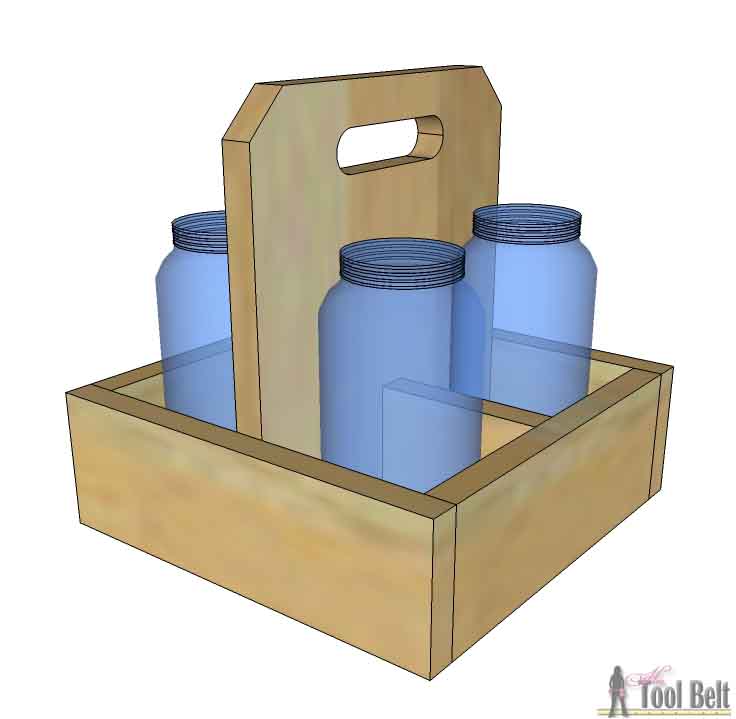
Materials
- 1 – 1″ x 10″ x (2′ or longer) board (actually 3/4″ x 9 1/4″)
- 1 – 1″ x 4″ x 8′ board (actually 3/4″ x 3 1/2″)
- 4 – quart mason jars
- 1 1/2 – 1 5/8″ screws (I used 1 5/8″ deck screws)
- 1 1/4″ pocket screws (optional)
- wood glue
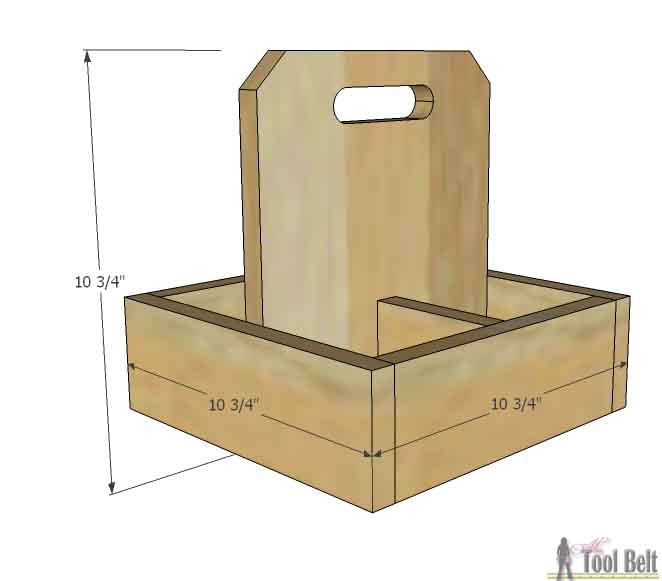
Cut List
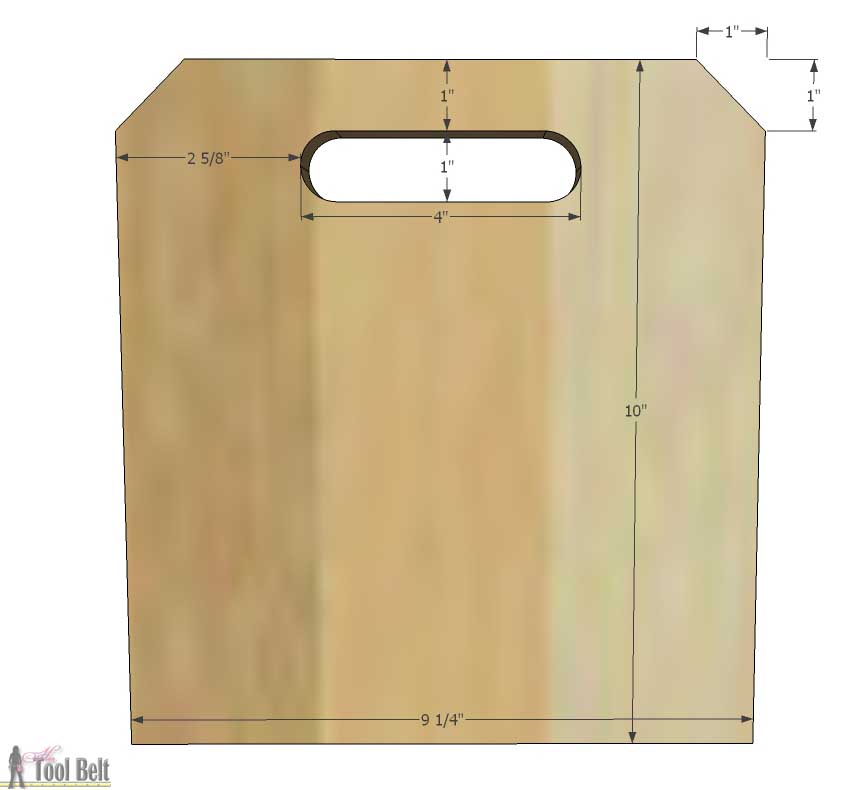
- 1 – 3/4″ x 9 1/4″ x 10″
- 1 – 3/4″ x 9 1/4″ x 9 1/4″
- 2 – 3/4″ x 3 1/2″ x 10 3/4″
- 2 – 3/4″ x 3 1/2″ x 9 1/4″
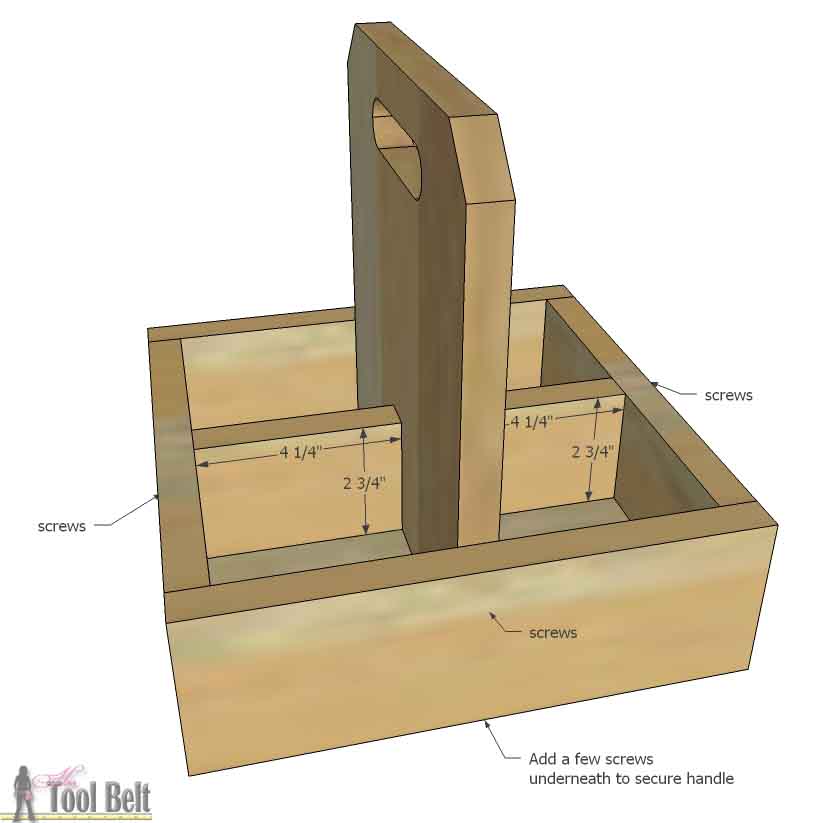
- 2 – 3/4″ x 2 3/4″ x 4 1/4″
Note: I used barn wood to build my caddy, and the thickness is slightly thicker than 3/4″. If you are also using barn wood double check your thickness and make adjustments as necessary.
I wanted to limit the number of screw heads showing, so I drilled pocket holes (affiliate) in the bottom piece. If you don’t care or don’t have a pocket hole jig, add screws through the side. Pre-drill the holes before adding screws to reduce wood splitting.
Glue the sides and secure to the bottom piece, making the bottoms flush. 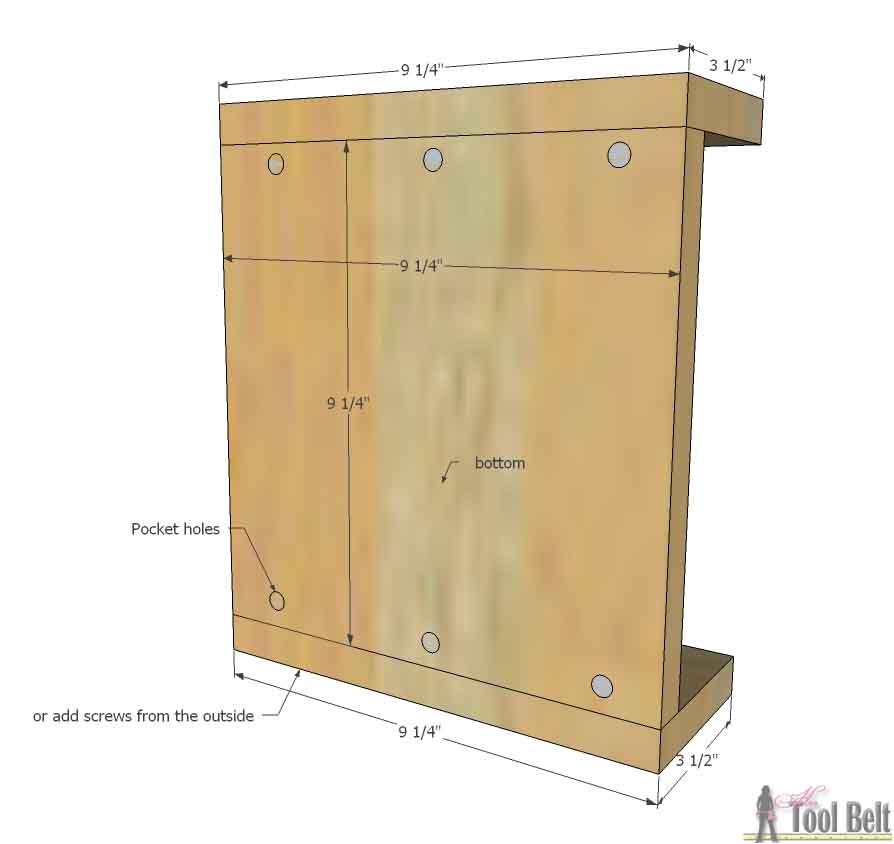
Glue the sides, secure to the sides and bottom piece, making the bottoms flush. 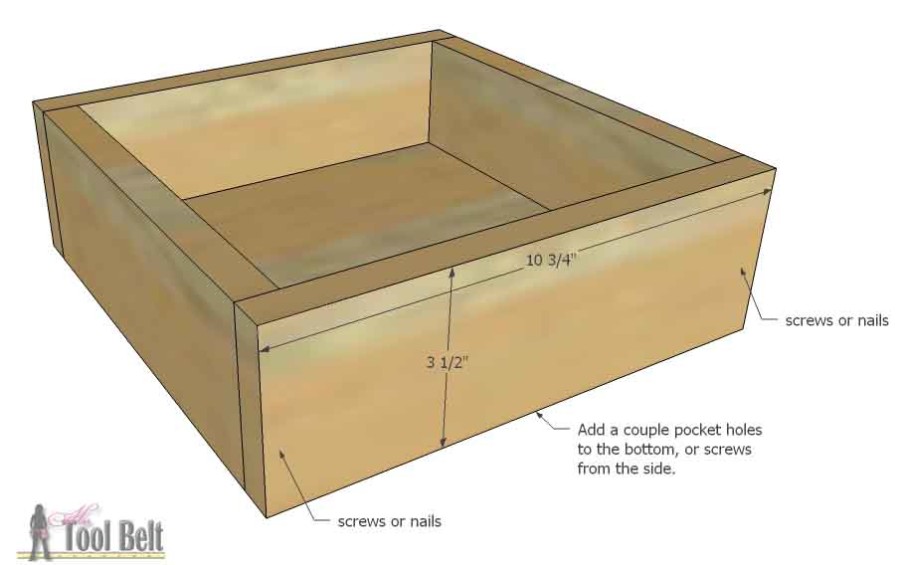 To make the handle, measure down at least 1″ from the top and 2 5/8″ from the sides. Drill 1″ holes on each side, a spade drill bit works great. Use a jig saw to cut the straight portion of the handle out between the holes. Cut off a few 45 deg dog ears from the top corners, about 1″ x 1″.
  Glue the handle to the center of the planter box, also glue in the small divider pieces. Add screws to the sides and bottom securing the pieces into place.
I left my square planter box caddy natural barn wood. They will also look great stained, painted and/or distressed! 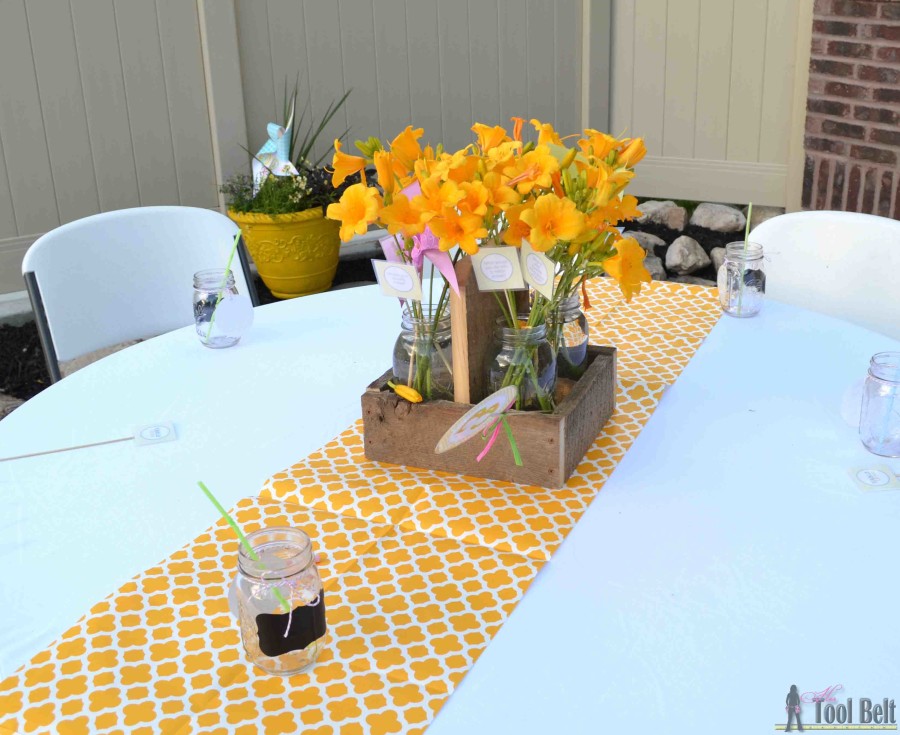
How would you finish yours? BTW the little cards on skewers are conversation cards, just in case there is a dull moment 🙂
Thanks for pinning!
Download Plans
DIY Square Planter Box Caddy
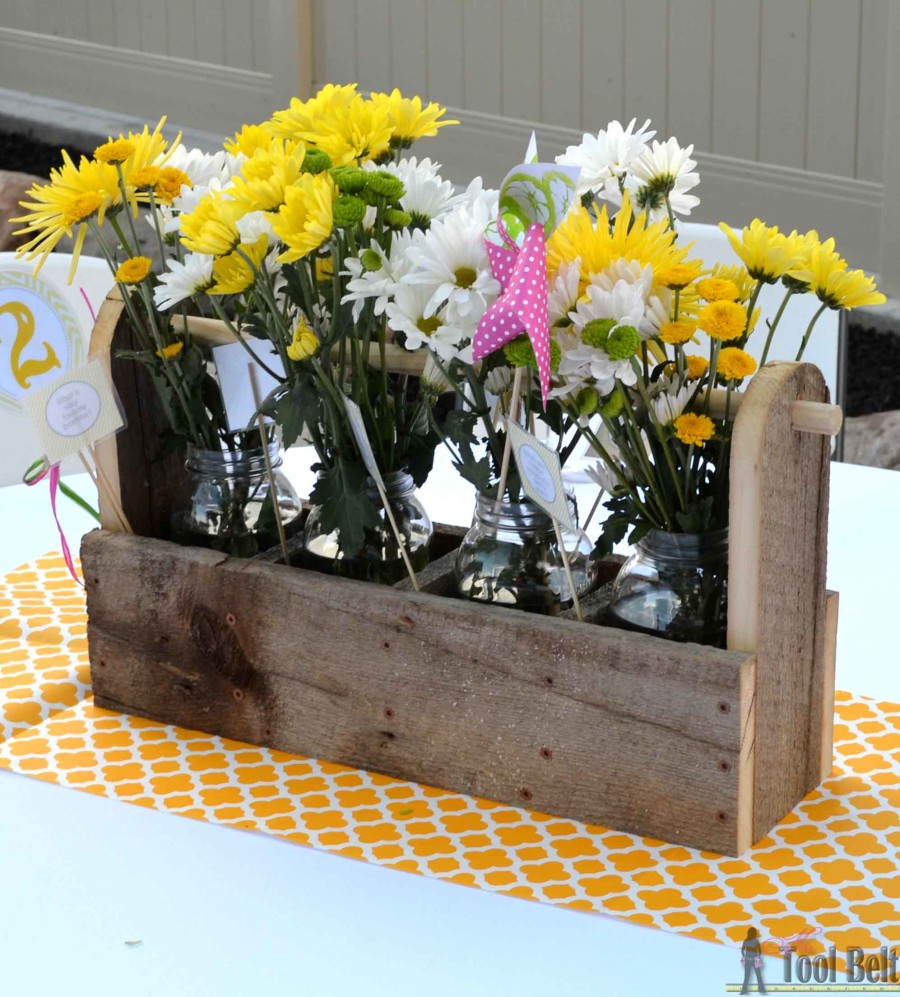
I couldn’t decided on what syle of planter box centerpieces to make, so I made 3 different styles: square, long, and tool box.
Tool Box Style
Linked to My Favorite Link Parties, Remodelaholic, Savvy Southern Style
This caddy is amazingly awesome! 🙂 Love the natural look and how versatile it is. You could definitely use it in any room of the house, and probably accessorized for all the holidays too!