Hi! I’d love for you to follow me on Pinterest Her Tool Belt and if you love instagram, you can keep up with me there too!
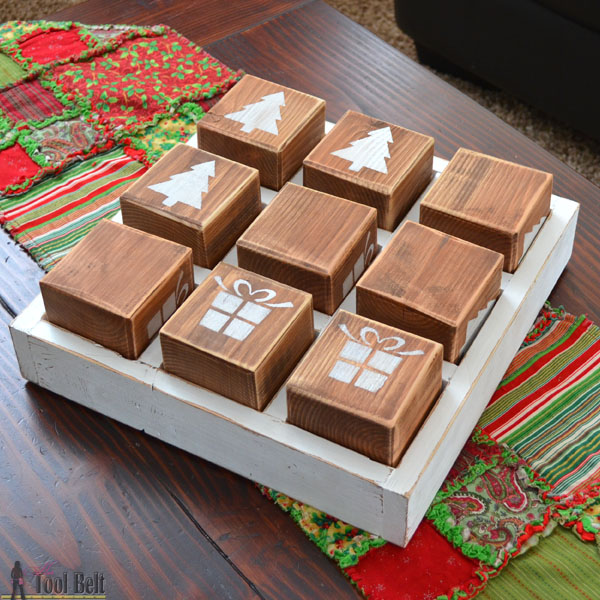
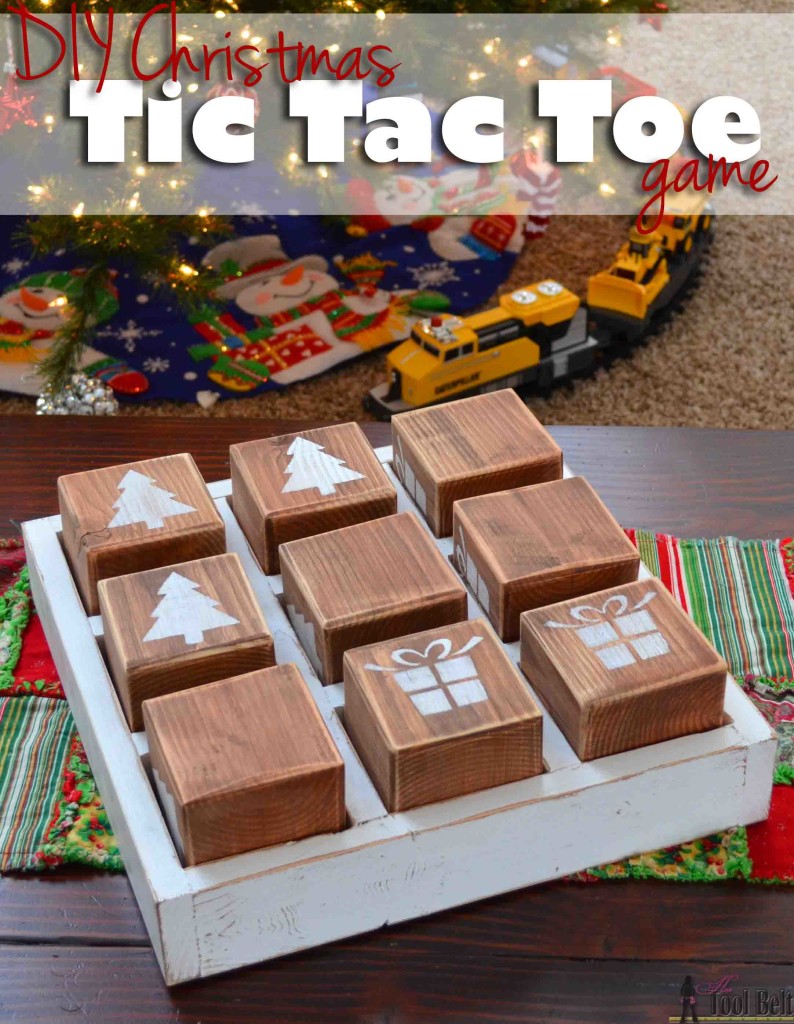
Recently my Mom saw an oversized tic tac toe game in the lobby of a hotel, sitting on an ottoman for the patrons to play while waiting. Of course she texted me a picture so I could whip one up for her. 🙂 After I started making it, I thought it would be so fun to make a Christmas version of tic tac toe with trees and presents.
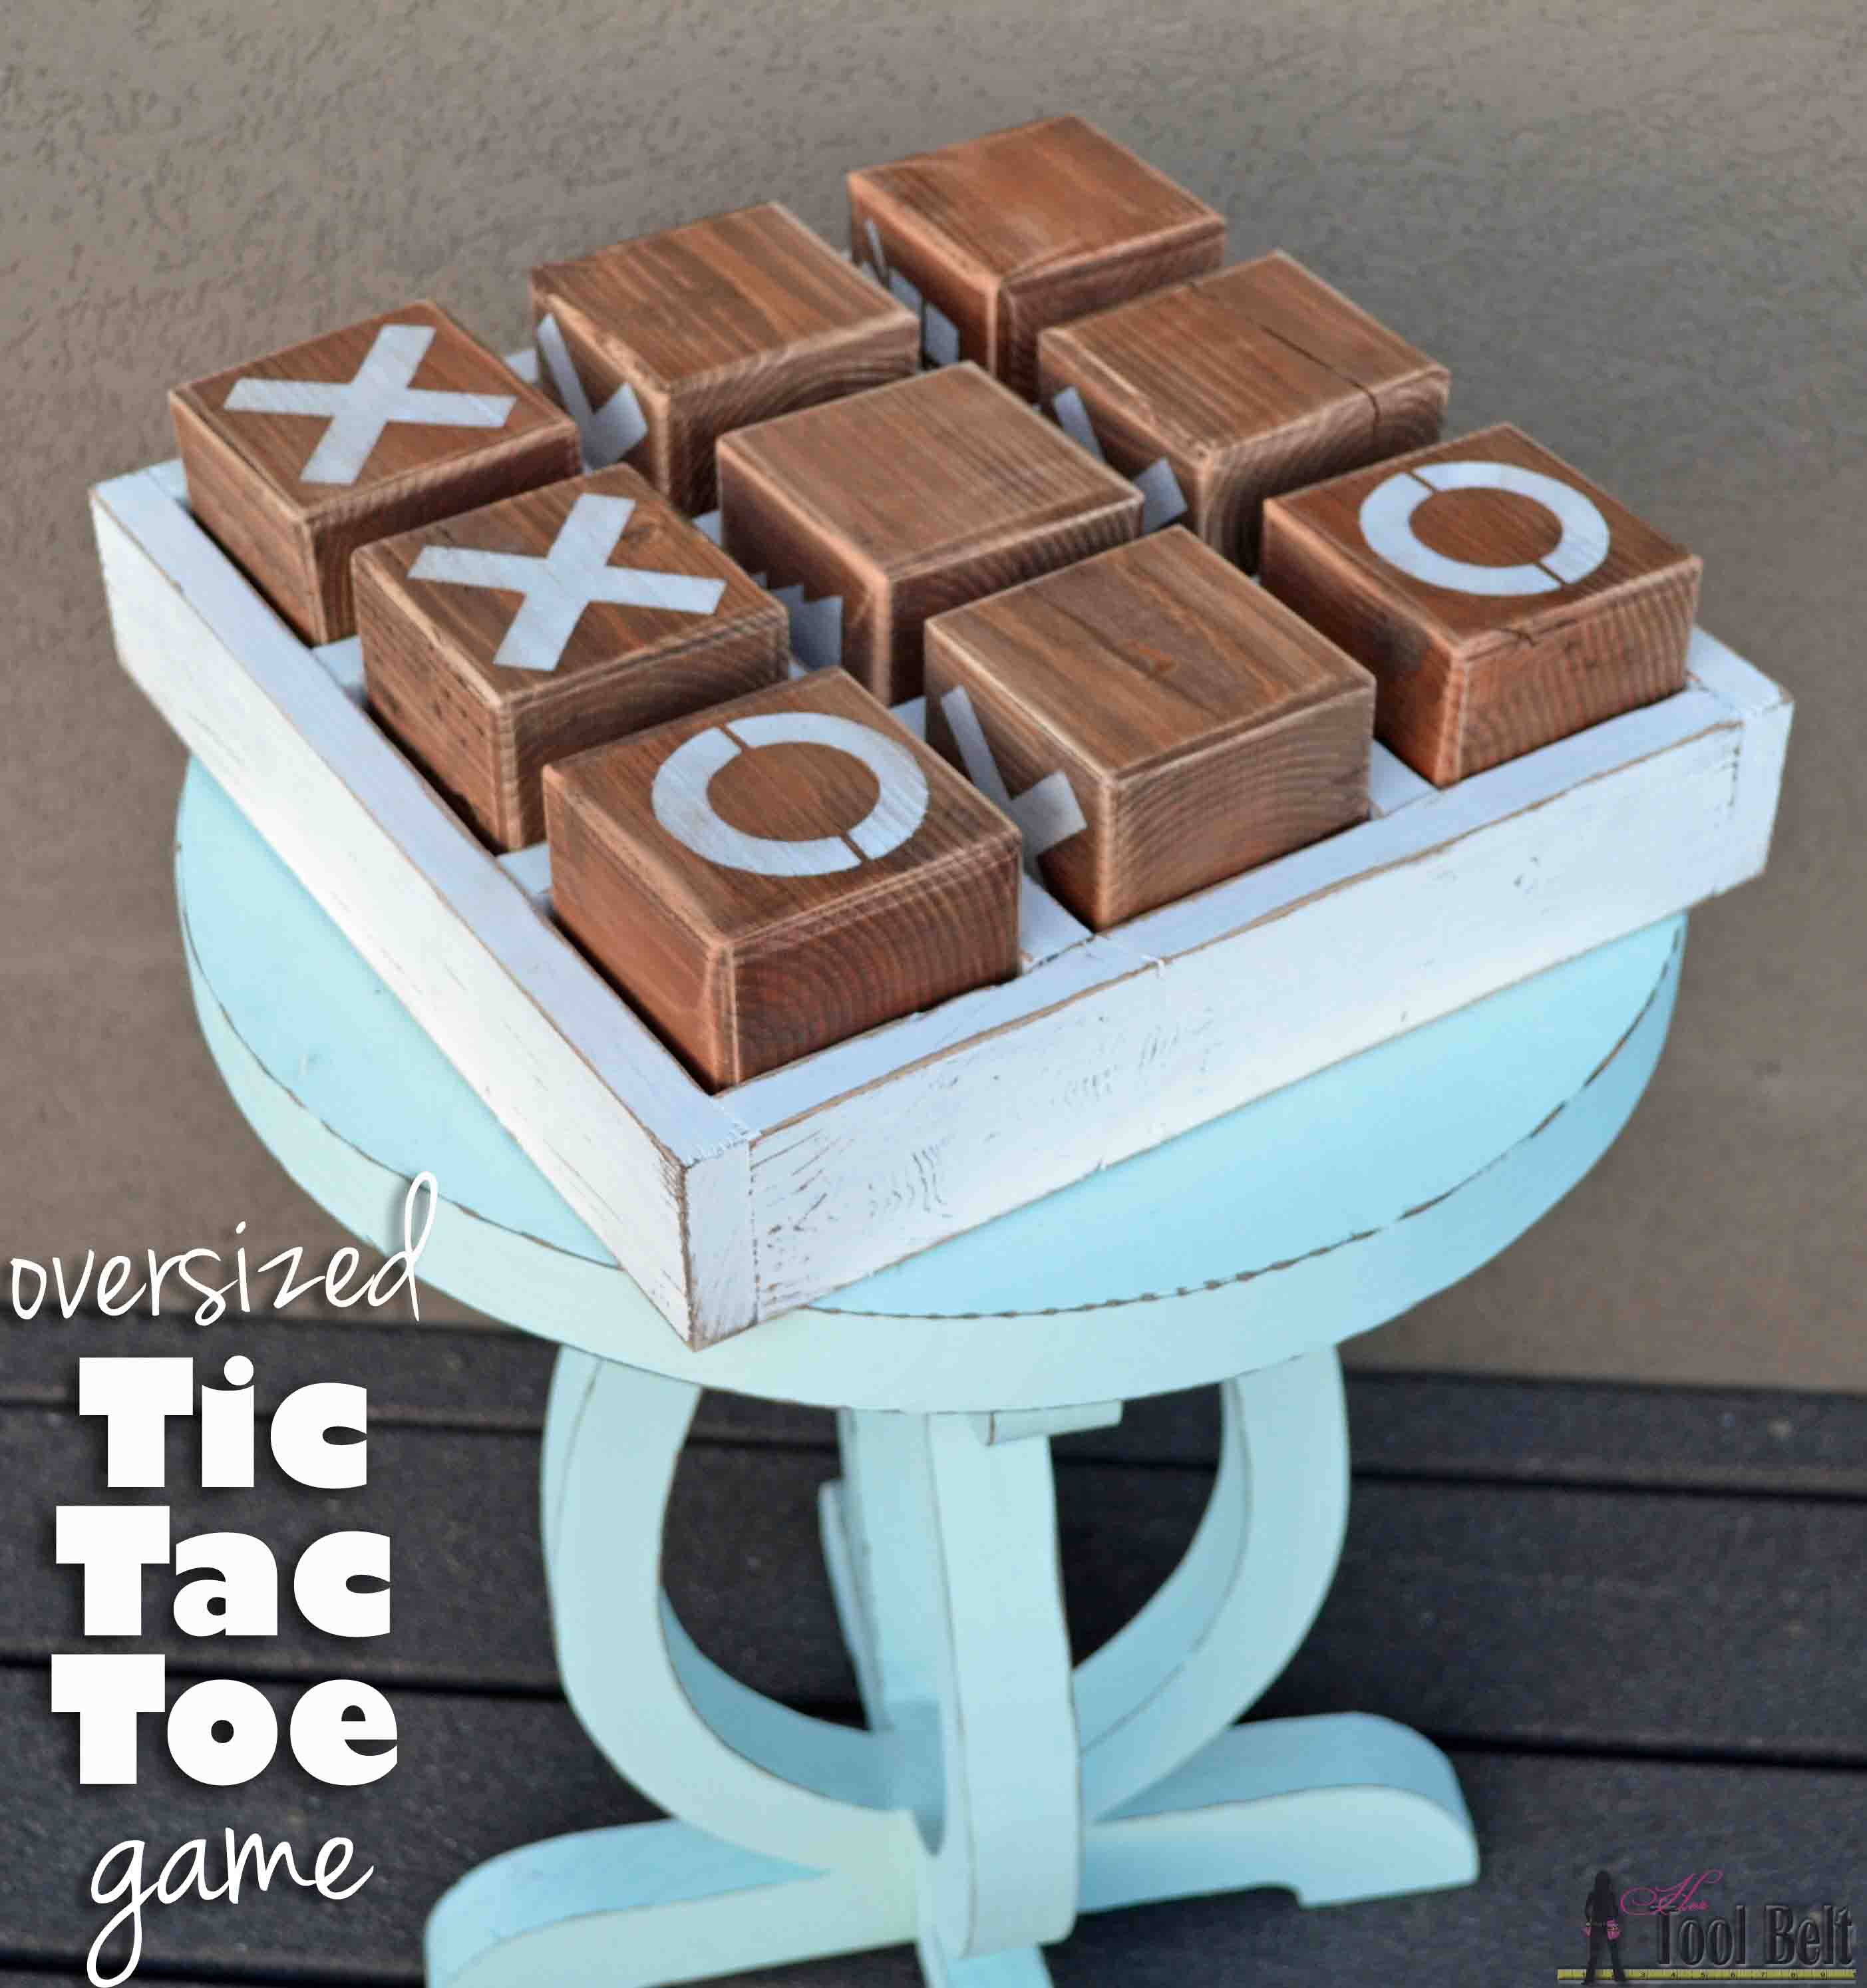
It is super cute with the traditional X’s and O’s too.
How to Build an Oversized Tic Tac Toe Game

This post contains affiliate links noted by *.
Materials
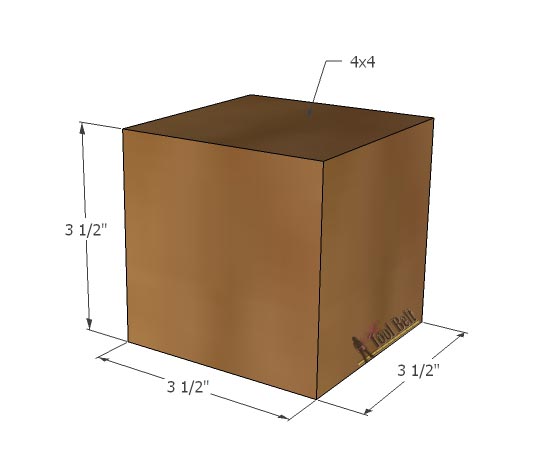
- 1 – 4″ x 4″ x 8′ post (actual 3 1/2″ x 3 1/2″)
- 2 – 1″ x 3″ x 8′ board (actual 3/4″ x 2 1/2″)
- either 3/4″ plywood or a 1″x 4″ board for the bottom
- stain*
- paint
- 1 1/4″ brad nails*
- wood glue*
- sandpaper
- Approximate lumber cost: $15.30 for 1 set, but if you make them in groups of 3 sets the price reduces down to about $7.70/set.
Cut List
- 9 – 3 1/2″ x 3 1/2″ x 3 1/2″ blocks from the 4×4. (If you’re making multiple sets, cut the length at about 3 7/16″ and you can get 27 blocks from a 8′ 4×4 post.)
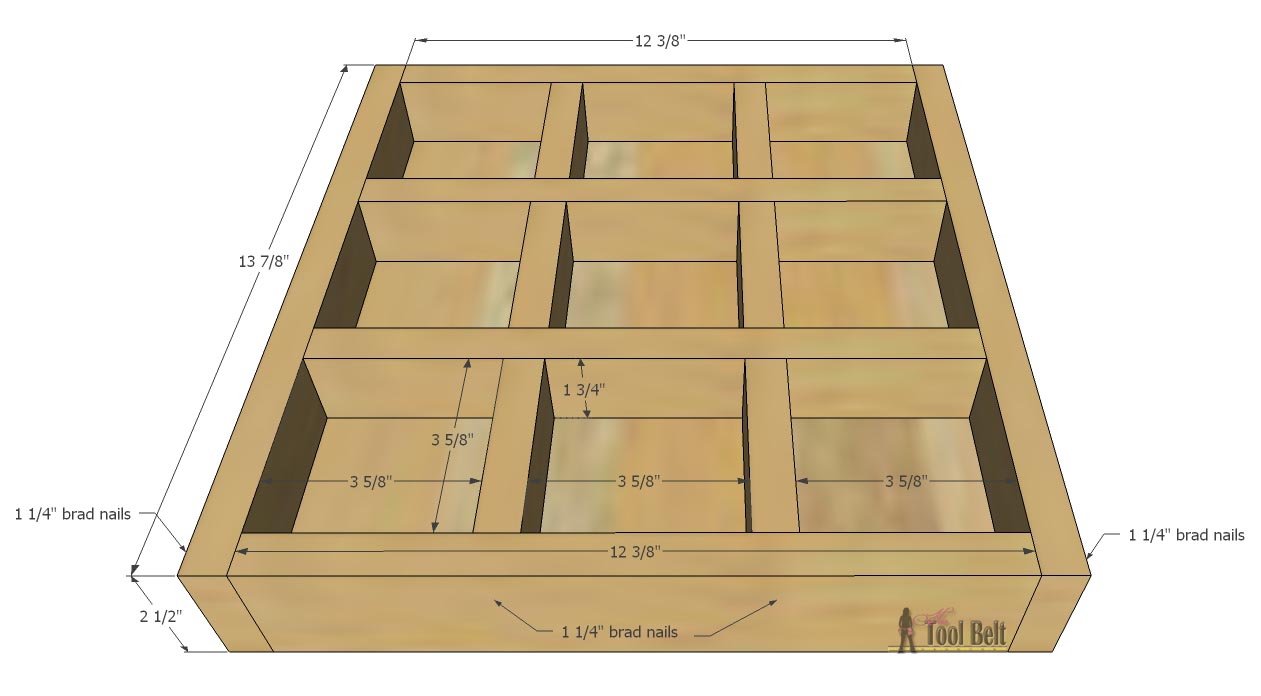
- 2 – 3/4″ x 2 1/2″ x 13 7/8″ from the 1×3
- 2 – 3/4″ x 2 1/2″ x 12 3/8″ from the 1×3
- 2 – 3/4″ x 1 3/4″ x 12 3/8″ from the 1×3
- 6 – 3/4″ x 1 3/4″ x 3 5/8″ from the 1×3
- 1 – 3/4″ x 12 3/8″ x 12 3/8″ from plywood or 1×4’s put together.
Cut the 9 blocks 3 1/2″ long from the 4×4. If you are making multiple sets, to eliminate waste, cut the blocks at 3 7/16″ long and you should get exactly 27 blocks from a 8′ 4×4.
Cut the rest of the pieces from the cut list.
To assemble the game tray, take the 13 7/8″ pieces and one of the 2 1/2″ x 12 3/8″ pieces and secure together with wood glue and 1 1/4″ brad nails. Slide the bottom piece into place, and secure with glue and brad nails.
Mark along the 12 3/8″ piece, 3 5/8″ from each end and glue and nail 2 of the 3 5/8″ pieces. Then glue and nail in a 1 3/4″ x 12 3/8″ piece.
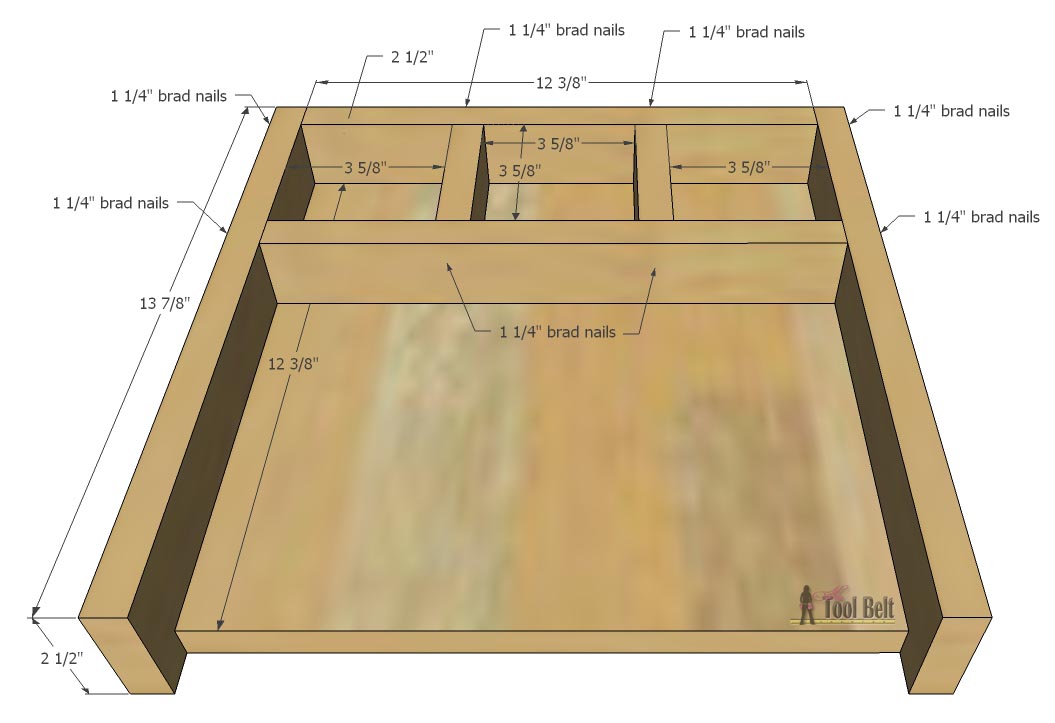
Mark along the 12 3/8″ piece, 3 5/8″ from each end and glue and nail 2 of the 3 5/8″ pieces. Then glue and nail in a 1 3/4″ x 12 3/8″ piece.
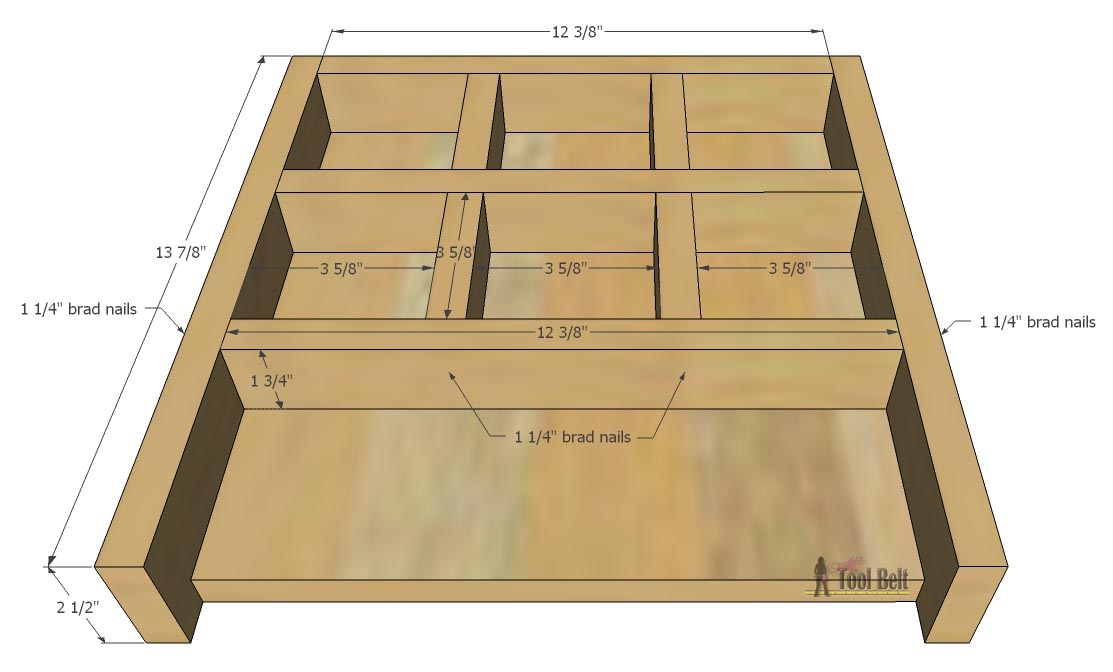
Mark along the 12 3/8″ piece, 3 5/8″ from each end and glue and nail 2 of the 3 5/8″ pieces. Then glue and nail in a 2 1/2″ x 12 3/8″ piece.
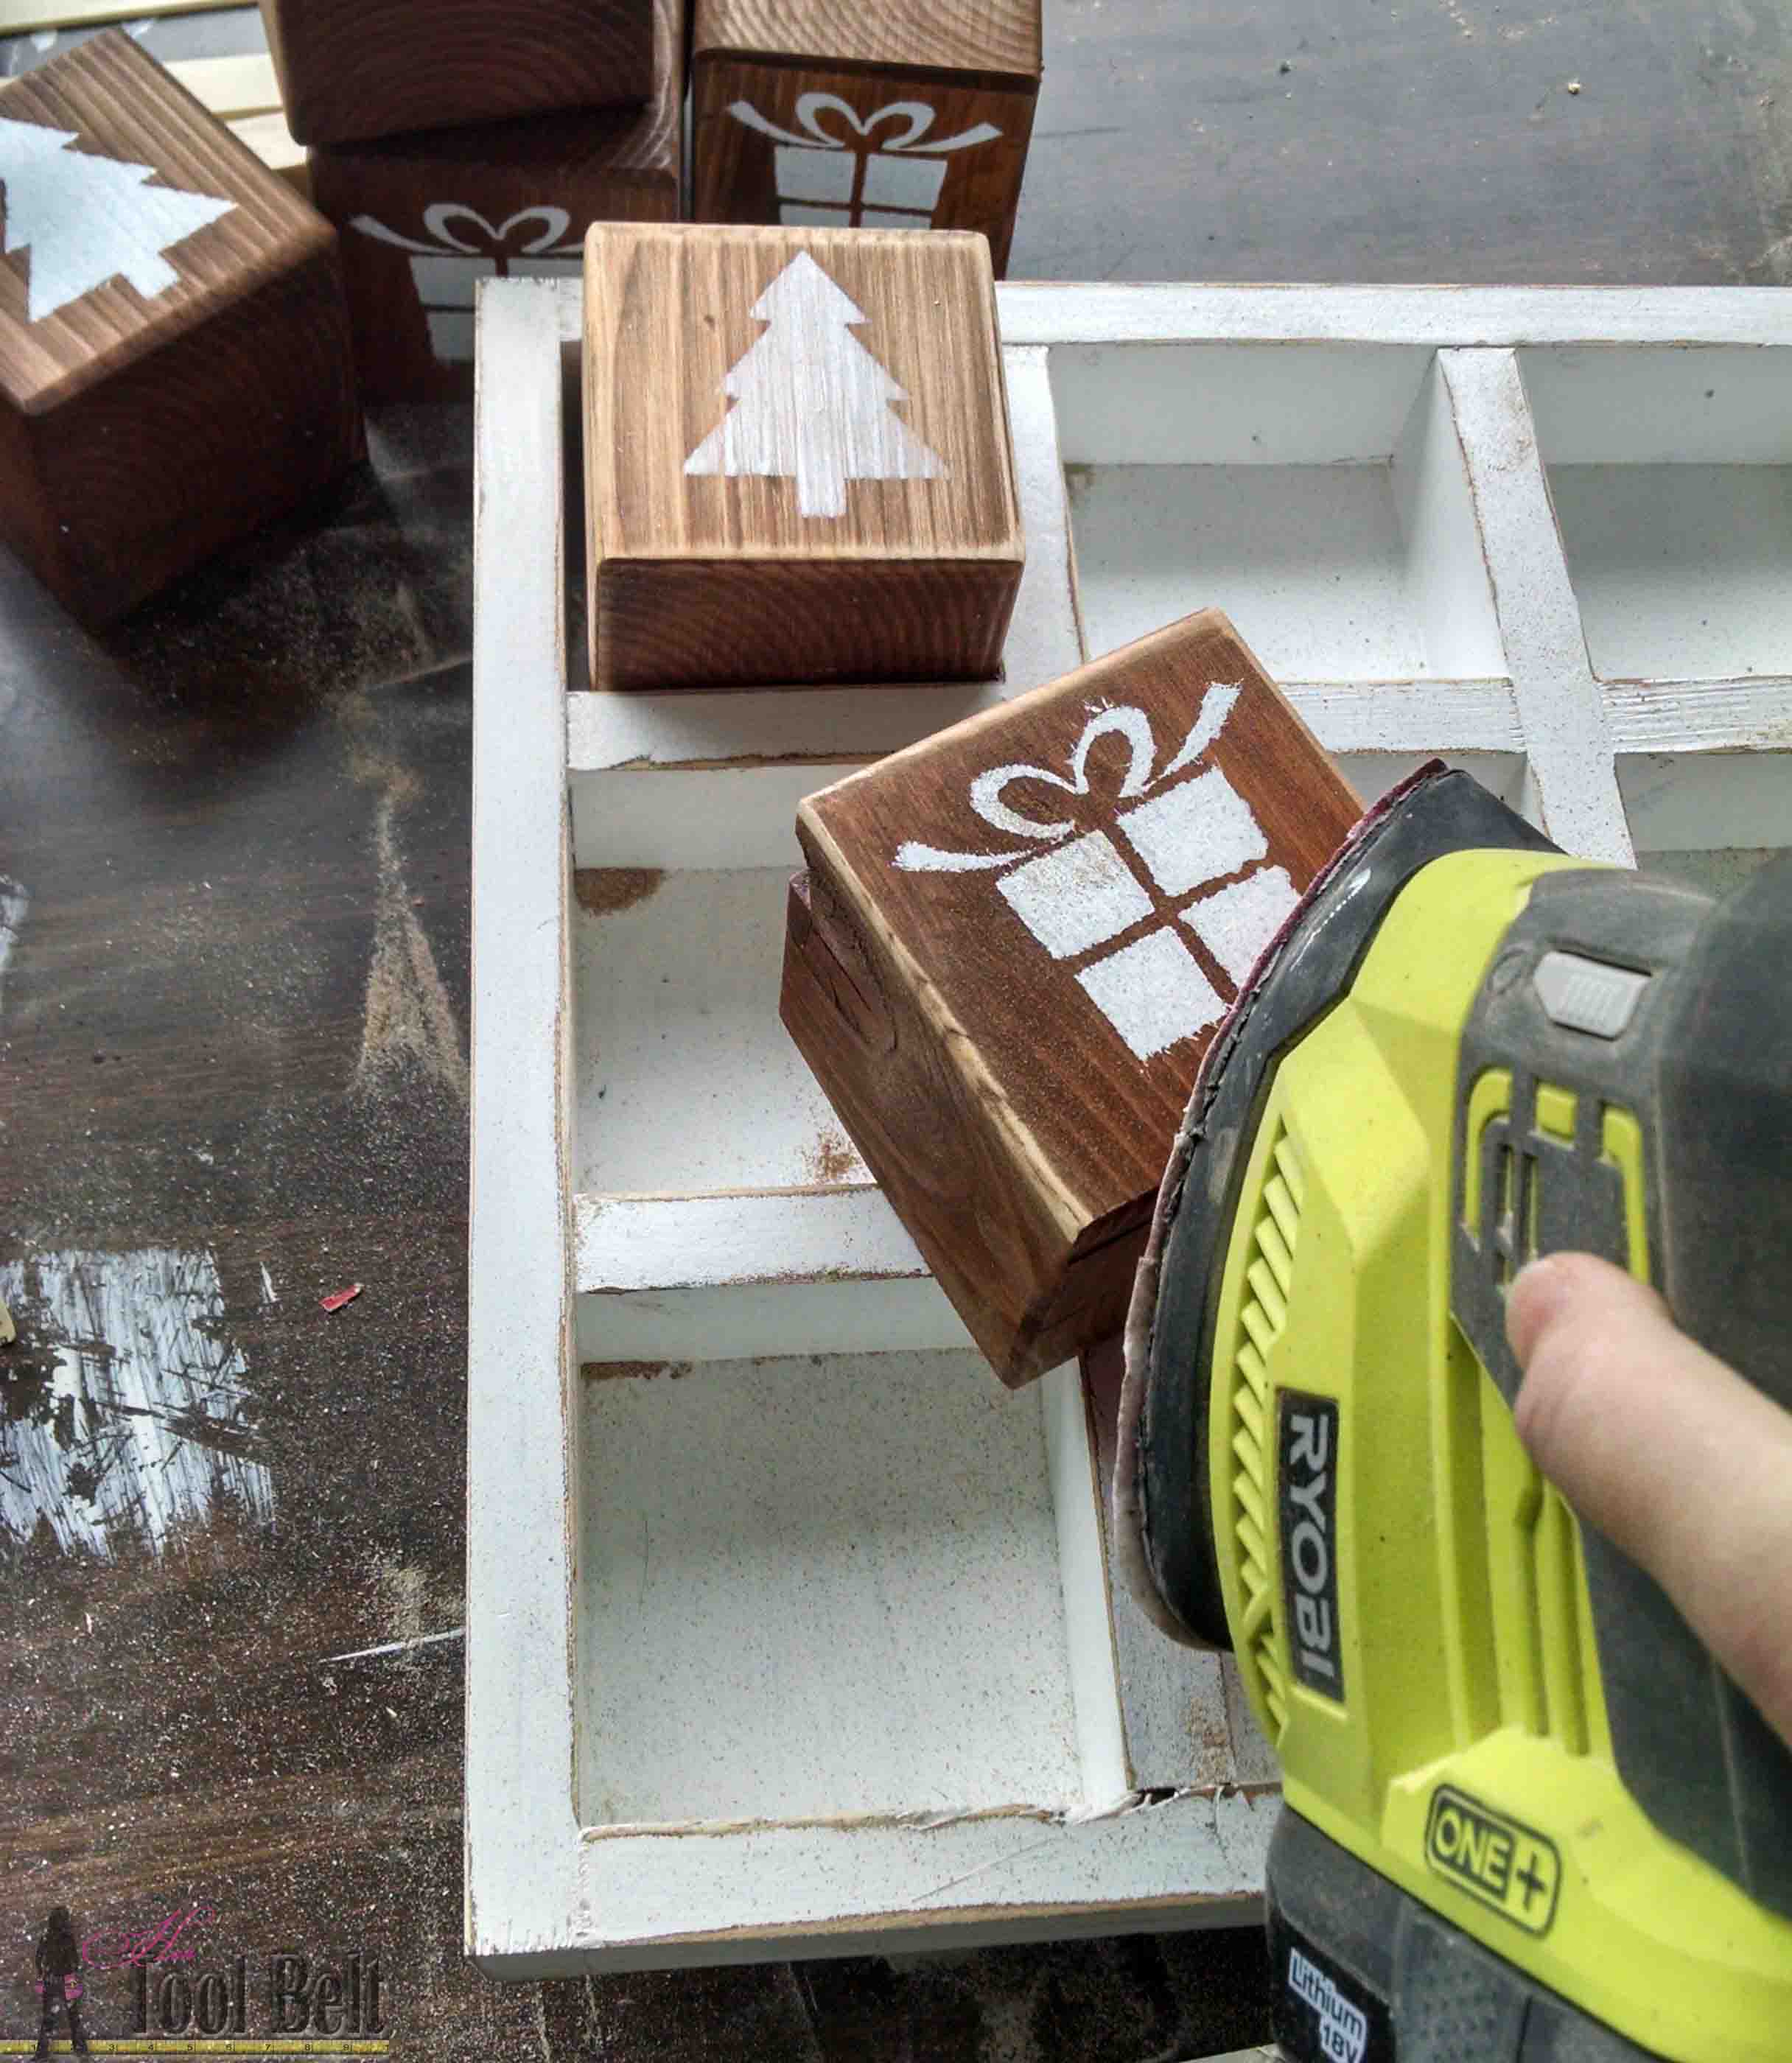
Let the wood glue dry. Then lightly sand everything as needed.
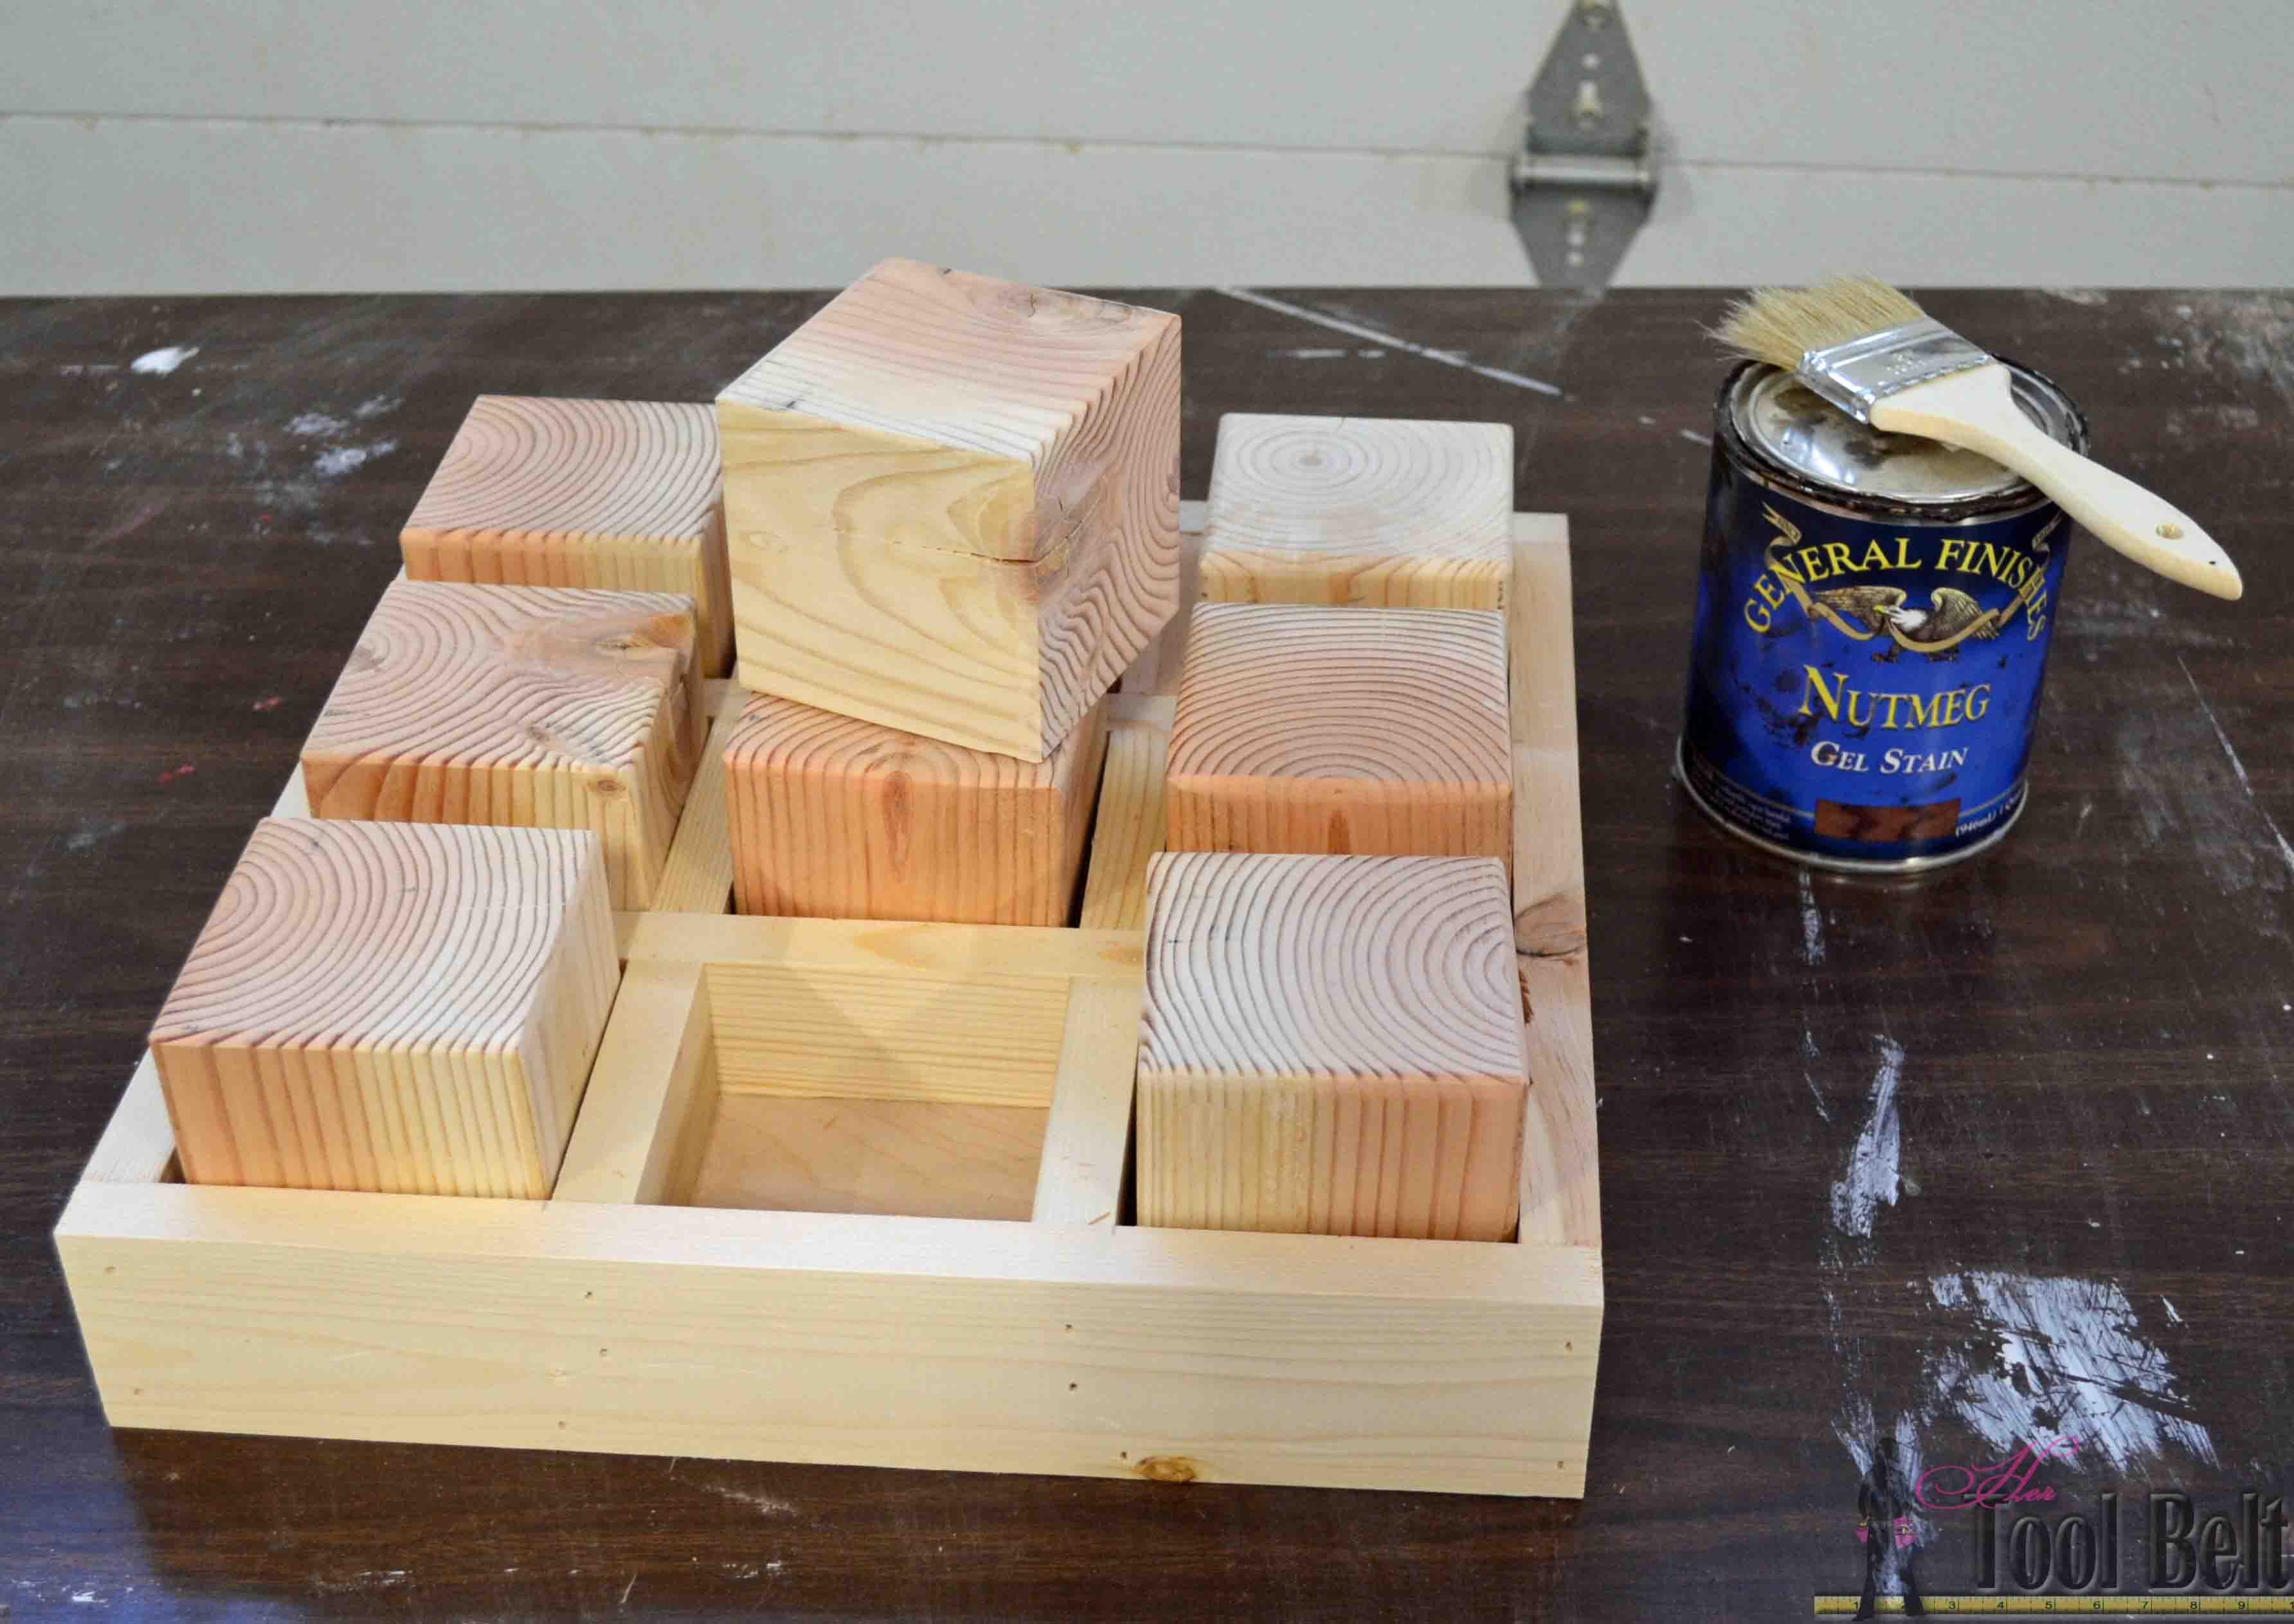
I stained my blocks and tray with General Finishes Nutmeg* and let everything dry. After the stain was completely dry on the tray, I painted it white with Behr white latex paint.
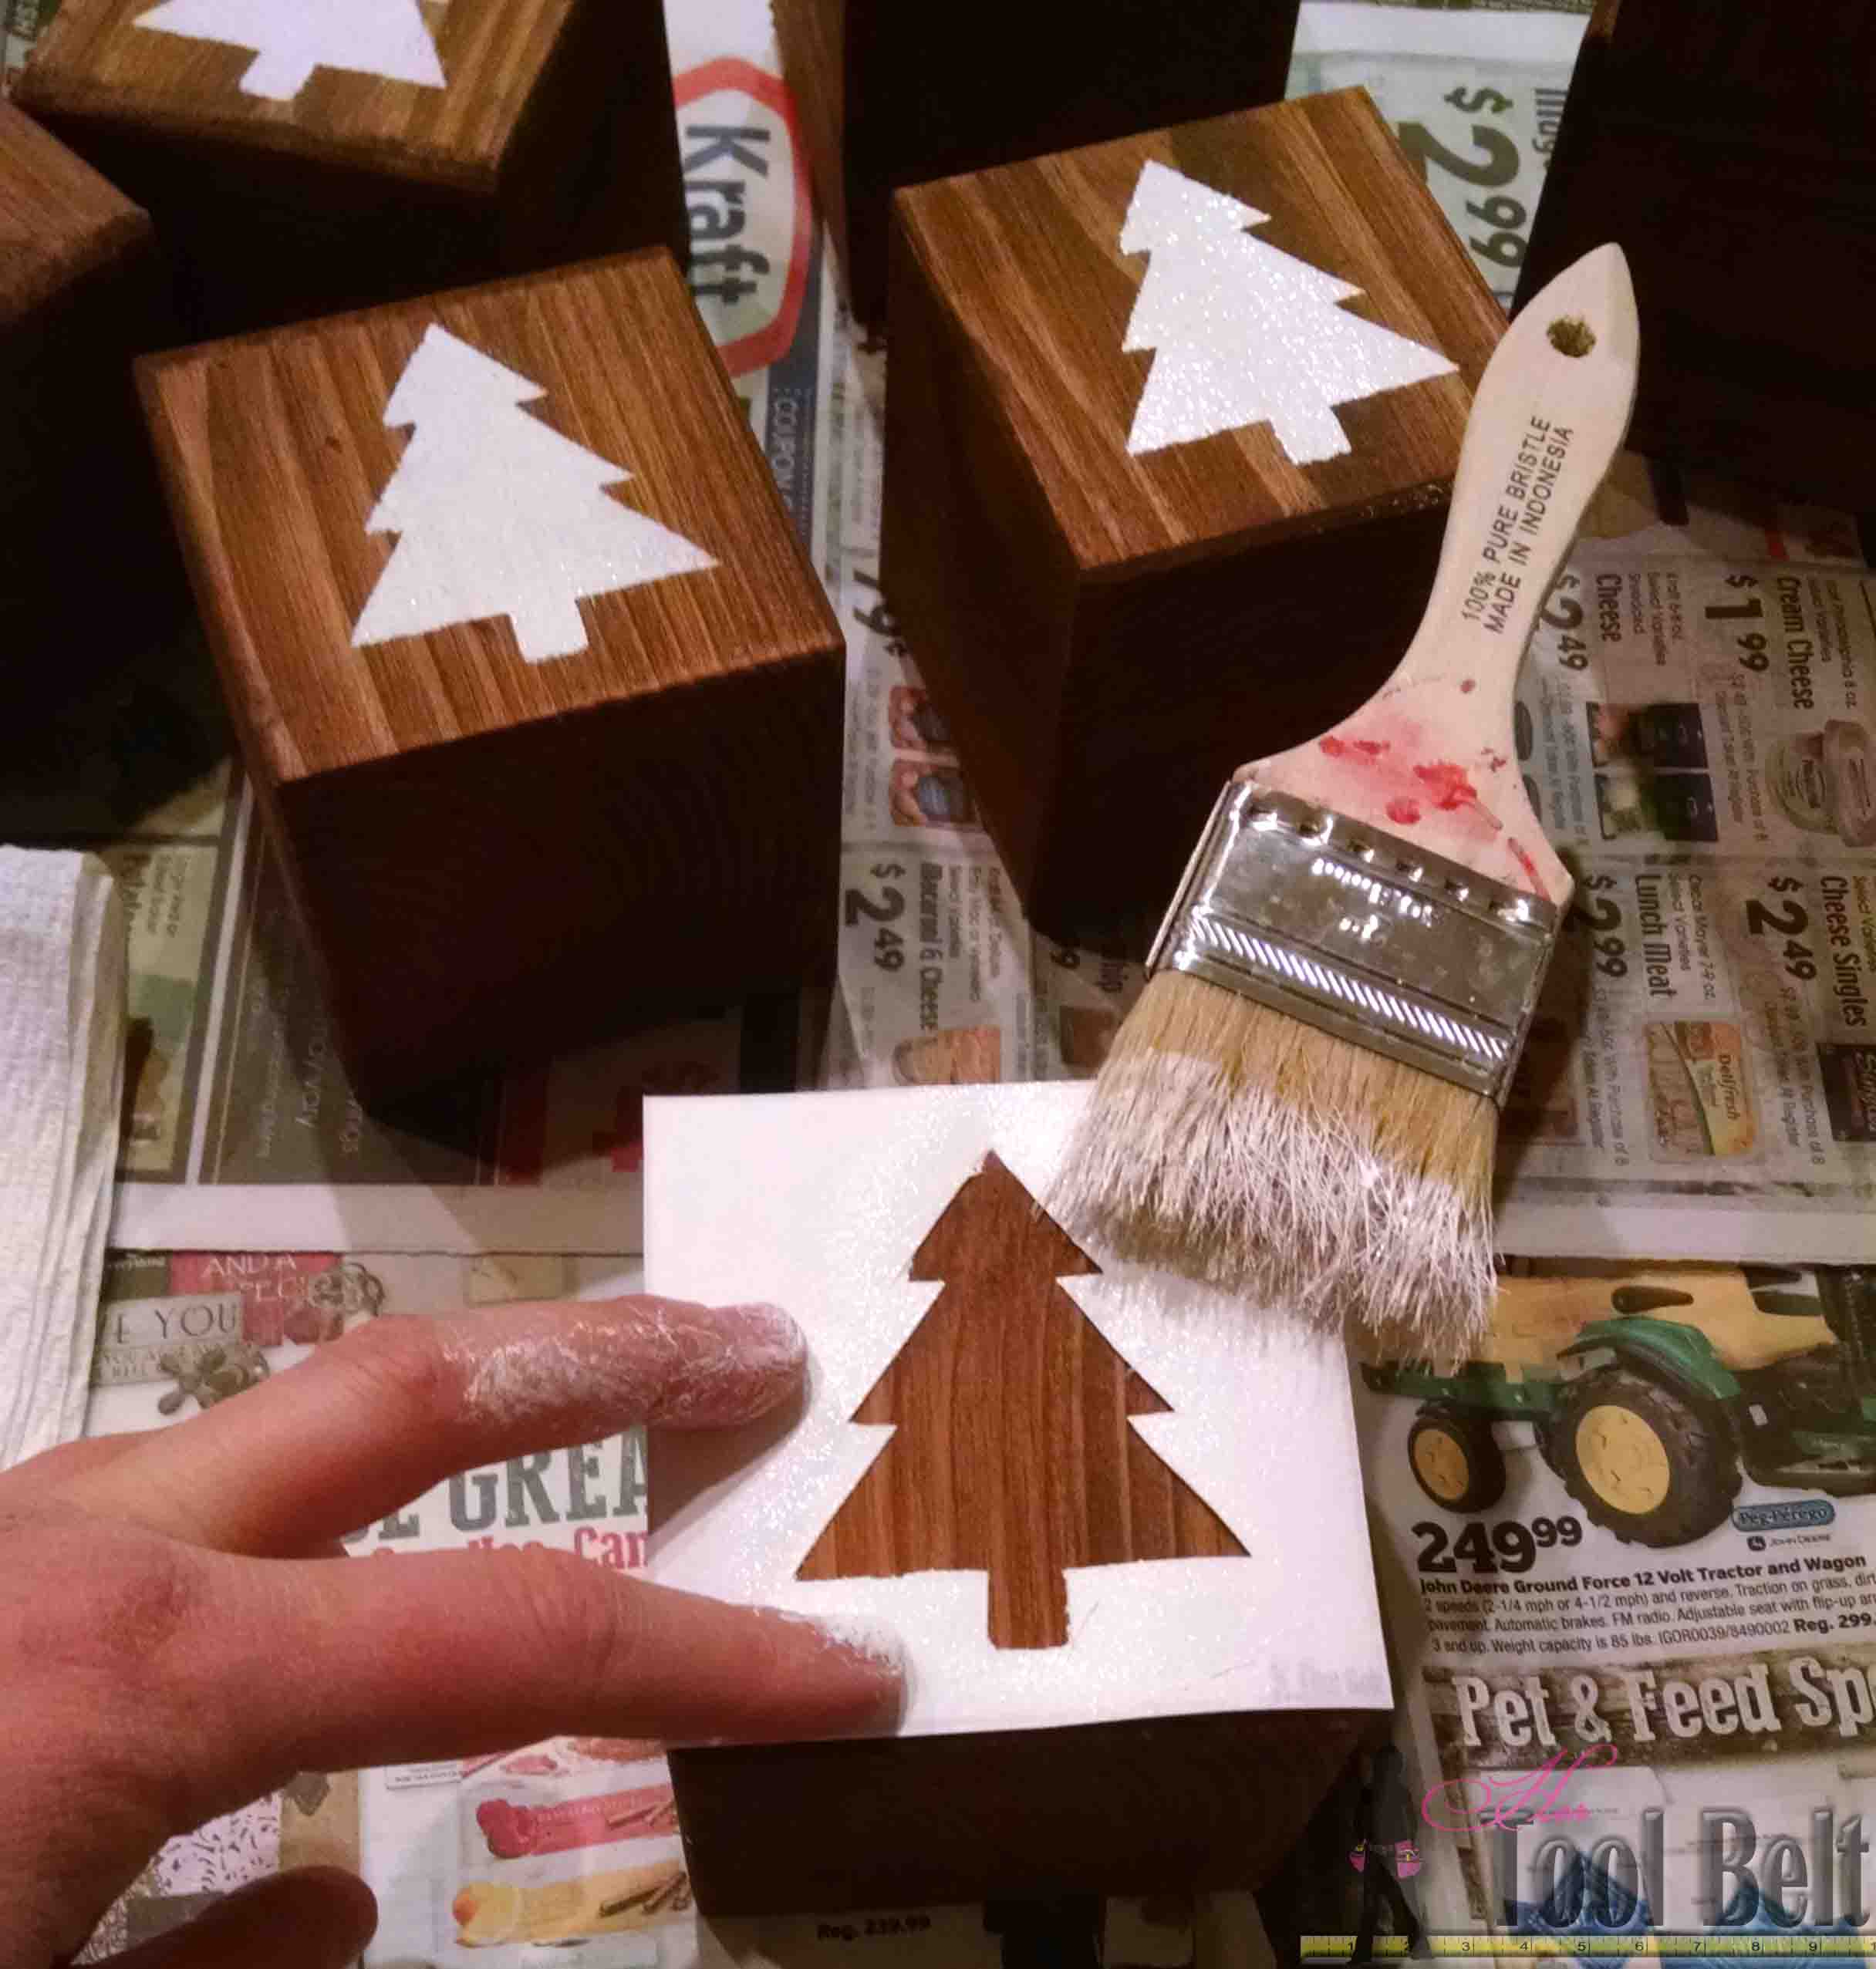
Now time to paint the blocks, you can go traditional with X’s and O’s or you can do festive with trees and presents. 🙂 (or any other combination) I am not good at free handing anything, so I made a little stencil. tic tac toe templates I printed it on card stock and cut out the patterns. Use the dry brush method and pounce the paint lightly onto the blocks.
Once the paint fully dries, distress the blocks a little on the edges and face. Distress the game tray too. The Ryobi corner cat sander works great for distressing.
Dust off the sawdust and now you have a super cute DIY tic tac toe game.
Check out the rest of the Home for Christmas tour:
 Loading InLinkz ...
Linked to link parties, savvy southern style, remodelaholic
Adorable! I love it! Thanks for the tutorial.
Amy, these are great! They would make a perfect gift too!
This is so cute! These would make great gifts! Love it!
This Christmas tic tac toe game is awesome!!! That was very creative of you to give the traditional game a Christmas twist! 🙂 Thanks for the tutorial!
These are so cute. I love this idea and great gift too.
Amy this is the cutest and most clever toy! Definitely adding to my list but I might use 2×2 blocks instead as I envision my kids hurling the 4x4s at each other 🙂 Great gift idea.
That’s a great idea, I didn’t even think about 2×2’s. That would be cute.
Cute Cute Cute Tic Tac Toe game!!! I want one!
I so want to make this! Have a fun and creative holiday. Pinning!
Thanks Jeanette
Most adorable idea EVER! I just love how you enhanced an old school game in a fresh new way! Beautiful project!
Thanks Donna!
I was admiring these during the link up and it’s great to see them up close now. LOVE these – such a great idea and talk about the perfect gift! Pinned to share 🙂
Great game and tutorial.
This is adorable! Great project!! pinning!
This is super adorable Amy!! I seriously love it!
It is SO cute!! I would love to receive one as a Christmas gift!
Hugs,
Pili
I love this idea!
Saw this tic tac toe featured on Hit Me With Your Best Shot.. Love love love. Very cute and ingenious. Will be saving to make. Thanks for the tutorial.
Thanks Mistie!
Amy I was doing some blog hopping this morning and ran into this project. This is adorable! I The little video at the beginning is so cute! I love doing wood projects!
Thank you!
Maybe i missed it in the instructions, but do you paint an X on one side, an O on another, and leave two sides blank. Probably a dumb question, but I’m old and senile.
Thank you, this is a great idea you have.
John
Yes a X on one side and an O on the opposite side, leave the other sides blank.
First off I love this! I’m currently trying to make a set. How do u get your x’s & o’s perfectly centered? Is there a neat trick to it? I’m having a hard time making them look nice when I paint them. Please help!
I’m sure mine aren’t perfect. I used these templates, the square block from the template should be the same size as the 4×4 block and should make them really close to be centered. https://www.hertoolbelt.com/wp-content/uploads/2015/12/tic-tac-toe-templates.pdf
Super cute. May I ask why you stain the tray and then paint over it? Would it matter a whole lot if you skipped staining the tray and went straight to painting?
I was trying to do the worn paint look. Totally not necessary.