I’m excited to participate in this years annual Handmade Holidays Blog Hop hosted by Smart Fun DIY.
I love to make wood signs out of cheap cedar fence pickets. They are thin so the sign is light weight, and the wood is a little rough making them easy to distress. I need a Christmas sign to replace my FALL sign on the porch and settled on Noel since it’ll be the same length as Fall.
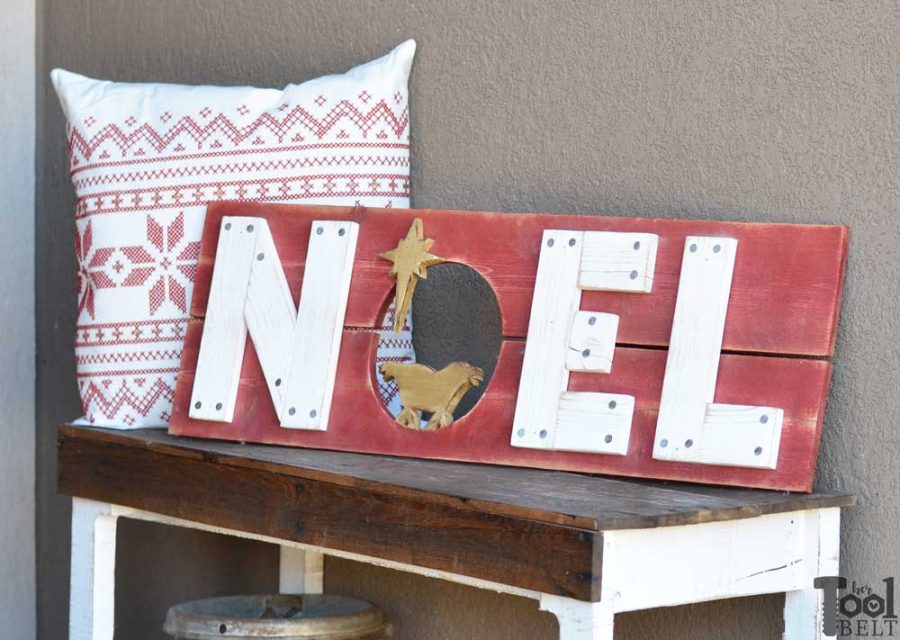
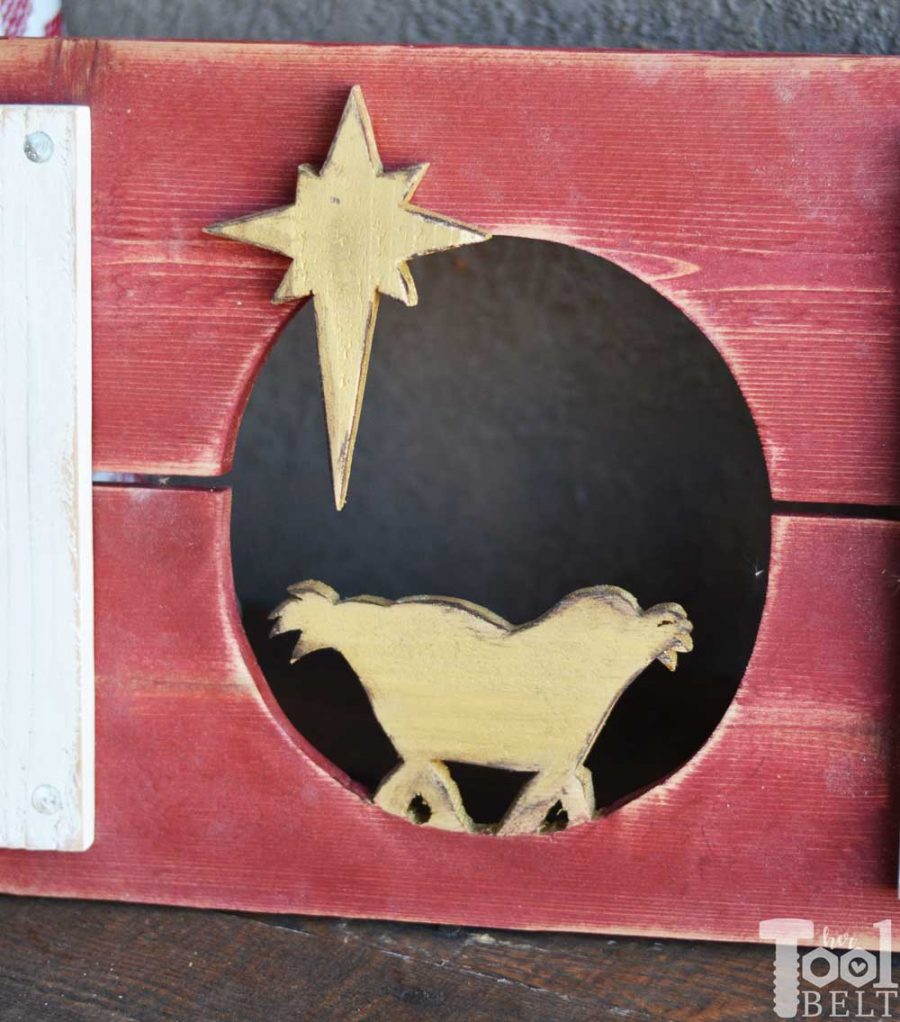
When I googled NOEL, it said that it can be traced back to a latin meaning of ‘birthday’. I decided to incorporate the birth into the Christmas sign with a little silhouette of the manger. Hopefully you can use your imagination and see it 🙂 (and not a chicken). It’s based off of cute ornament I saw on Oriental Trading.
This post contains some affiliate links for your convenience. Click here to read my full disclosure policy.
How to Make a Wood Noel Christmas Sign
Materials
- 2 Cedar pickets (5/8″ x 5 1/2″ x 6′) about $3 each
- Nails (I used roofing nails with the large heads)
- Wood glue
- Sandpaper
- 1″ brad nails (optional)
- Paint/stain (I used Red Varathane stain, White paint, and gold toll paint)
- paint brush
- printable pattern — download and print
Tools
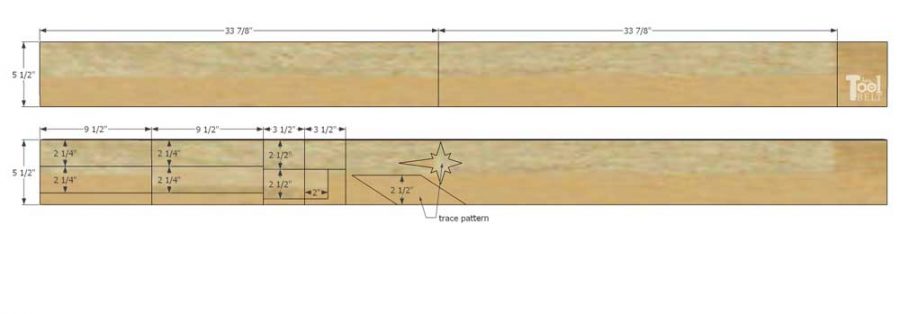
Cut List
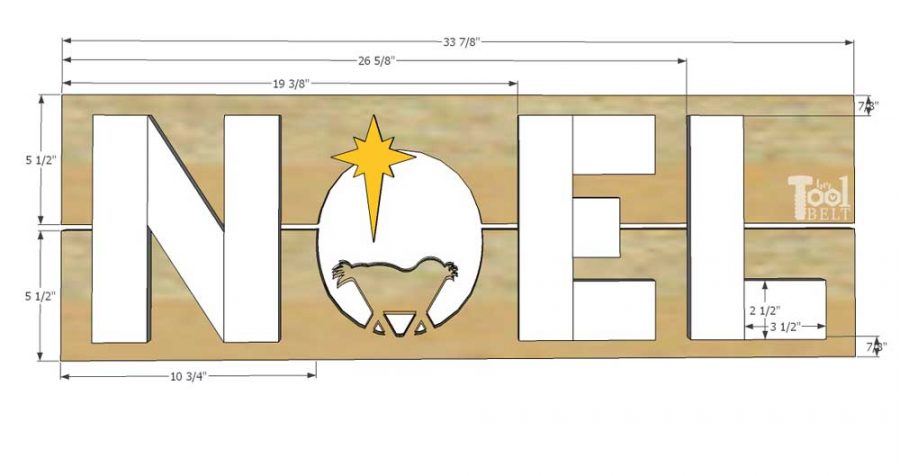
- 2 – 5/8″ x 5 1/2″ x 33 7/8″
- 4 – 5/8″ x 2 1/4″ x 9 1/2″
- 3 – 5/8″ x 2 1/2″ x 3 1/2″
- 1 – 5/8″ x 2 1/2″ x 2″
- 1 diagonal (see pattern)
- 1 star (see pattern)
Cut Diagram
Step 1
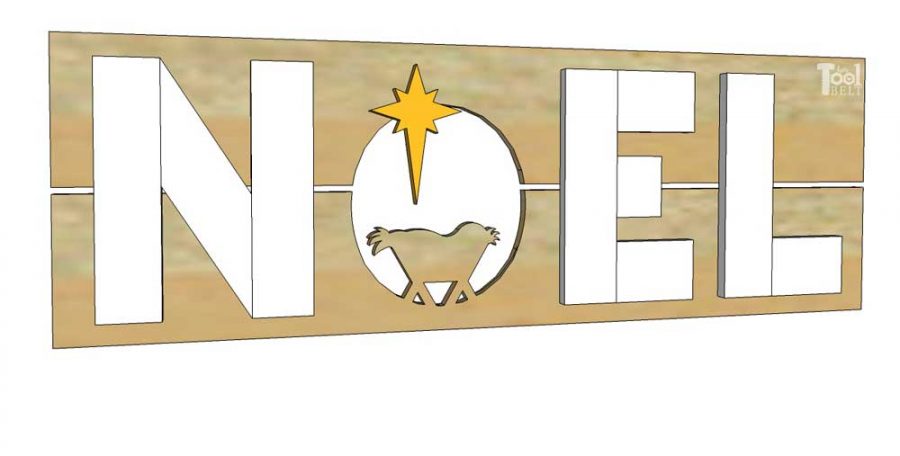
Print and cut out patterns for the N diagonal, star and manger. Cut out the rest of the wood. I used a jigsaw to make all of the cuts, but a miter saw and table saw are great options to make the cuts too. For the more intricate cuts, you can use a jig saw, scroll saw or band saw.
Lightly sand the wood to remove any of the really rough parts.
Step 2
Mark about 10 3/4″ over from the left side of the 33 7/8″ boards and this is where the O starts.
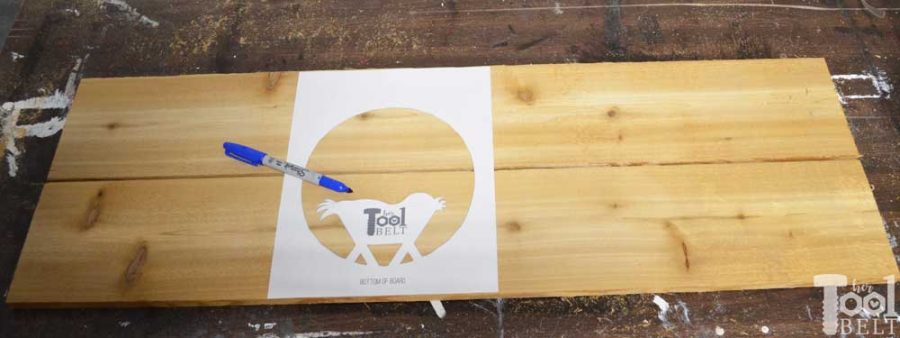
Trace the manger pattern onto the cedar boards. I separate the boards about 1/8″-1/4″.
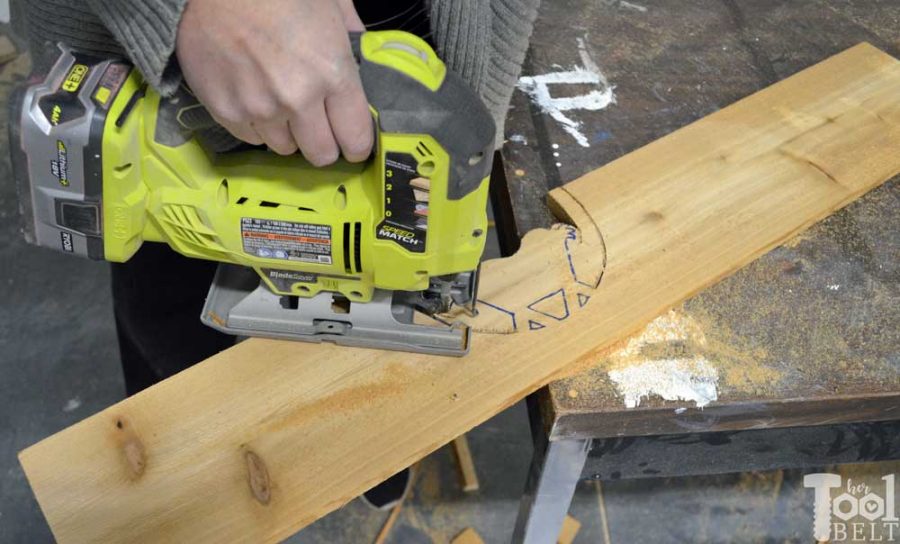
Use a jig saw, scroll saw or band saw to cut out the manger scene. Cut all of the big things first, leaving the small and more delicate parts until the end. The jig saw is not my favorite on intricate cuts, but its quick and handy.
Sand all of the cuts removing any rough spots.
Step 3
I decided to paint and stain my pieces before assembly. I had a really hard time deciding on the color scheme, I ended up with red stain background, white paint letters and gold manger and star. How would you finish yours?
After the paint and stain dried, I used the sander to lightly distress the finish on the edges and here and there.
Mark and measure the locations for the letters. N starts at 1 1/2″ from the left, E starts at 19 3/8″ and L starts at 26 5/8″. All of the letters start at 7/8″ from the top. Use wood glue and a brad nailer with 1″ nails to hold the letters in place.
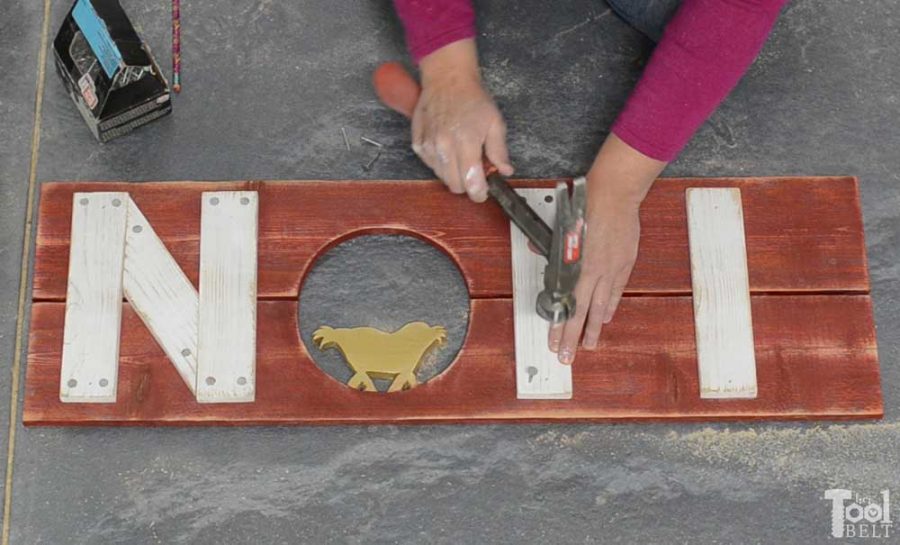
If you want to, hammer in large nails in the corners for character.
All done and ready to display the Noel Christmas sign.
Check out all of the other great #handmadeholidays decor projects:
Enter to win
Thank you to the handmade holidays sponsors.



Leave a Reply