Hi! I’d love for you to follow me on Pinterest Her Tool Belt and if you love instagram, you can keep up with me there too!
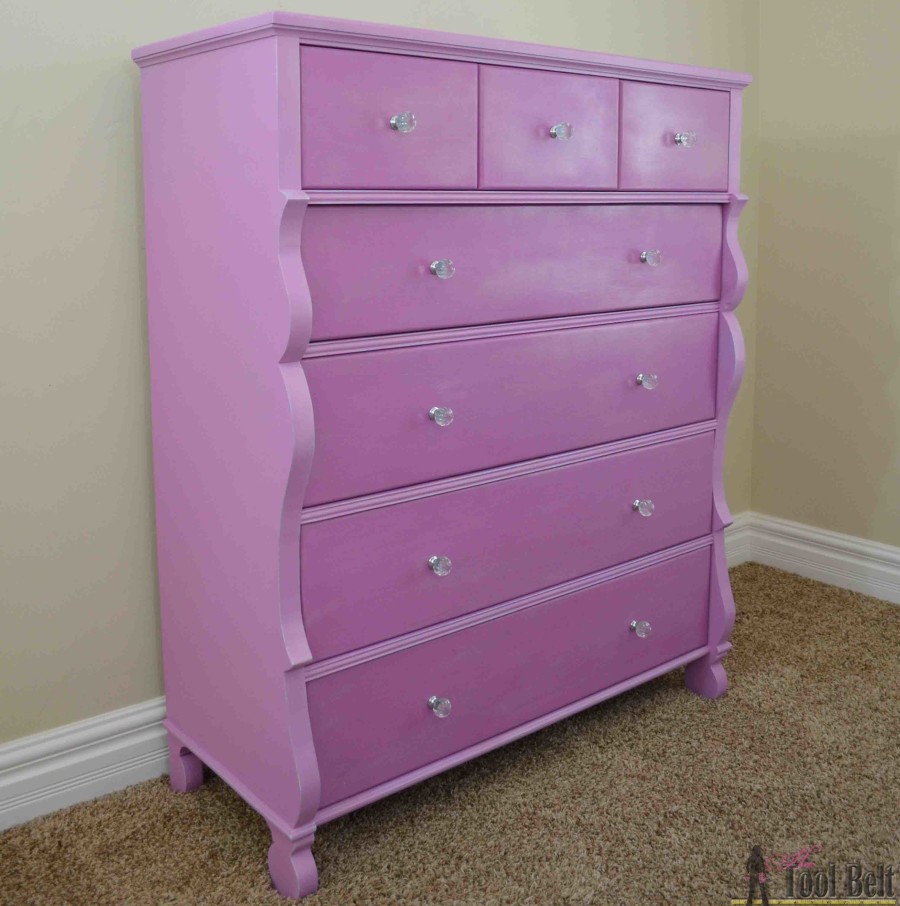
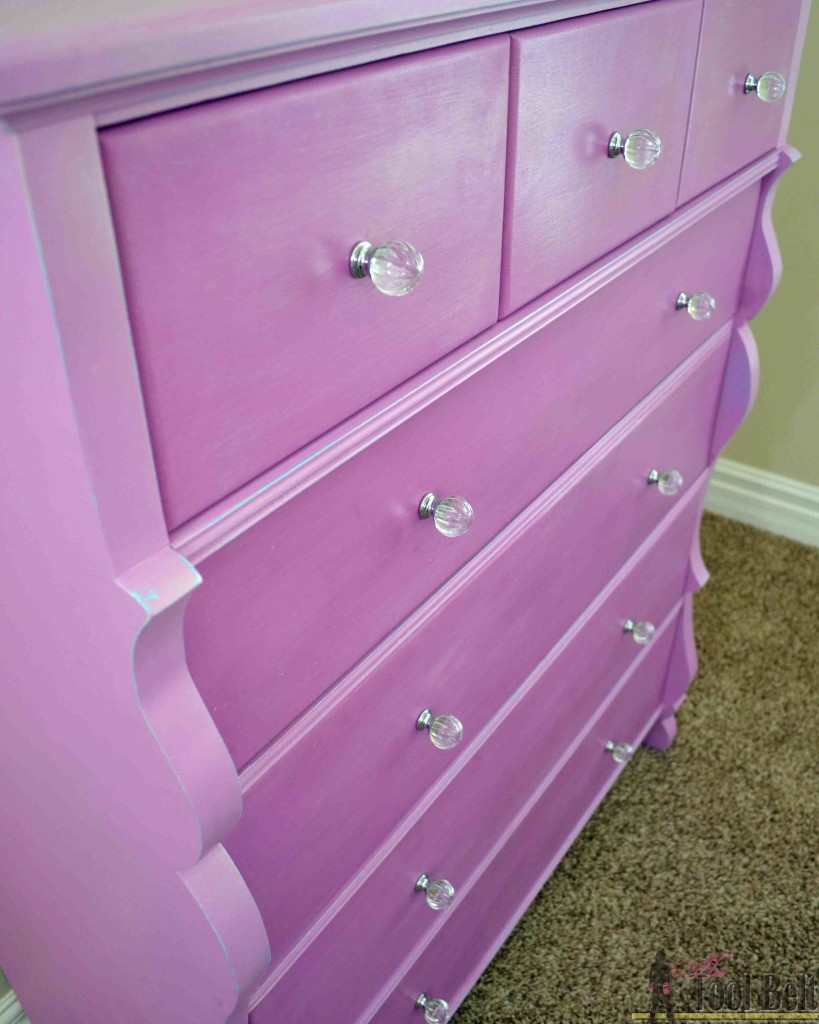
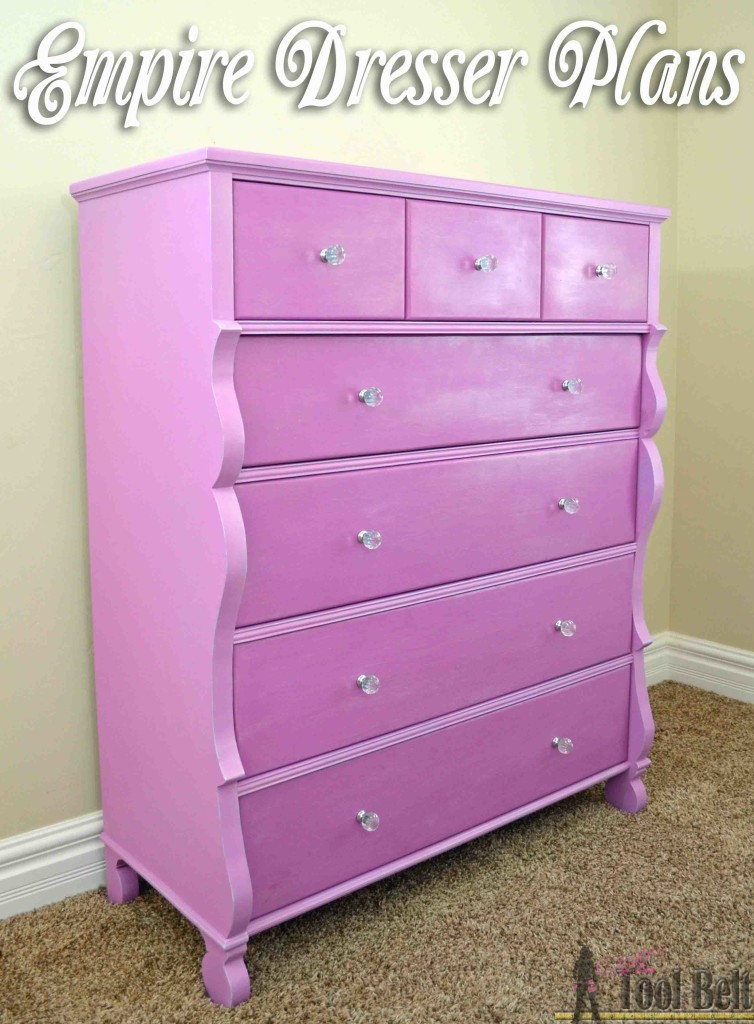
I’m so happy to be finally posting this project, it’s been a tale of waffling on decisions! I have had this dresser built since July, but I could not decide on the finish. I have been wanting to build a dresser for my little 2 year old princess. I really like the curves of the old empire style dressers. Then I saw this modern version of the empire style by Ethan Allen. I think the shape is fabulous, so I came up with some plans that are inspired by it. I ended up finishing it in princess purple :-). (aka Amy Howard Orchid) In real life the color is a little more purple and less pink.
This post contains affiliate links noted by *.
How to Build an Empire Style 7-Drawer Dresser
Materials
- 1 sheet 3/4″ plywood (cabinet grade 4′ x 8′)
- 1 sheet 5 mm (3/16″) underlayment plywood 4’x 8′, buy another 1/2 sheet if you want to put a back on the dresser.
- 1 – 2″ x 4″ x 10′ or 2 – 2″ x 4″ x 8′ (actual 1 1/2″ x 3 1/2″)
- 1 – 2″ x 6″ x 10′ (actual 1 1/2″ x 5 1/2″)
- 1 – 2″ x 12″ x 8′ (actual 1 1/2″ x 11 1/4″)
- 5 – 1″ x 4″ x 8′ (actual 3/4″ x 3 1/4″)
- 3 – 1″ x 10″ x 8′ (actual 3/4″ x 9 1/4″)
- 1 – 1″ x 10″ x 6′ (actual 3/4″ x 9 1/4″)
- 11 – Chrome and Victorian Clear glass knobs
- 4 – 16″ medium duty ball bearing slides
- 3 – 16″ bottom Side Mount drawer slides
- 2 1/2″ pocket hole screws*
- 1 1/4″ pocket hole screws*
- wood glue*
- sand paper
- double stick tape
- Molding as desired and 1″ brad nails – optional
- Primer/paint (primed with Zinsser, painted with Amy Howard One Step in Orchid*)
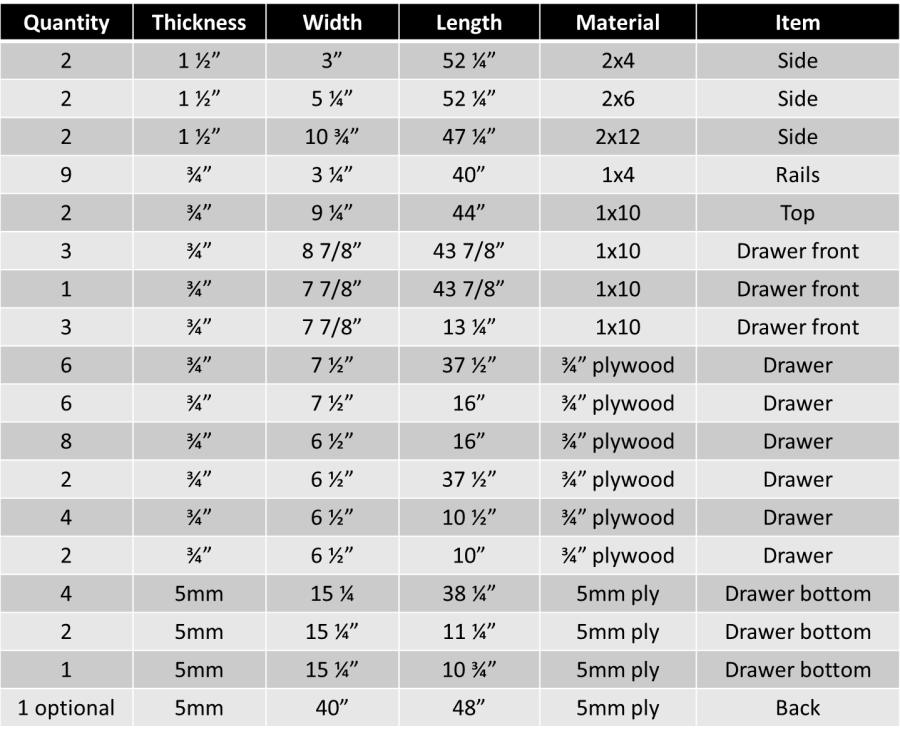
Cut List
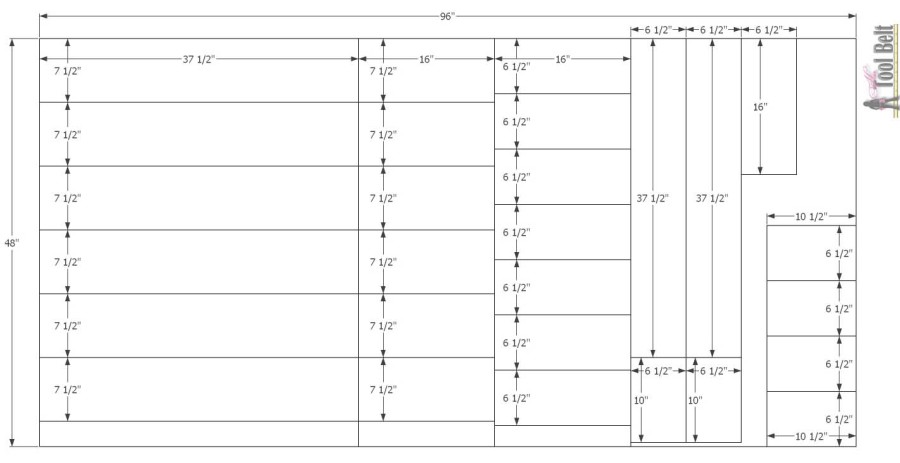
3/4″ plywood cut diagram
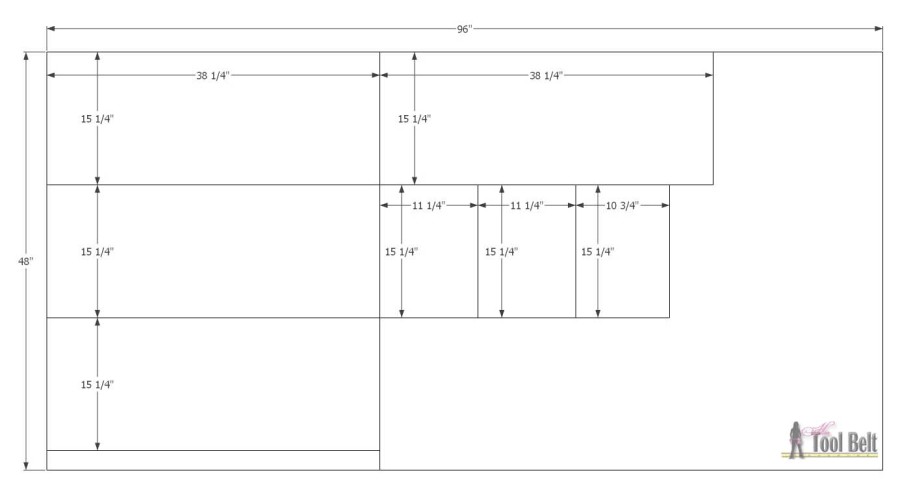
5mm plywood cut diagram
Step 1
Download and print the dresser side scroll pattern, make sure your printer settings are on 100% and not ‘fit to page’. Empire dresser scroll pattern
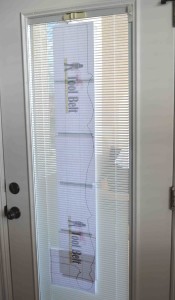
Line up the pattern lines and tape together. It helps to use a window. Cut out the scroll pattern.
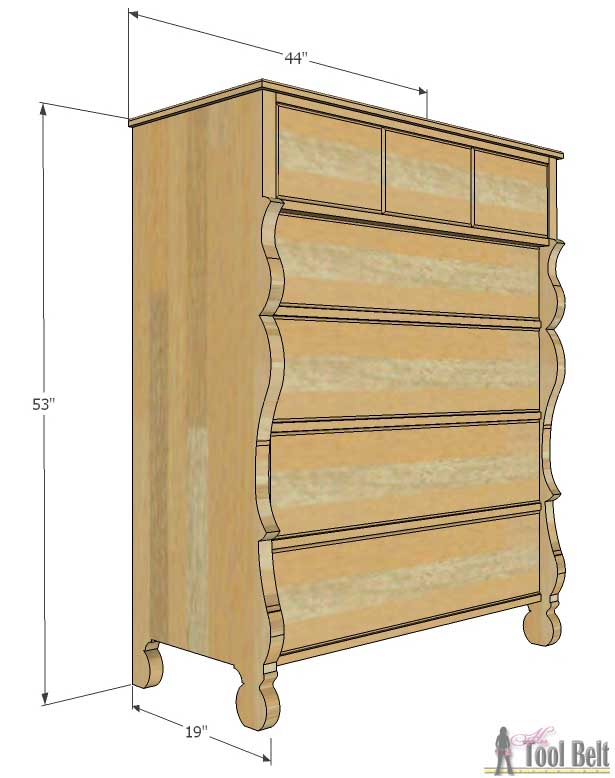
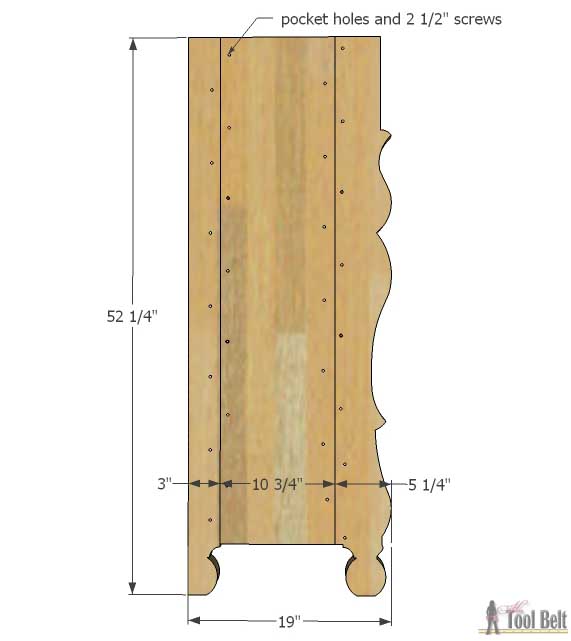
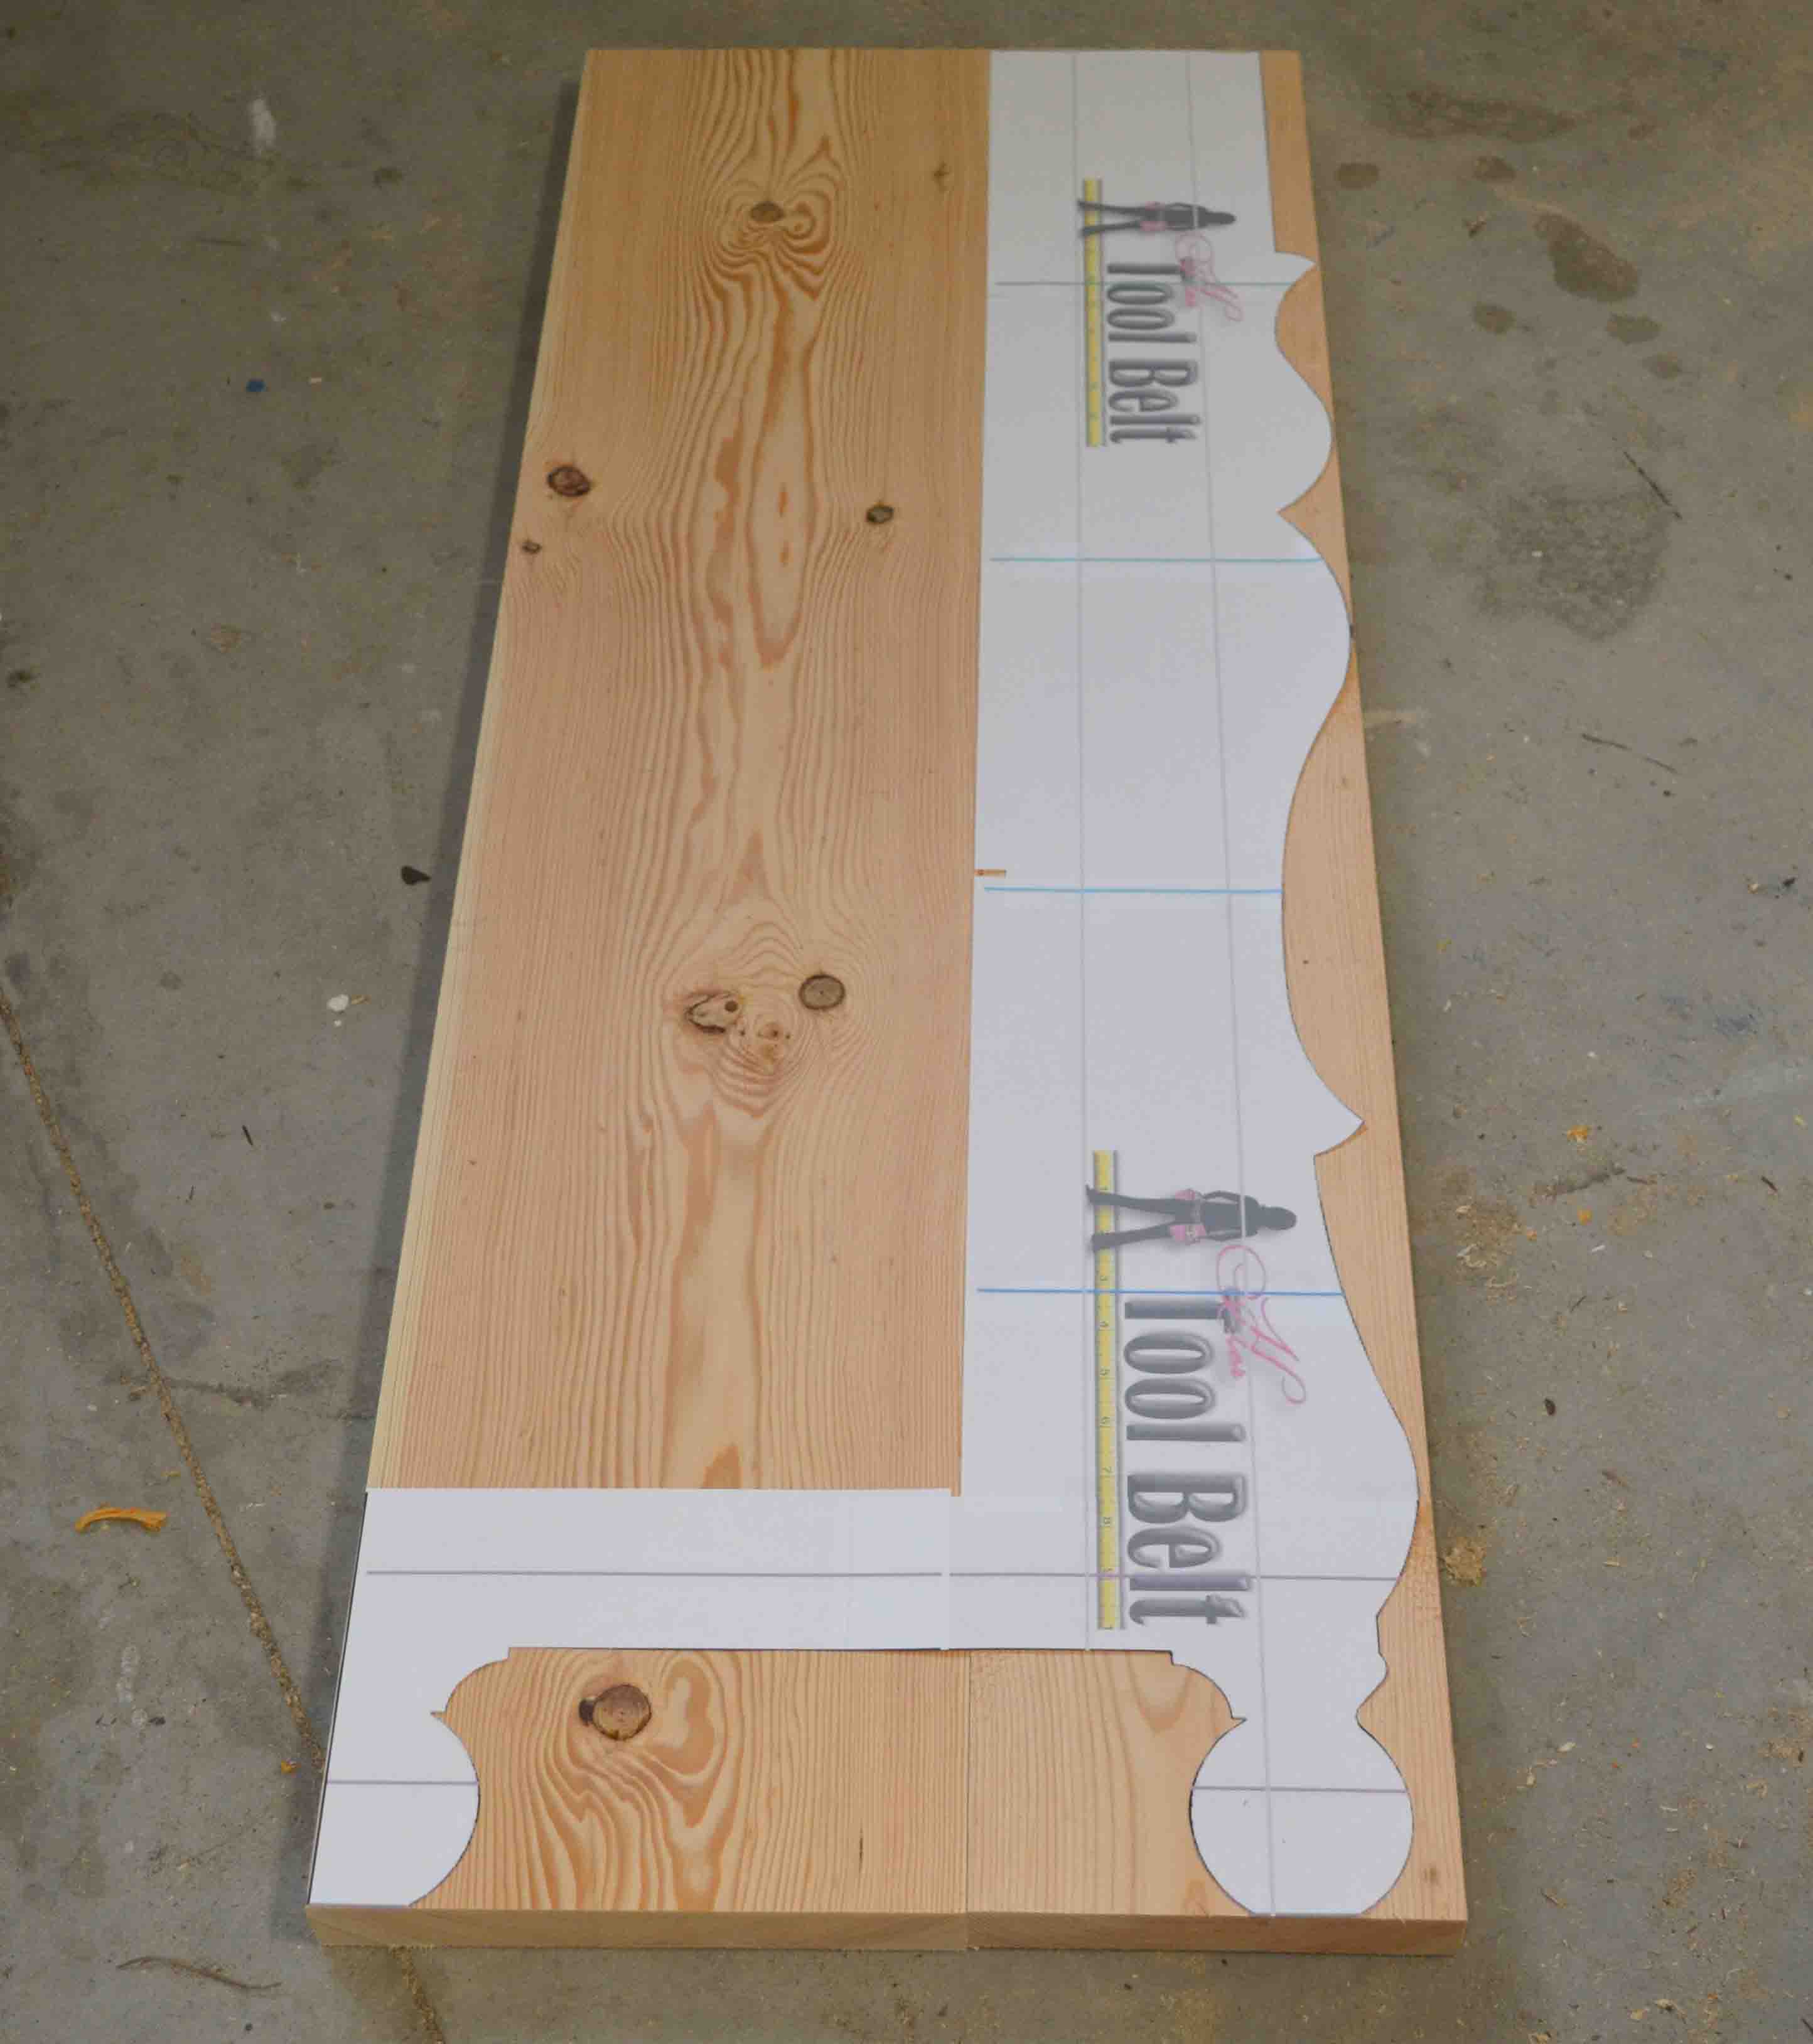
Cut the lengths of the 2×4, 2×6, and 2×12. Trim off the rounded edges from the 2x boards. The total width of all three boards after trimming needs to be about 19″ Trace the pattern onto the 2 sets of side boards. Then use a band saw or jig saw to cut out the scroll pattern, I used a band saw. (If you use a jig saw, you may have a hard time making it cut straight through the board.)
(Note: I didn’t use the 3 boards for the width, I used a 2×12 and a 2×10. While cutting out the curves on the band saw, I found the boards to be really heavy and awkward to rotate around. I think using the smaller boards on the outside will be easier to manage 🙂 . I accidentally shorted myself on the total width, 18 1/2″ instead of 19″…you know what they say ‘measure twice and cut once!’ I made it work, but the bottom drawers aren’t inset as much as I planned.)
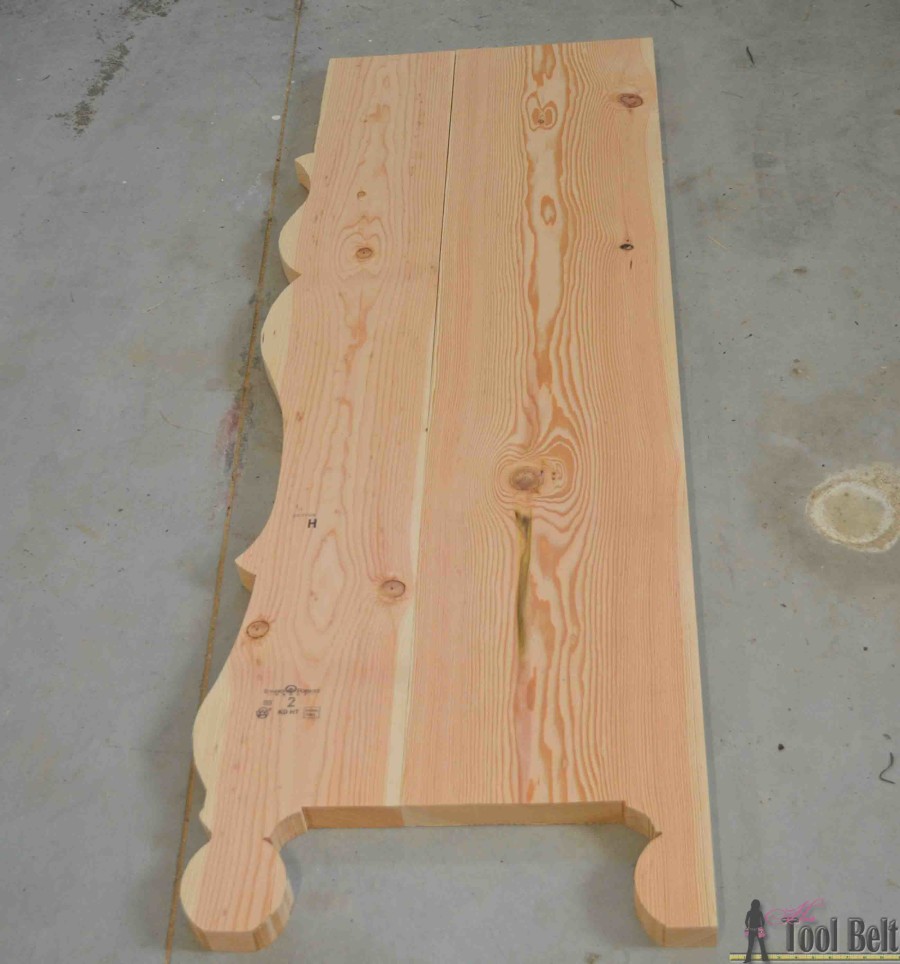
Once you get the curves done for both sides, drill pocket holes* for 1 1/2″ material along the joints. Make sure you drill the holes on the inside faces of the dresser sides. Use wood glue and 2 1/2″ pocket hole screws to join the boards together. You want the top as flush as can be. Once the glue has dried, sand sand sand. You want the inside face nice and smooth and hopefully flat. This will make installing the drawer runners easier later. You may also want to drill pocket holes for 3/4″ material along the top edge to attach the top later.
Step 2
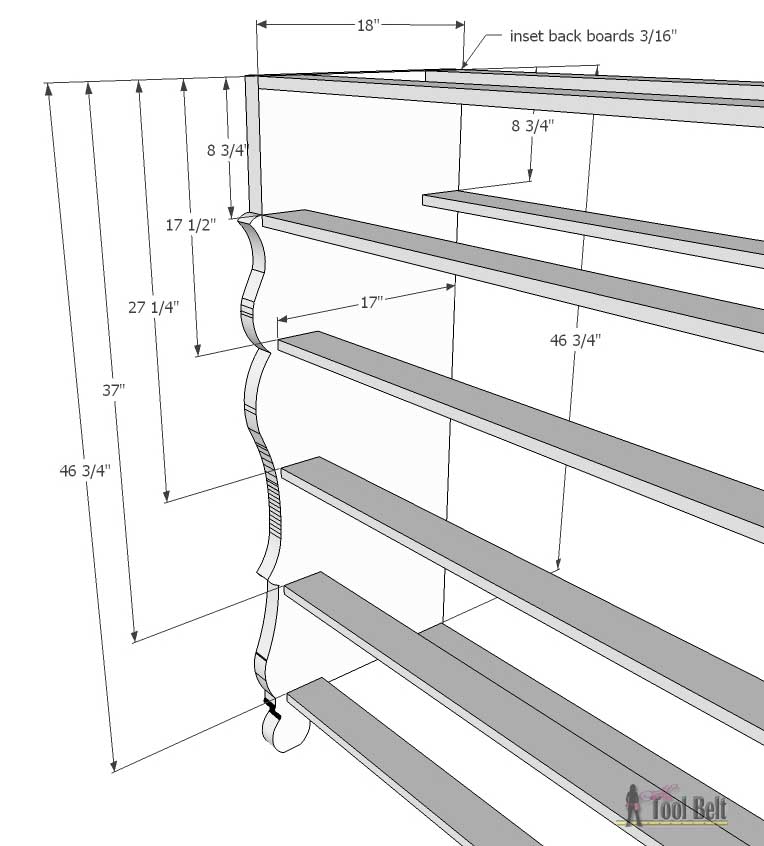
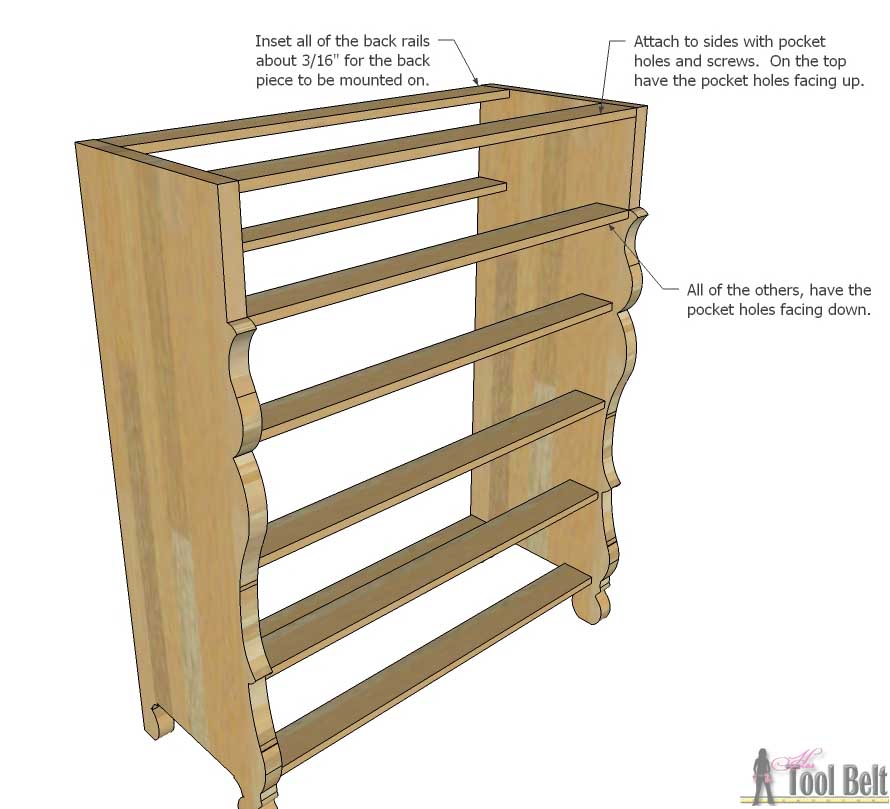
Cut all of the 1×4 pieces according to the cut list. Drill pocket holes for 3/4″ material in each end of the 40″ pieces. Measure and mark the locations for the 1×4’s according to the the diagram. Note: the top 3 drawers stick out farther than the 4 lower drawers.
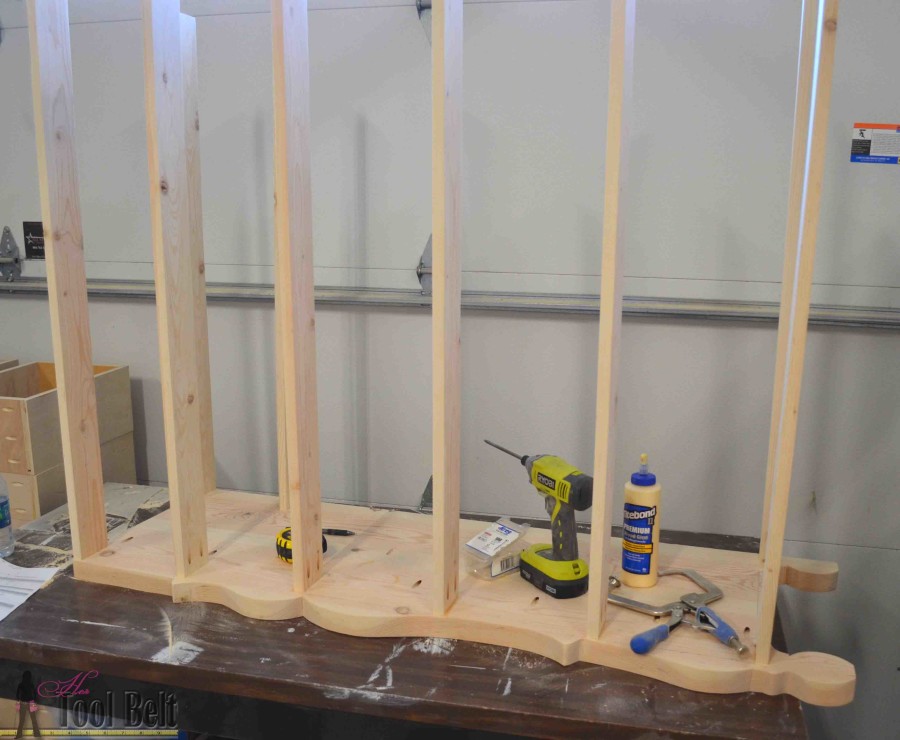
Use wood glue and 1 1/4″ pocket hole screws to secure the rails on a side. Make the pocket holes face up on the top 1×4’s, and down on all of the other 1×4’s.
Then attach the rails to the other side.
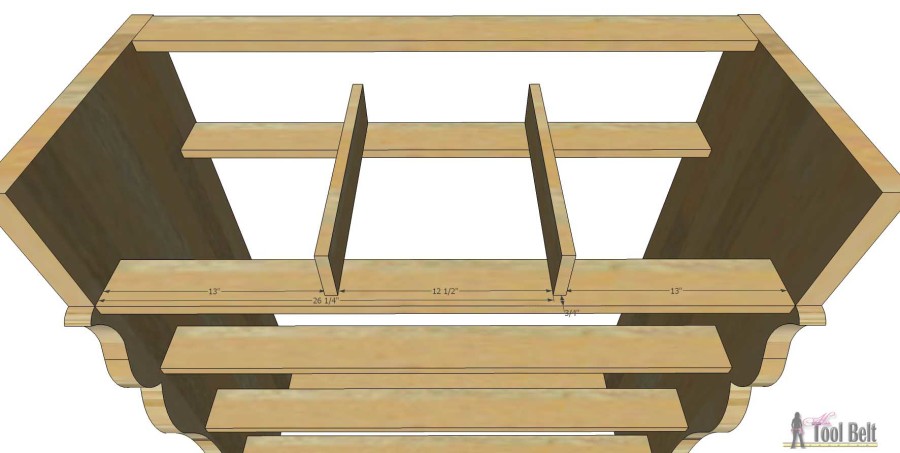
Measure and mark the location for the top drawer dividers. You can either attach the drawer dividers with pocket holes, or from underneath with screws. If you do secure from underneath make sure to set it far enough back that the lower drawer front will not hit your screw head.
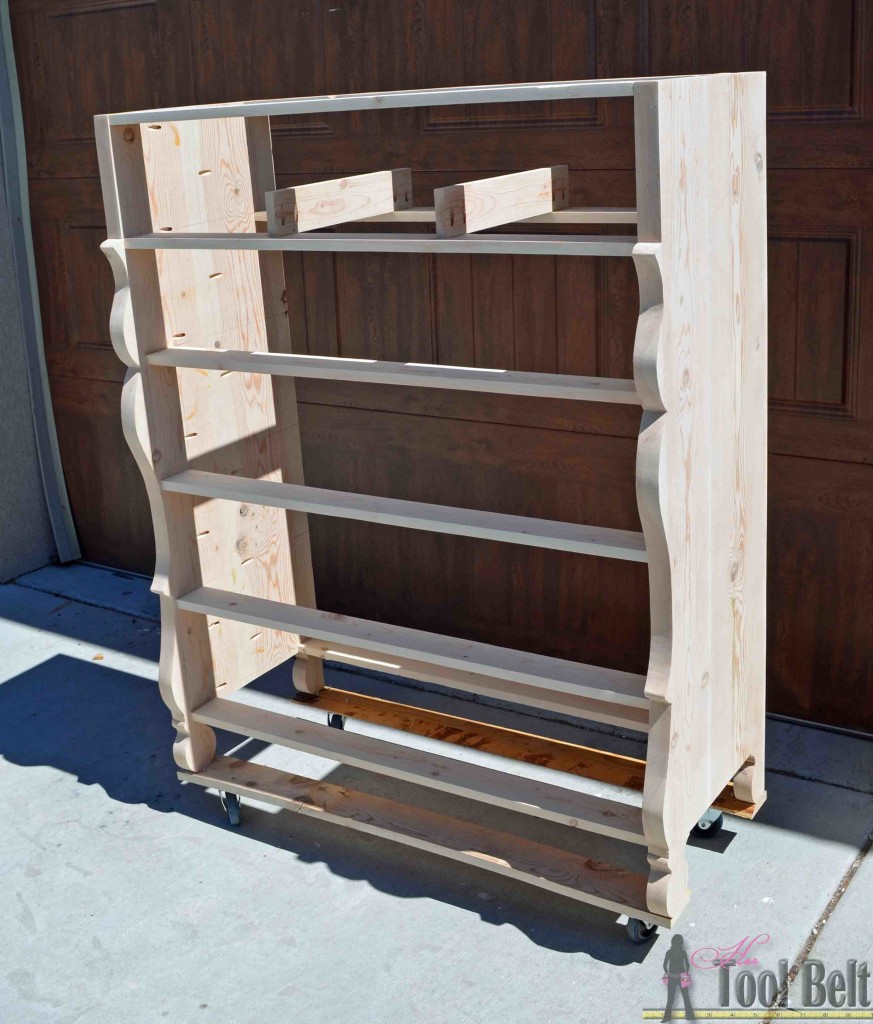
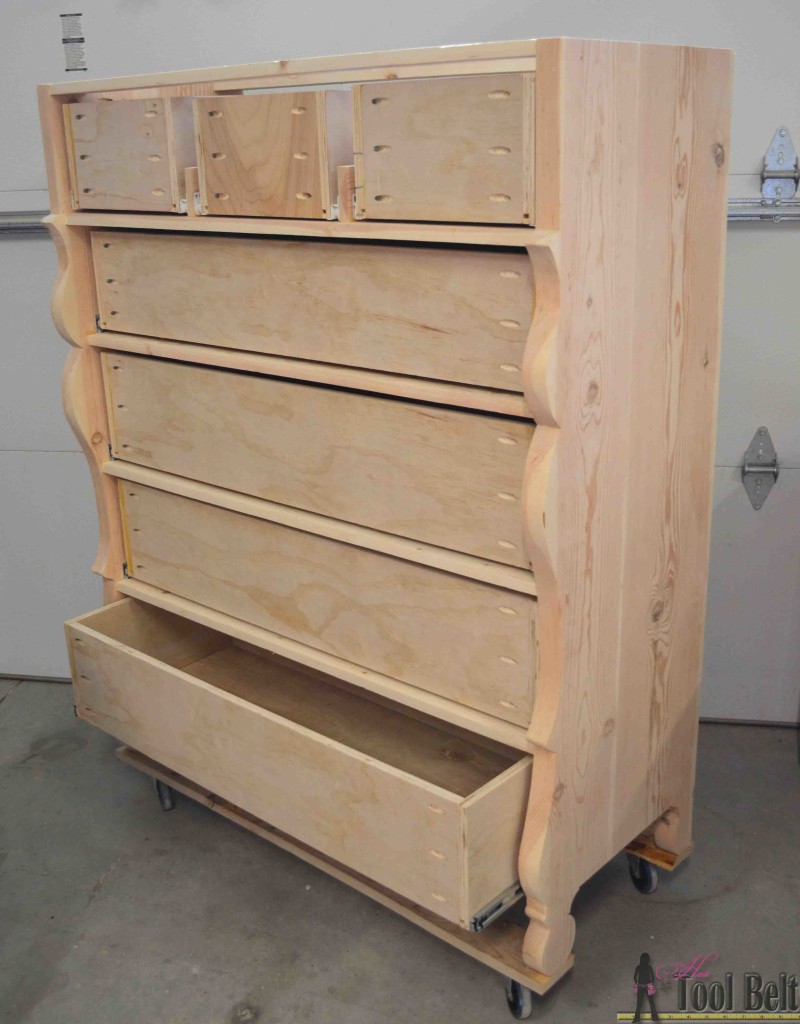
Yay, now the dresser bones are together and it’s starting to take shape. I put the dresser on casters to make it easier to move around.
Step 3
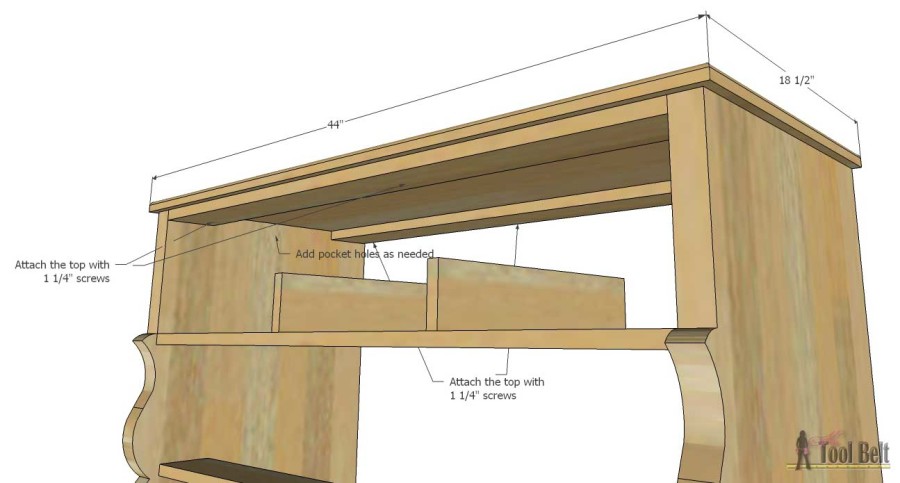
Cut the 1×10’s for the top. You can make these longer if you want a larger overhang. Drill pocket holes for 3/4″ material along a long edge to join the boards together. Use wood glue and 1 1/4″ pocket hole screws to join the 2 top boards together. Once the glue has dried, sand the top smooth. I routed a round over edge on the front and side edges. Place the top on the dresser, centering it from side to side and make the back flush to the dresser back. Secure the top to the dresser with 1 1/4″ screws. My top had a slight bow, so I didn’t secure in the front middle. I thought it might create a bigger gap than planned for the drawer fronts.
Step 4
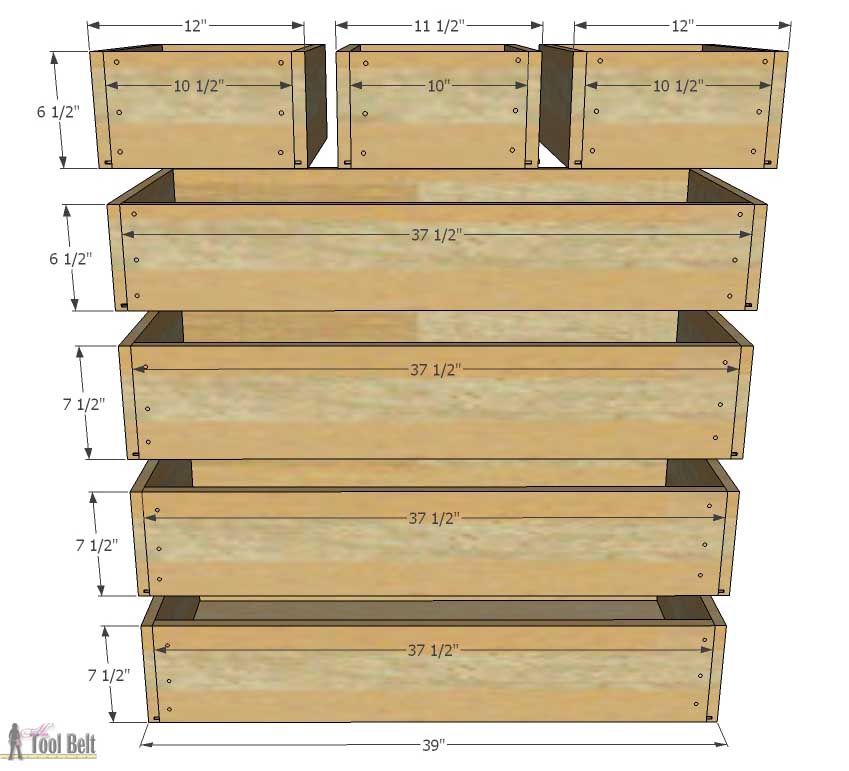
Time to tackle the drawers. Cut out the drawer parts from the sheets of plywood. These drawer dimensions assume your plywood is 3/4″. I bought some cheap ‘cabinet grade’ stuff from China that my HD started carrying for $35. I didn’t notice at first that the thickness is significantly thinner than I expected. Check your plywood thickness and adjust the cuts as necessary.
Overall drawer dimensions, the drawer runners have a little give and the width can be slightly less.
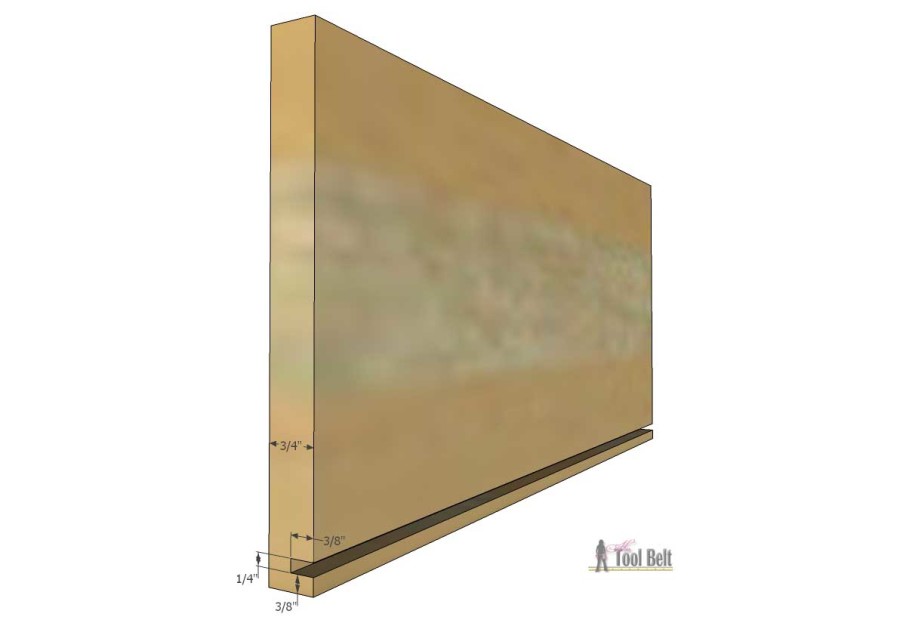
Cut a dado 3/8″ from the bottom, 3/8″ deep and 1/4″ wide in each of the 3/4″ drawer pieces. You can do this with multiple passes on the table saw, using a dado blade or a router with a 1/4″ straight bit.
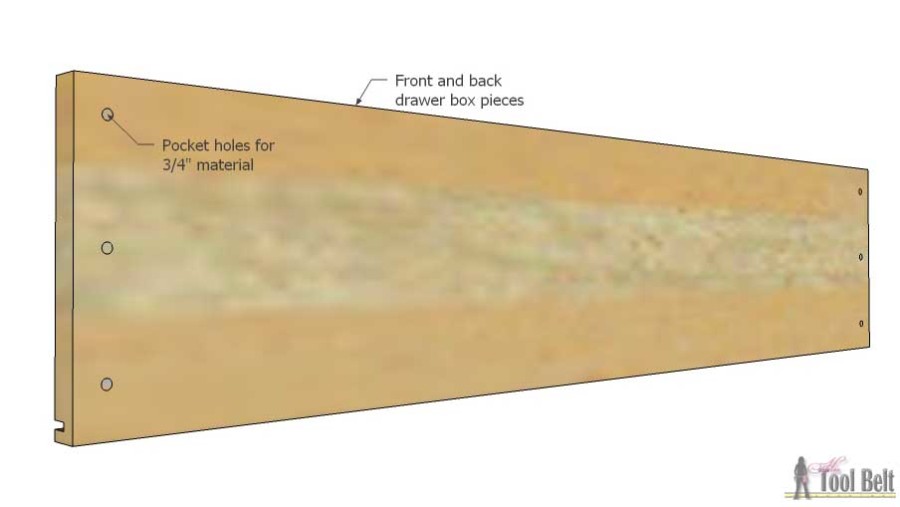
Set aside all of the 3/4″ drawer pieces that are 16″ long, these are the drawer sides. In all of the other 3/4″ pieces, drill pocket holes for 3/4″ material in the opposite face of the dado, avoid putting pocket holes by the dado.
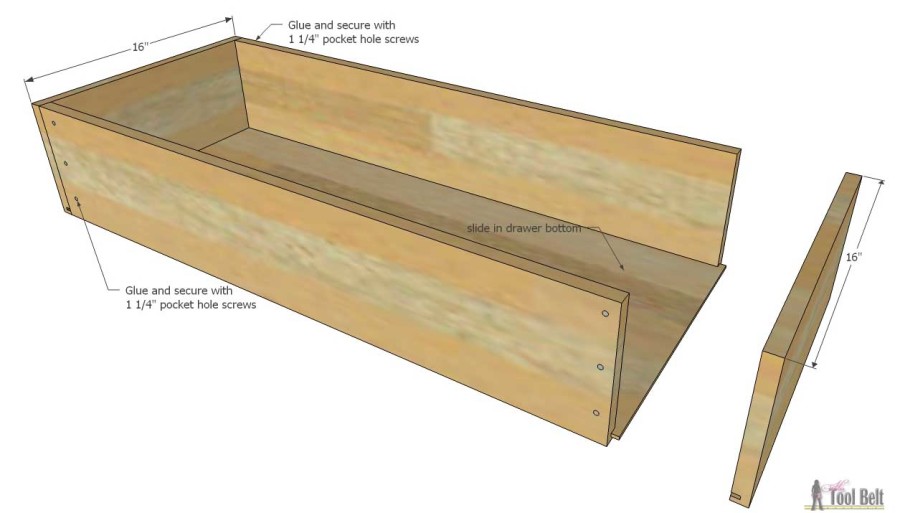
Assemble the drawers. Use wood glue and 1 1/4″ pocket holes to secure a front and back to a side. Slide in the drawer bottom. Then glue and secure the other side with 1 1/4″ screws. Repeat this process for all 7 drawers.
Install the drawer runners to the inside of the dresser sides and to the drawers, inset the drawers about 3/4″ in from the rails. I really like full extension ball bearing drawer slides and used them on the big drawers. I used bottom/side mount white slides on the 3 small drawers.
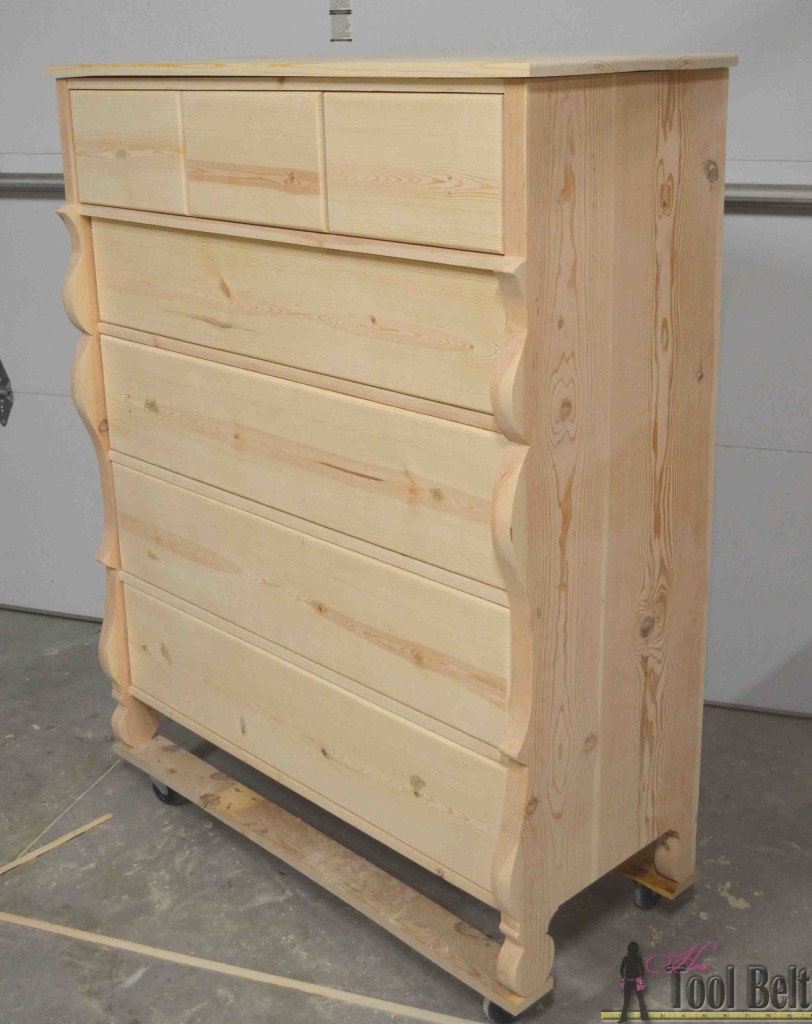
Once all of the drawers are installed, cut the drawer fronts, you’ll want a small gap all around the drawer front. Dry fit all of the drawer fronts and trim as necessary. I routed a simple round over edge around my drawer fronts. Now comes the fun part (frustrating part), attach the drawer front to the drawers. You need to put your drawer fronts in place then secure with a few screws from the inside of your drawer into the front. It is helpful to use heavy duty double stick tape to set it, then push your drawer out and secure with screws.
Step 5
I added a little molding under the top, on the front faces of the rails and around the bottom-ish area (inline with the bottom rail). Drill holes for the drawer knobs. Fill gaps, cracks and blemishes with wood filler and let dry. Then sand the dresser really well, ending with 120 grit paper.
Now for the finish, I debated and debated and debated how to finish it. Initially I was toying with the idea of dyeing the wood turquoise, but I chickened out. In July I went to a DIY conference in Atlanta called Haven. I attended a really great painting class taught by Amy Howard, she has done some really amazing things and has a line of finishing products. Somehow I lucked out and won some of her products, so I decided to try them out on this dresser. I was still thinking about the aqua/turquoise color scheme, so I got One Step Paint in Indian Summer.
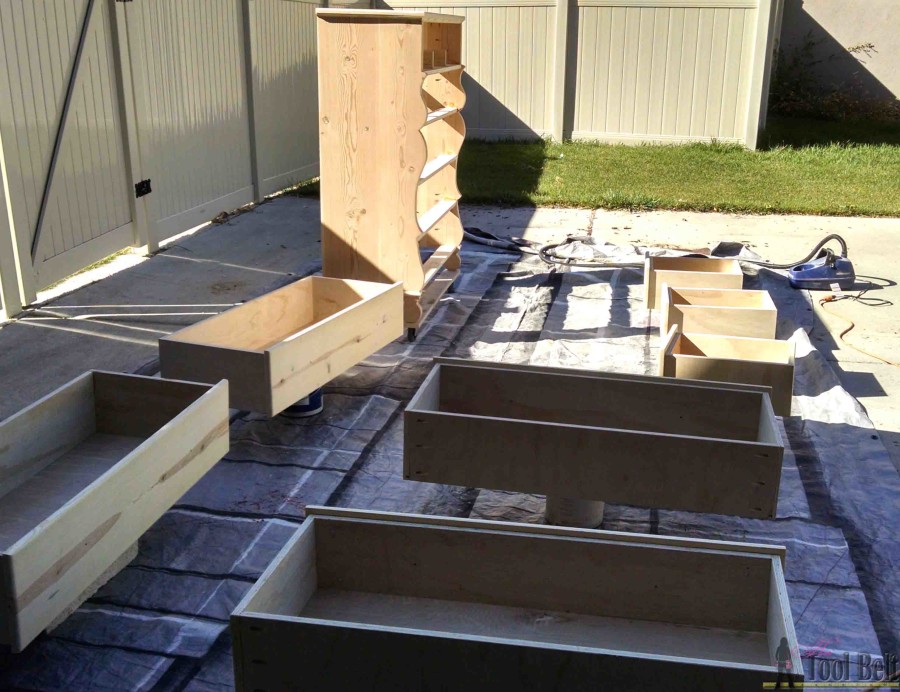
I pulled out the drawers and removed the runners. I used the Home Right finish max pro* to spray the paint, you just can’t beat the perfect look of a sprayed finish.
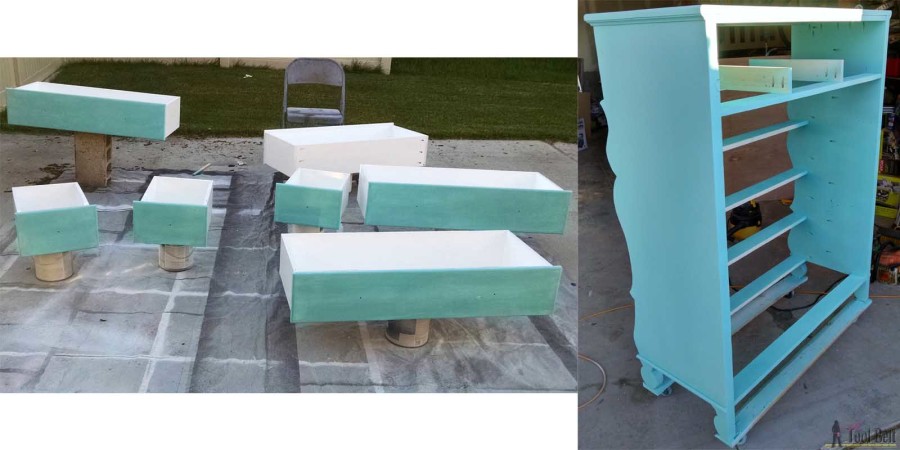
I primed the dresser and the drawers with Zinsser. (You don’t have to prime with one step paint, but primer is cheaper than chalk paint so I didn’t want to waste the first coat that absorbs into the wood on the good paint.) I decided to paint the drawer boxes where the clothes go with white latex paint.
To use paint/chalk paint in a sprayer you need to thin the paint with water, about 15%. I got everything painted and I wasn’t sure about the blue. It ended up being a little more teal than I expected. Then I started to doubt my choice, was I painting it blue because that’s what I like…or what my daughter likes, it’s what I like.
So I made a rash decision and ran over to Ace and picked up One Step Paint in Orchid. For the dresser body I added a little white to the orchid so there would be some color variation. The drawer fronts were painted in straight orchid. After the paint dried, I scuffed the edges a bit and some of the blue peaks through…it’s a fun look.
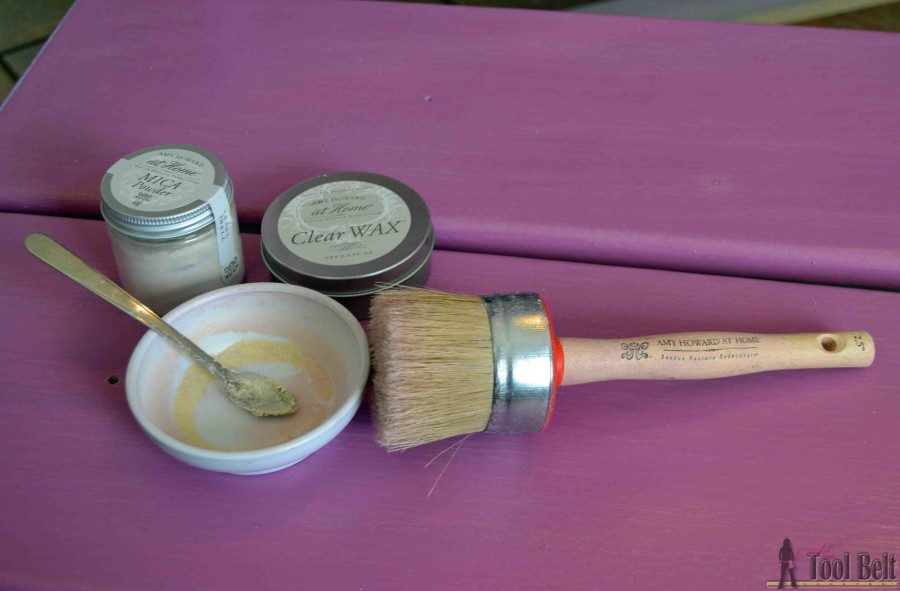
I’ve never waxed furniture before and decided to try it out. I added some pearl shell mica powder to the clear was (1 part mica:3 parts clear wax) and brushed it on. The mica powder gave the dresser this beautiful pearly sheen.
I found the perfect knobs at D. Lawless Hardware, I’m such a sucker for glass/acrylic knobs and they have lots of choices at great prices.
Now my little princess has lots and lots of room to put her clothes, this dresser is pretty large. Now onto the princess bed!
Thanks for pinning!
Download and print the plans Empire Dresser Plans-hertoolbelt 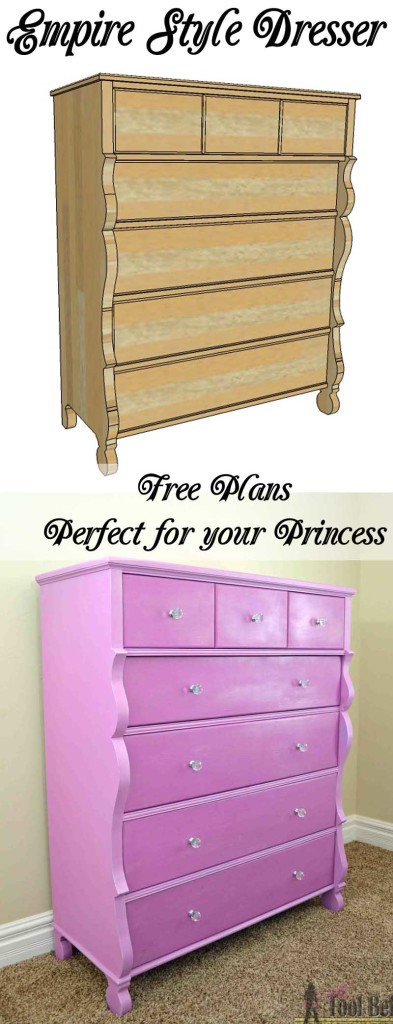
Disclosure: The knobs and drawer runners were generously provided by D. Lawless Hardware. All efforts and opinions are completely my own.
Linked to link parties, savvy southern style, homestoriesatoz, remodelaholic
Wow! I love it, it is darling!
Amy, you did a Awesome job with this and my niece would love the color.
Thanks!
How I loved the empire cuts I would like to build this for my son with straight sides. Would all cuts and measurements work just the same to do this? Would I need to do something different so that none of the drawers stick out further than others?
All of the drawers are the same depth, so you can build them as is. (I just mounted the top drawers farther out than the 4 lower drawers). Good luck
That is a dresser fit for a little princess! It came out great! It’s hard to do all that work and then paint it a color you wouldn’t have chosen for yourself. I’m working on a piece for my son, and he wants it painted green, my least favorite color. But I need to remember that it’s not for me!
Thank you! For sure, we have to make sure that our most important customers are happy 🙂 .
This looks so incredible! Pinned and tweet. Thank you for being a part of our party. I hope to see you on Monday at 7 pm, because we love to party with you! Happy Halloween~Lou Lou Girls
Amy, this is a beautiful dresser! I love the way you shared all the plans too! Thanks for sharing 🙂
Thanks Lindi!
hi,
nice project
what kind wood do you use i don’t see playwood
The outside of the dresser is all pine and the drawers are made from plywood.