My older kids are back to school and that means more and more stuff! Where does it all come from? 
This post contains some affiliate links for your convenience. Click here to read my full disclosure policy.
Enter to Win a big Crate Prize Pack (Sept 7-Sept 13) —->HERE <—-
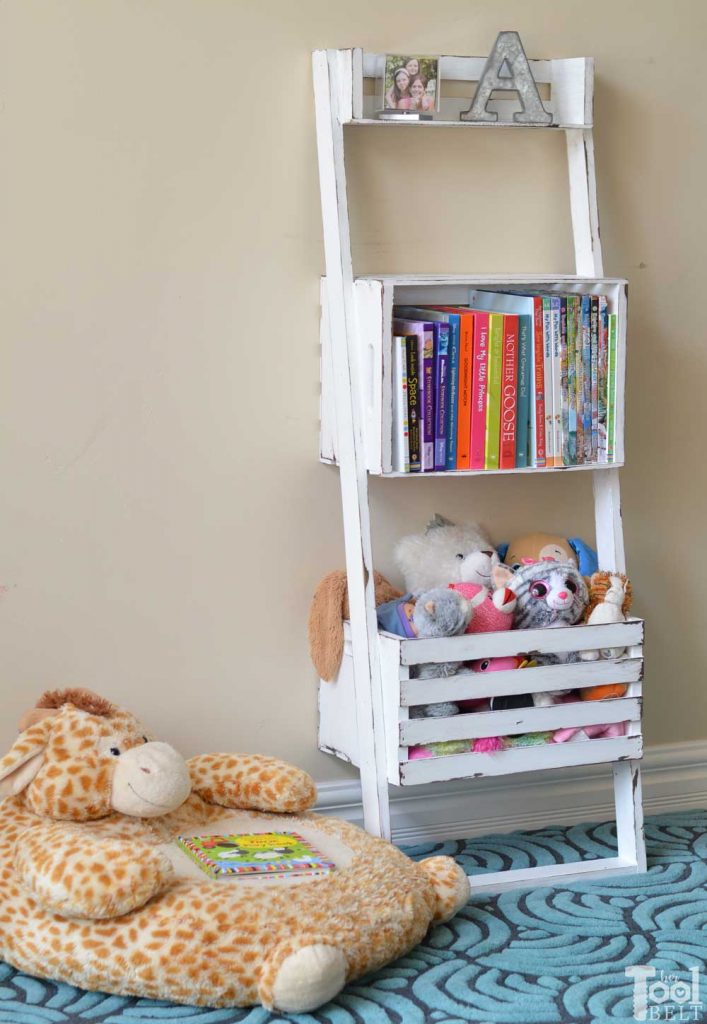
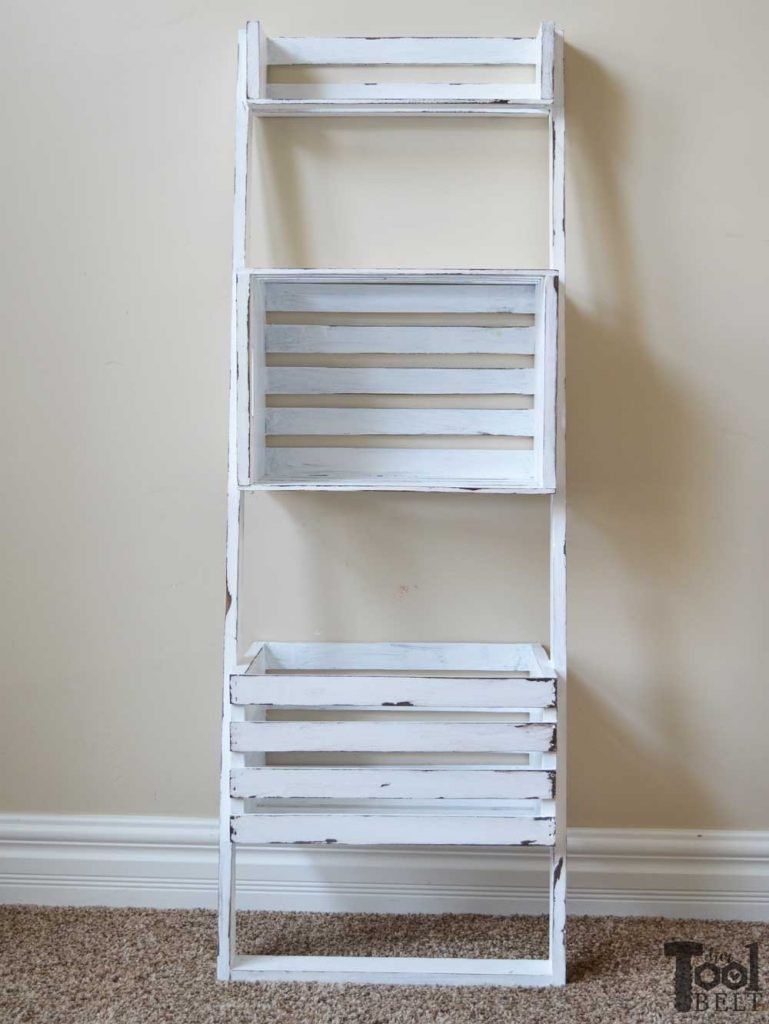
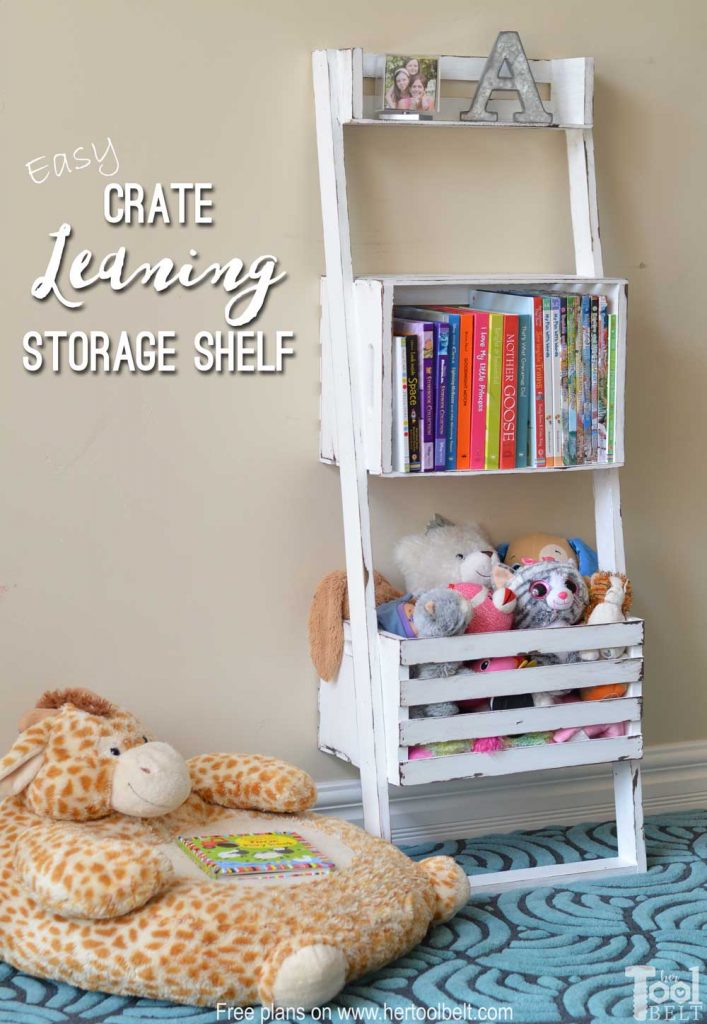
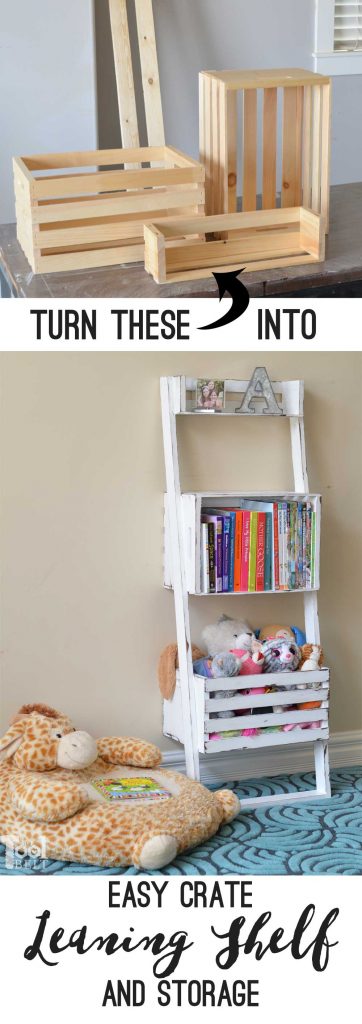
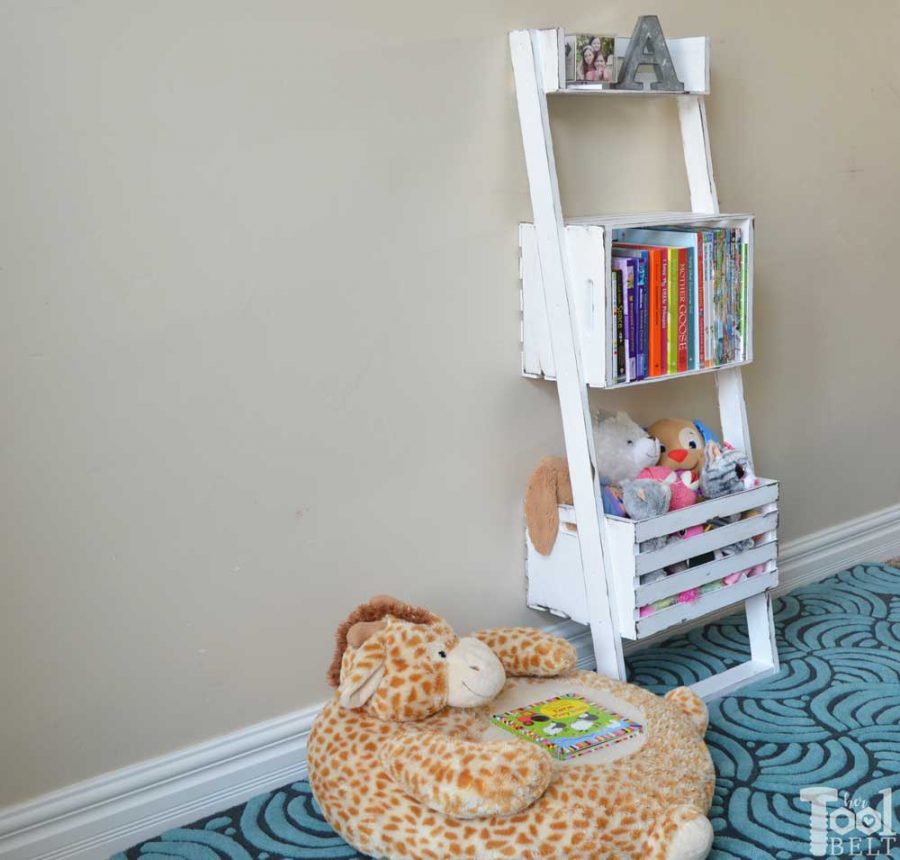
How to Build an Easy Crate Leaning Storage and Bookshelf
Materials
- 2 – Large wood crates
by Crates & Pallet
- 1 – 1/2 wall crate by Crates & Pallet
- 2 – 1″ x 3″ x 8′ boards (actual dimensions 3/4″ x 2 1/2″)
- 20 – 1 1/4″ wood screws
- wood glue
- sandpaper
- wood stain/paint (I used Kona and Ultra Pure White)
Tools
Cut List
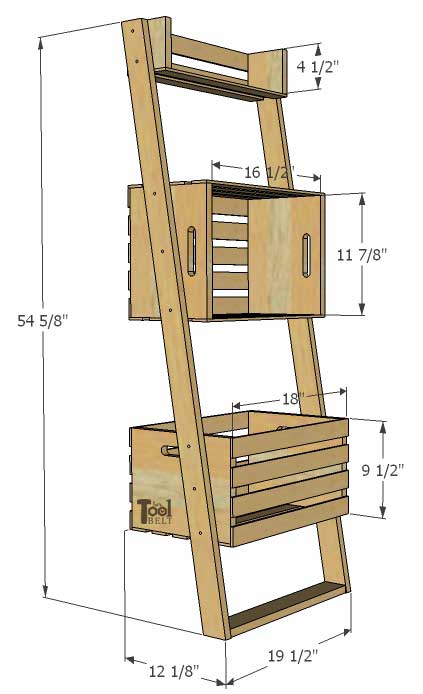
- 2 – 3/4″ x 2 1/2″ x 55 1/2″ with 10 deg miter cuts on both ends in the same direction, see diagram.
- 1 – 3/4″ x 2 1/2″ x 18″
Cut Diagram
Step 1
Inspect your boards and pick the best sides to face out. The boards need to mirror each other, so when standing up they will both lean back.
On the outside faces of the legs, I marked and drilled the holes in the legs where the crates attach. Mark the center-line of the legs (1 1/4″) and from the top center, measure and mark down the board for the attachment holes. Use a countersink bit to drill the holes at each mark. (You don’t actually have to do this part, it just makes assembly later a little easier.)
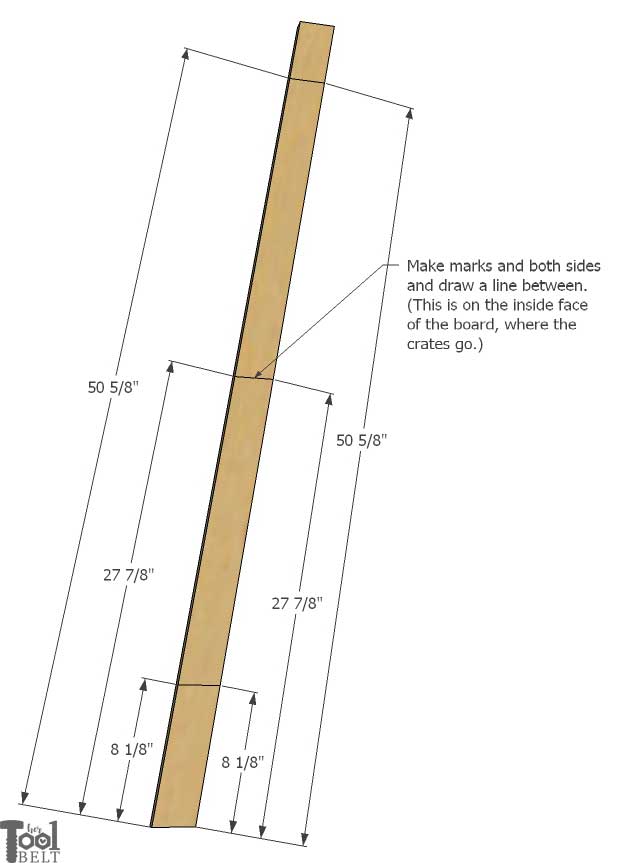
On the inside face of the legs, mark the line for the bottom of each crate. Start at the bottom of the leg and mark 8 1/8″, 27 7/8″ and 50 5/8″ on one side, repeat on the other side and use a straight edge to connect the marks. This is where the bottom of each crate will line up.
Step 2
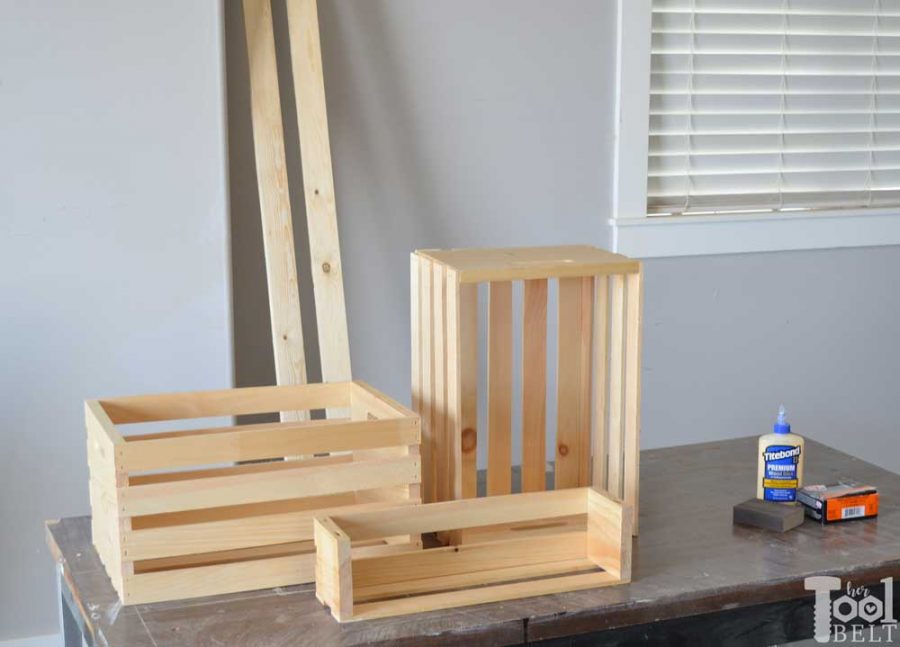
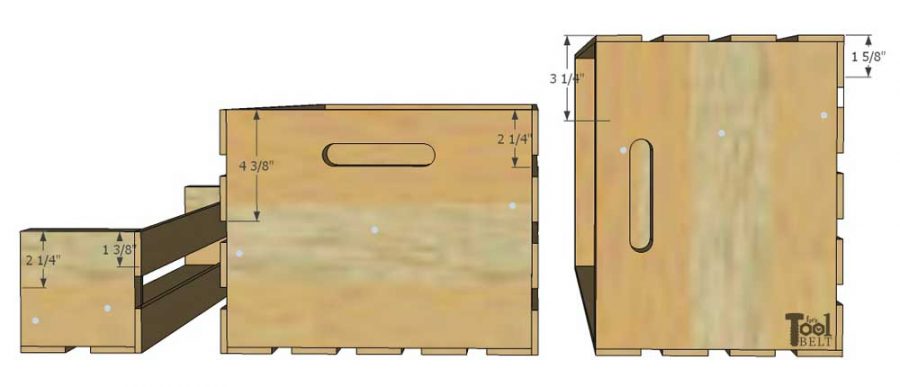
Place crates on a flat surface, in this orientation, measure and mark each crate with the following marks. This is where the legs will line up with the crate.
Step 3
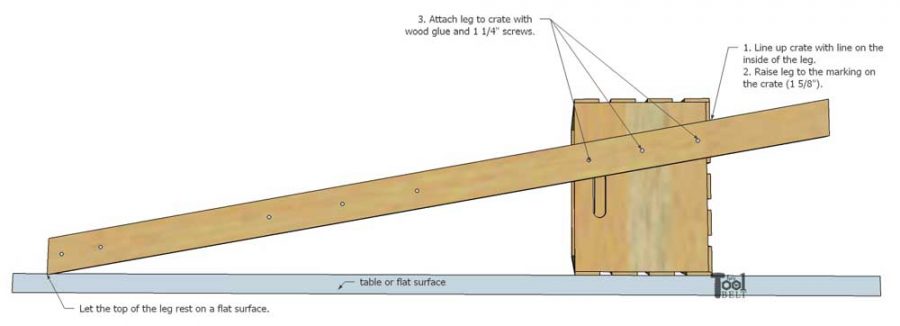
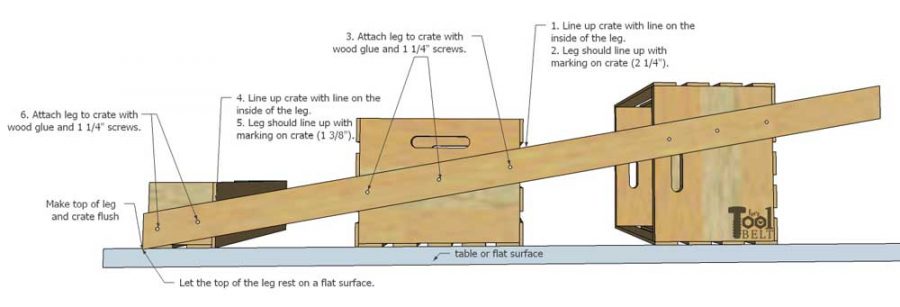
Place the bottom crate on a flat surface (like a table) on it’s ‘back’. Let the top end of one of the legs rest on the flat surface (table) and line up the bottom crate with the (8 1/8″) line marked on the inside of the leg. Raise the leg up to the mark on the crate (about 1 5/8″) and use wood glue and 1 1/4″ screws to secure the leg to the crate.
Line up the middle crate with the 27 7/8″ inside leg mark. Attach the leg to the middle crate with wood glue and 1 1/4″ screws. Line up the top crate with the 50 5/8″ mark (the top of the leg and top crate should be flush). Secure the leg to the top crate with wood glue and 1 1/4″ screws.
Repeat for the other leg.
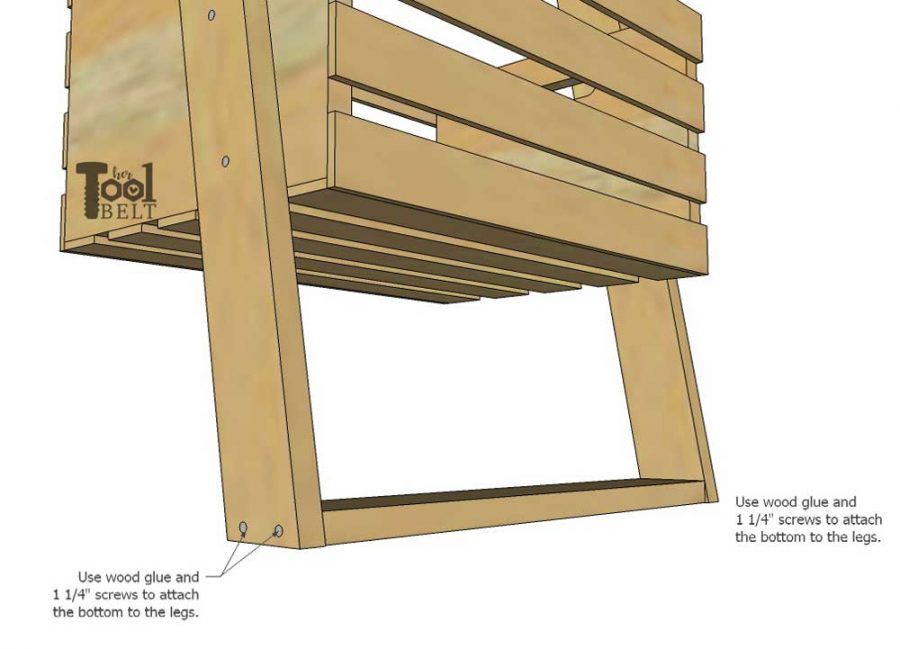
Place the bottom piece between the bottom of the legs and use wood glue and 1 1/4″ screws to secure.
Step 4
Sand the crates and legs smooth. Apply paint or stain as desired. I applied Kona (dark brown) stain to the whole shelf and let that dry. To get the chippy look, I put a little vaseline on the board edges and everywhere I didn’t want the paint to stick. Then I painted the whole shelf with Behr Ultra Pure White latex paint and let the paint dry overnight. Once the paint dried, I used the corner cat sander to remove the unwanted paint and distress the shelf.
Note: If you have little climbers in your house, consider mounting the leaning shelf to the wall. You can easily run a screw or nail through a crate slat into a wall stud.
Where can you use some extra storage?
Thanks for pinning!
*** I received the two large crates as part of Crates and Pallet hosting the September Creativity Unleashed link party. All ideas and words are my own. ***


So darn clever every time. Love this idea.
Thanks Jaime!