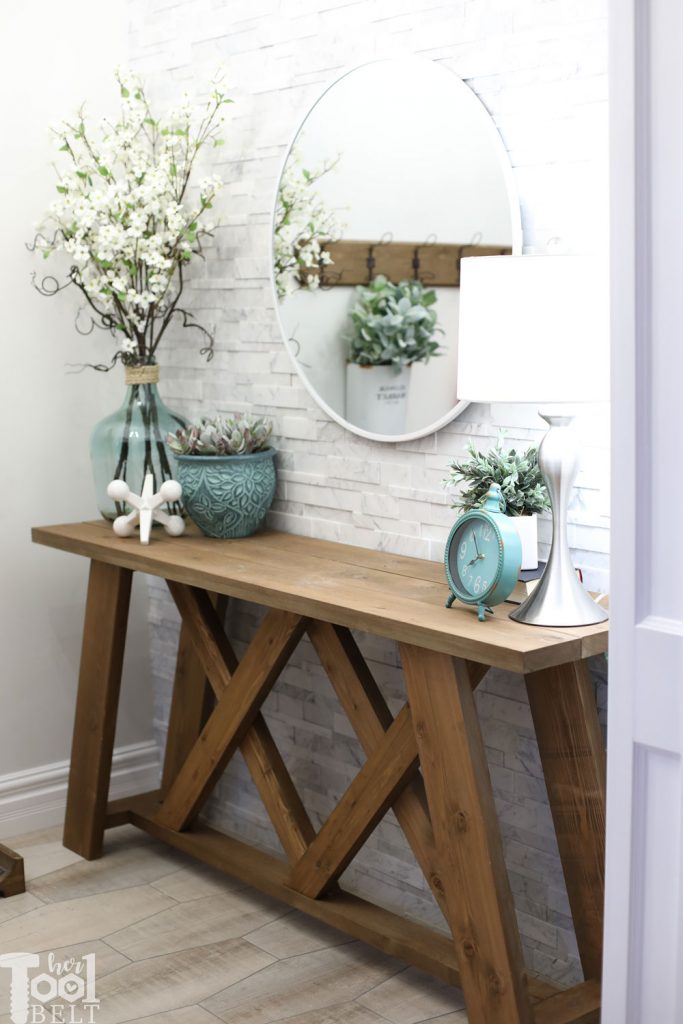
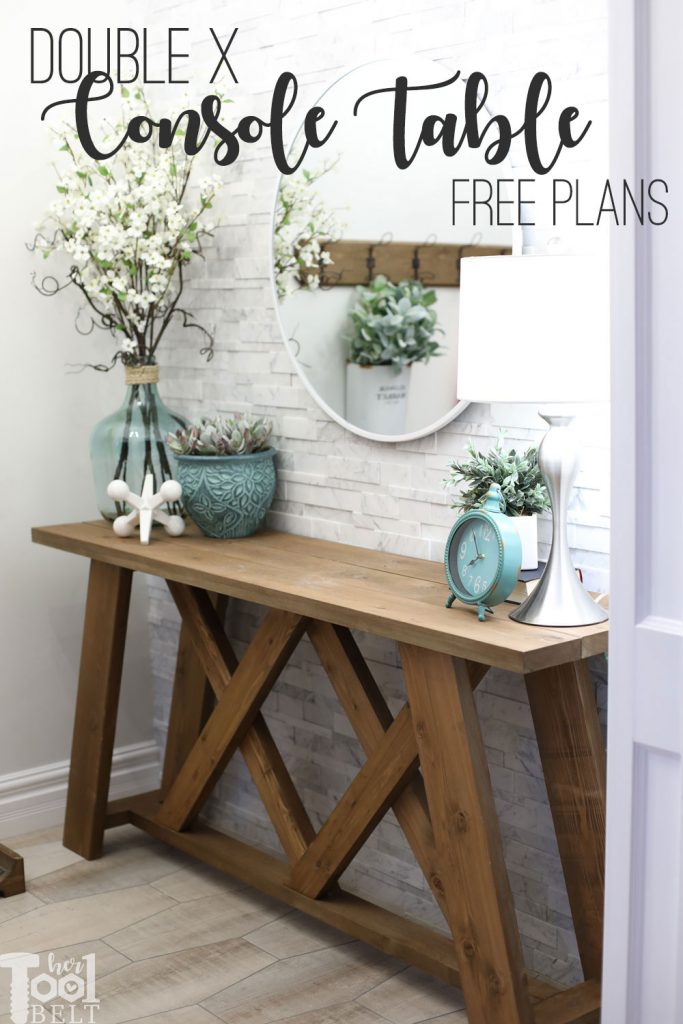
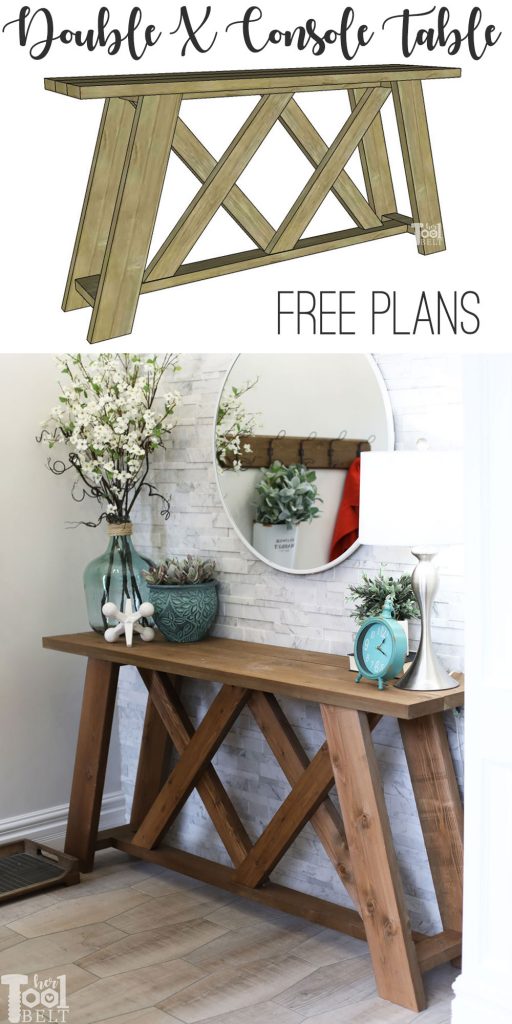
I completely renovated my entryway a few weeks ago (check it out here). This new Double X Console Table is the anchor piece to the room. It is a similar style to one of my favorite benches, just made it table-sized. 🙂 The lumber for this table only cost me about $38! Sweet.
How to Build a Double X Console Table
This post contains some affiliate links for your convenience. Click here to read my full disclosure policy.
Materials
- 2 – 2″ x 6″ x 10′ boards (actual dimensions 1 1/2″ x 5 1/4″)
- 2 – 2″ x 6″ x 8′ boards (actual dimensions 1 1/2″ x 5 1/4″)
- 3 – 2″ x 4″ x 8′ boards (actual dimensions 1 1/2″ x 3 1/2″)
- 2 1/2″ pocket hole screws
- 2″ brad nails (optional)
- wood glue
- sand paper
- stain (I used Varathane Aged Wood Accelerator in Brown)
- top coat
- Approximate Lumber cost is $38
Tools Used
- Miter Saw
- Sander
- Drill
- Brad nailer (optional)
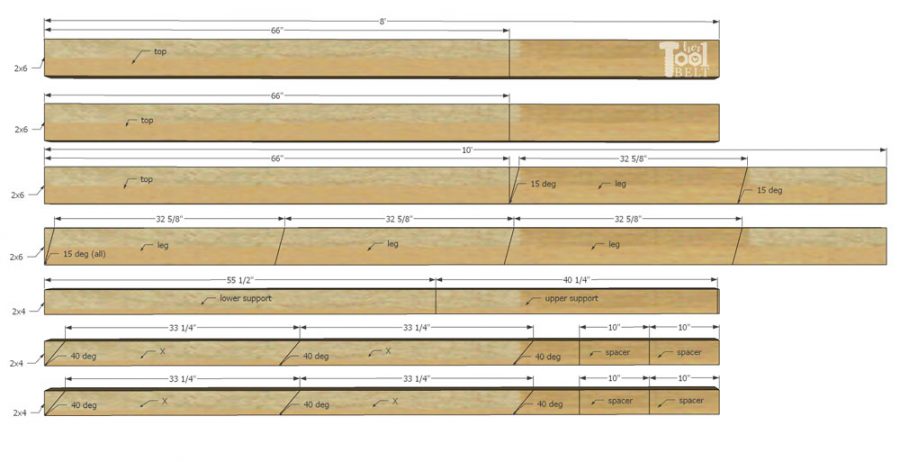
Cut list
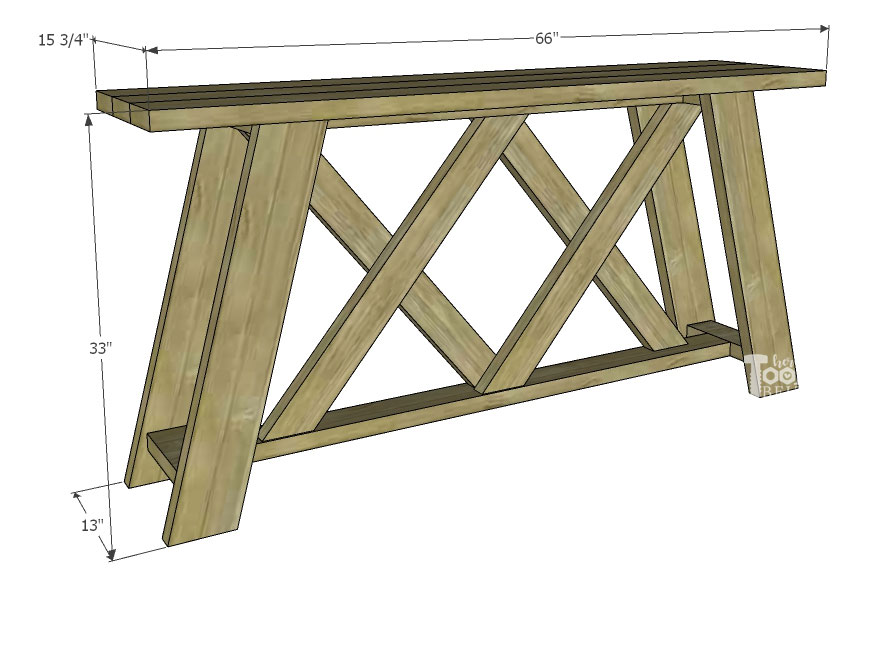
- 3 – 1 1/2″ x 5 1/4″ x 66″ – Top (2×6)
- 4 – 1 1/2″ x 5 1/4″ x 32 5/8″ with 15 deg miter cuts on each end – Legs (2×6)
- 1 – 1 1/2″ x 3 1/2″ x 55 1/2″ – Lower support (2×4)
- 1 – 1 1/2″ x 3 1/2″ x 40 1/4″ – Upper support (2×4)
- 4 – 1 1/2″ x 3 1/2″ x 33 1/4″ with 40 deg miter cuts on each end – X’s (2×4)
- 4 – 1 1/2″ x 3 1/2″ x 10″ – Spacer (2×4)
Cut Diagram
Step 1 – Cut and Pocket holes
Cut all of the boards according to the cut list/diagram above.
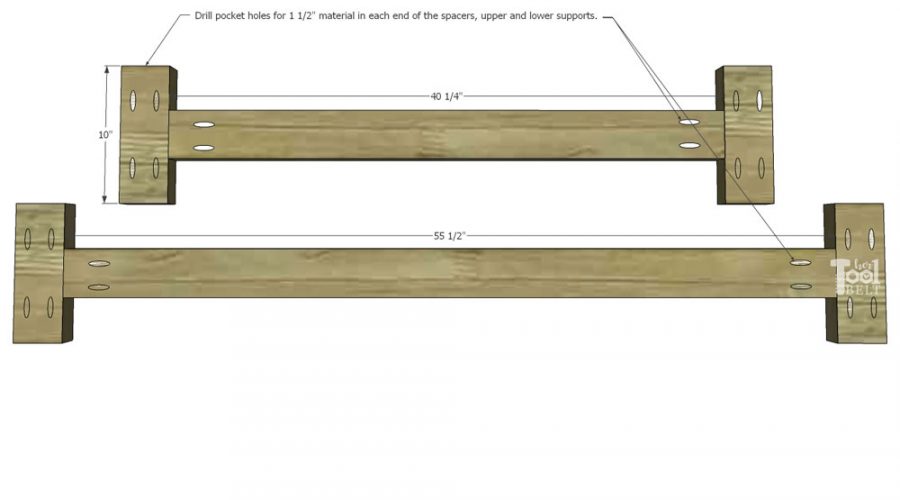
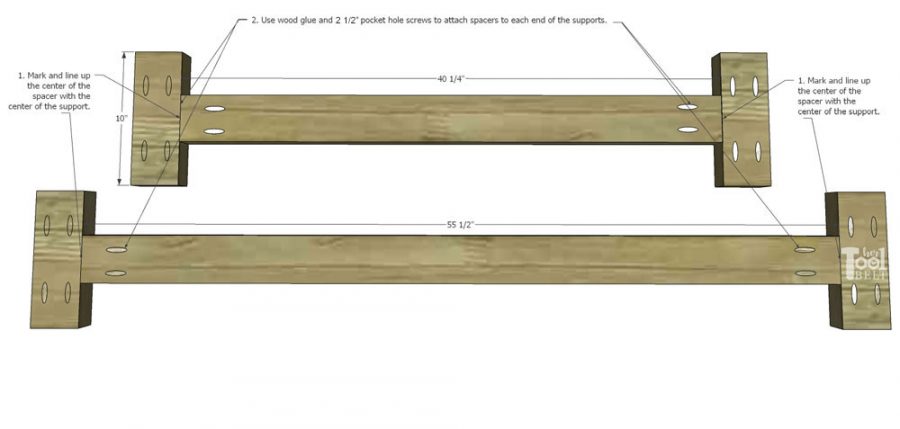
Drill pocket holes for 1 1/2″ material in each end of the upper/lower supports and spacers.
Measure and mark the side centers of the 10″ spacers and the end centers of the upper/lower supports. Use wood glue and 2 1/2″ pocket hole screws to attach a spacer on each end of a support piece.
Step 2 – Build the Table Base
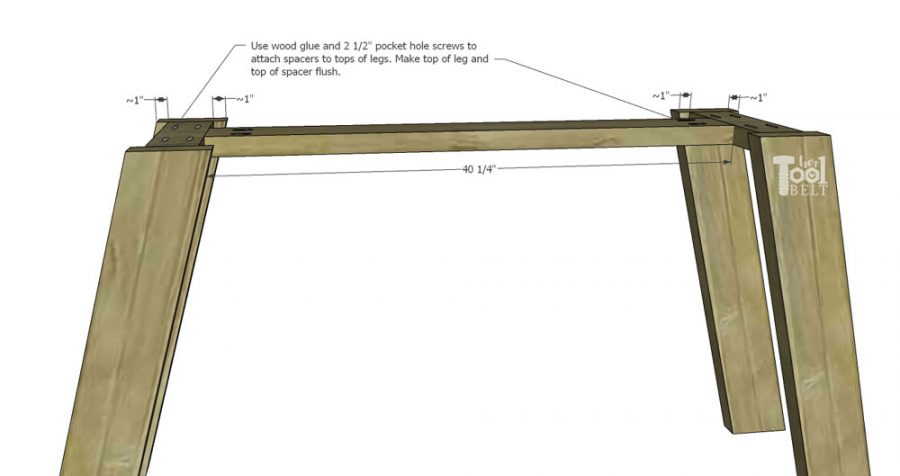
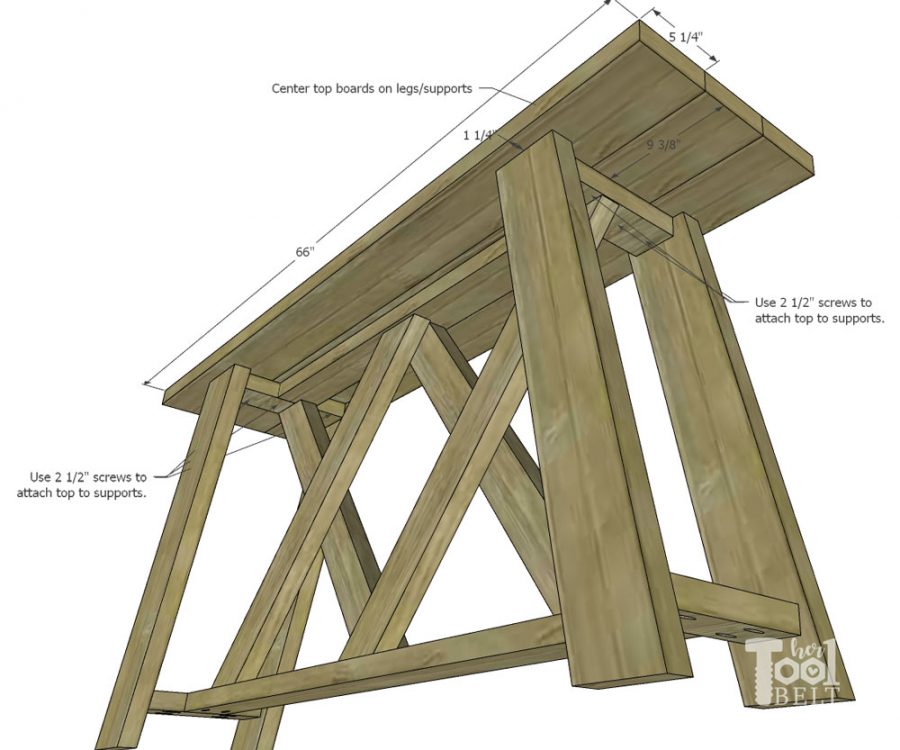
On the tops of the legs, measure and mark in just under 1″ from each side. Use wood glue and 2 1/2″ pocket hole screws to attach the spacers/upper support to the top of the legs. The leg tops should be flush with the spacer tops.
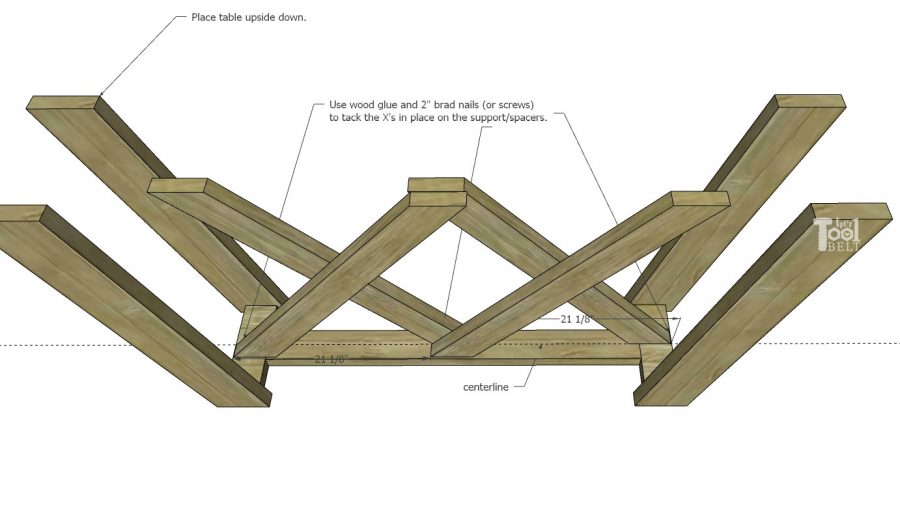
Turn the table legs upside down to attach the X pieces. Mark the centerline of the upper support and measure/mark over 21 1/8″ from each spacer, towards the middle.
Use wood glue and 2″ brad nails (or screws) to tack the X pieces onto the spacer/upper support. Line up one X piece on the edge of the spacer and another at 21 1/8″ (as shown), do the same thing on the opposite side (as shown).
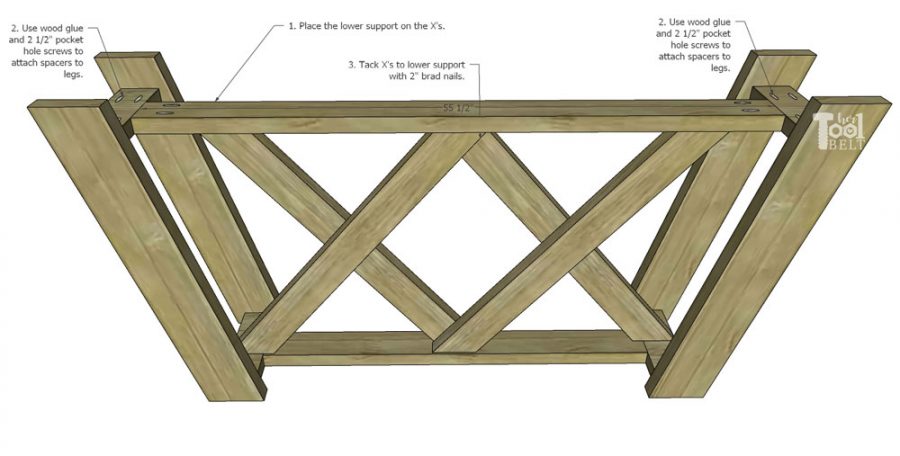
Put some wood glue on the spacer ends and place the lower support/spacer piece on top of the X pieces. Secure the spacers to the legs with 2 1/2″ pocket hole screws. It is helpful on this step if you have a shorter square bit for the pocket hole screws, if not, try and go in on an angle if you need to.
Tack the X’s to the lower supports with 2″ brad nails (or screws).
Step 3 – Attach the Table Top
Center the middle table top board on the table base. There should be approximately 9 3/8″ overhang on each end. Use 2 1/2″ screws and secure from the spacer up into the table top piece. (You can secure from the table top down into the spacer if you prefer.) Place the other table top pieces next to the center top piece, and secure with screws.
Step 4 – Finish
Sand the double x console table until smooth, starting at 80 grit sandpaper, 120 grit then 180 grit (and finer if you prefer.) Make sure to remove any excess glue. I stained the table with a very simple to use wood accelerator in brown. I just brushed the accelerator onto the wood and it soaked in gradually changed the color. Add a protective top coat to the console table.
Thanks for Pinning!
A step by step and a detailed guide building a console table. The style is simple but it is very harmonious You have a very creative brain,
We made this this weekend. It came out so beautiful. Thank you for sharing your plans. I wish I could share a picture with you.
My hubs and I made this yesterday!!! I love it. I need to sand and stain but it’s perfect!
I made this for my friend a couple weekends ago. Great easy build for a beautiful table! Would like to note that it cost me $60 just for the wood. Yikes wood prices have risen.
I know, it makes me cringe to buy ‘cheap’ lumber. It’s over double in price here. 🙁
Love this table! What kind of wood did you use?
The boards are Douglas Fir.
My husband and I made this table!!! We love it! We get so many compliments on it. It’s one of my favorite pieces of furniture in our home. We are not necessarily handy dandy people, but your instructions were super easy to follow! Love it! Thanks for the inspiration!