• Home
  • Project Gallery
  • About me
    • Disclosure
    • Disclaimer
  • Blog

Her Tool Belt

DIY furniture plans, crafts, and home improvement tutorials to empower you!

  • Free Woodworking Plans
    • Bathroom Furniture
    • Bedroom Furniture
    • Entry
    • Family Room Furniture
    • Garage
    • Kitchen furniture
    • Laundry Room
    • Mudroom Furniture
    • Organization
    • Outdoor Furniture
  • Home Decor
    • Upcycle
  • Crafts
    • Holiday
  • Home Improvement
    • Cleaning
    • Fix IT
    • Paint
    • Tile
  • Tool Reviews
  • Tool Time Videos

DIY Shiplap Wall Panel

July 29, 2017 by Amy 4 Comments

My sister-in-law has been dreaming of adding more detail to her house. She loves the look of shiplap and wants to add that to her mudroom wall. Problem #1 – she is married to my brother, a dust tracking, sometimes muddy, often smelly, hardworking farmer.  God made a Farmer. DIY shiplap wall look.

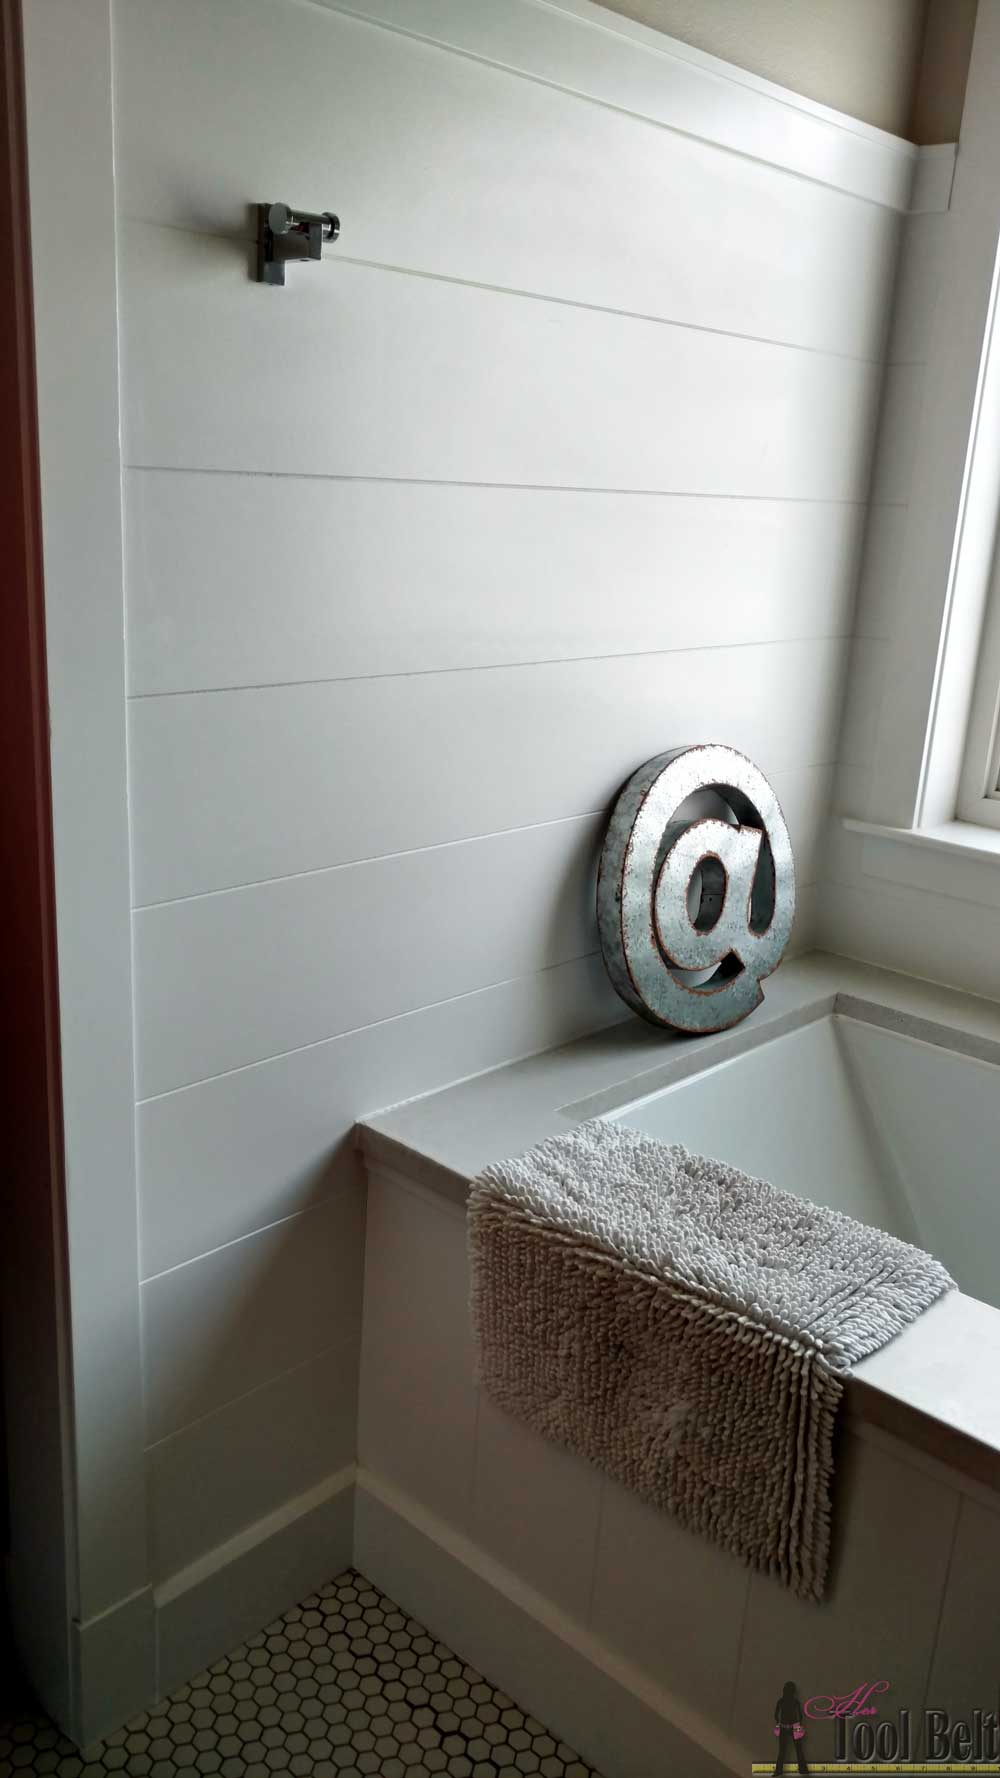
Her main concern about the shiplap is dust or mud getting into those little cracks in between the planks, and how in the world she was going to clean that out!  As she was still deciding what to do, her neighbor let us come tour her house that she has been DIY decorating.  In her neighbor Karilyn’s bathroom, she added the shiplap/planked wall look. However, instead of having separate planks, Karilyn used a router and routed lines into a 1/4″ sheet of MDF. Bingo! Problem solved, she can add a faux shiplap wall panel instead of individual planks! Thanks Karilyn for the awesome idea.

Karilyn's bathroom - faux shiplap wall. Love the look of a shiplap wall but don't want the gaps between the planks. Problem solved, route grooves in a plywood sheet for the shiplap 'planked' wall look! Set by step guide and tips.
Karilyn’s bathroom

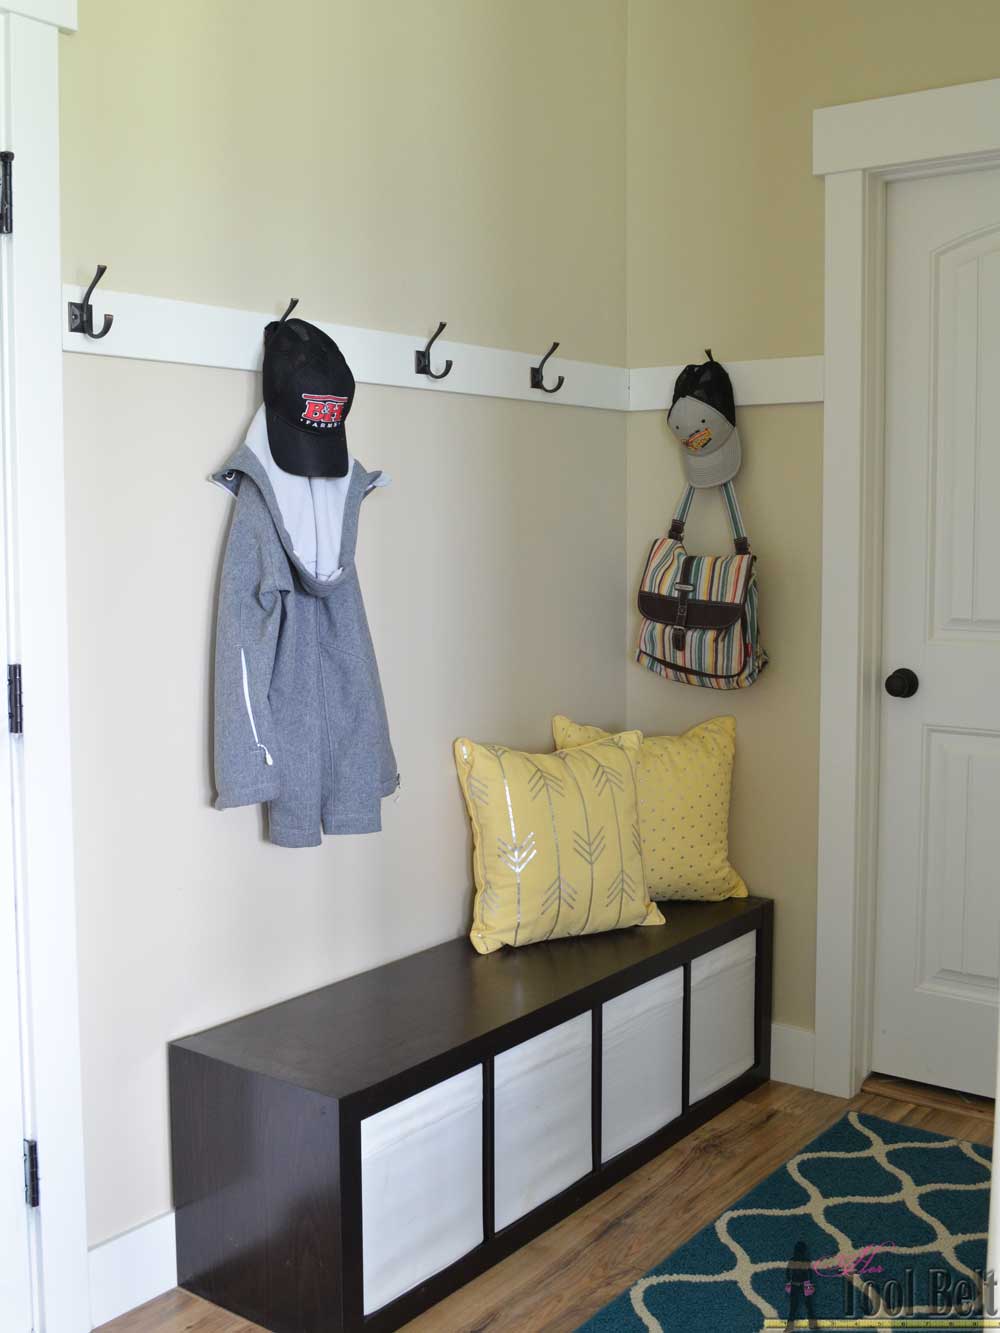
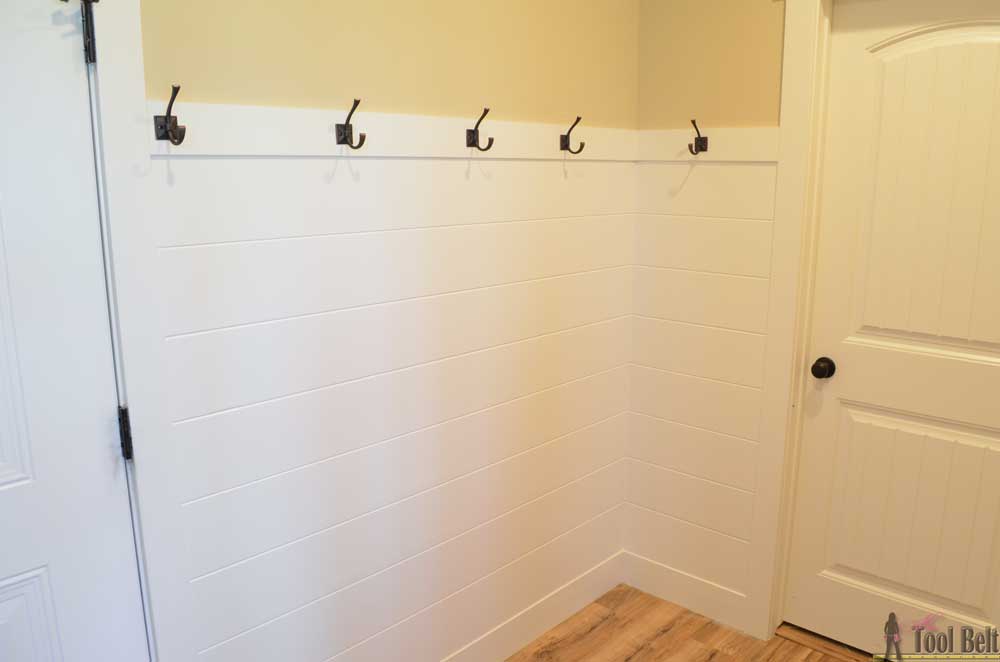
Here is the mudroom wall, it’s cute but she’s hoping for more detail. My brother added the coat hooks to the wall as a honey do for Christmas one year.  Painting the molding that the hooks are mounted on is still on the to-do list.

Mudroom before planked wall.
Mudroom BEFORE

How to do an Easy DIY Shiplap Wall Panel

This post contains some affiliate links for your convenience. Click here to read my full disclosure policy.

This project is pretty easy and can be done in one day depending on how fast your paint dries.

Materials

  • 2 – 1/4″ sheets of MDF (1/4″ x 49″ x 96″) (she picked these up at Ace for $14 each)
  • 2″ brad nails
  • paint primer
  • white paint
  • spackle
  • caulk
  • sanding block
  • paint brush
  • painters tape – optional

Tools Used

  • Ryobi trim router
  • 3/8″ diameter V groove router bit (1/4″ shank)
  • Ryobi circular saw
  • Kreg Accu-cut
  • Kreg Rip cut
  • Ryobi Airstrike brad nailer
  • Tape measure
  • Caulk gun
  • Stud finder
  • Clamps – optional
  • Paint sprayer – optional


The Layout

The first thing we did was measure the mudroom to see how many sheets of 1/4″ MDF we needed.  We need the MDF to cover 56″ in height and 88″ in length. That is just a little larger than 1 sheet, so she bought 2 – 1/4″ x 49″ x 96″ sheets of MDF.

Love the look of a shiplap wall but don't want the gaps between the planks. Problem solved, route grooves in a plywood sheet for the shiplap 'planked' wall look! Set by step guide and tips.

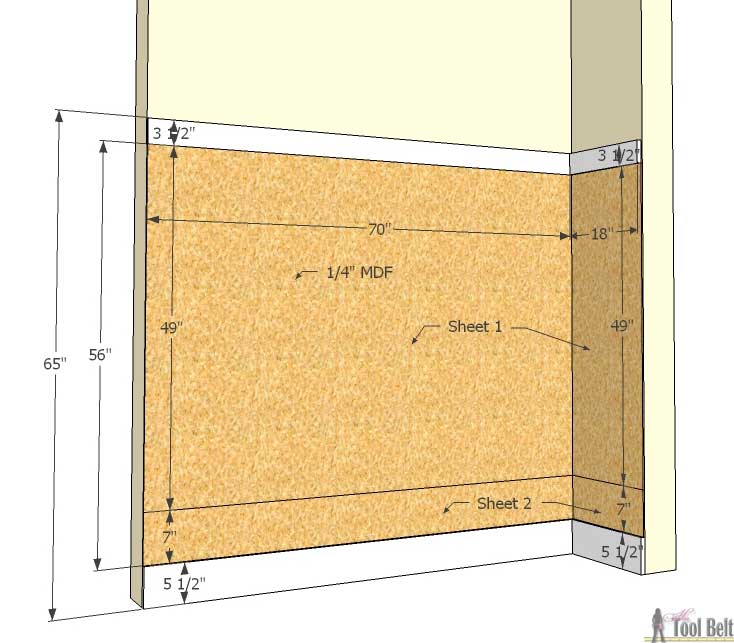
The sheet of MDF was 49″ wide instead of the typical 48″. We originally planned on routing 8″ wide ‘planks’, but 7″ wide planks worked out so much smoother because of the extra 7″ we needed to add below the main panel, 56″/7″ = 8 ‘planks’.
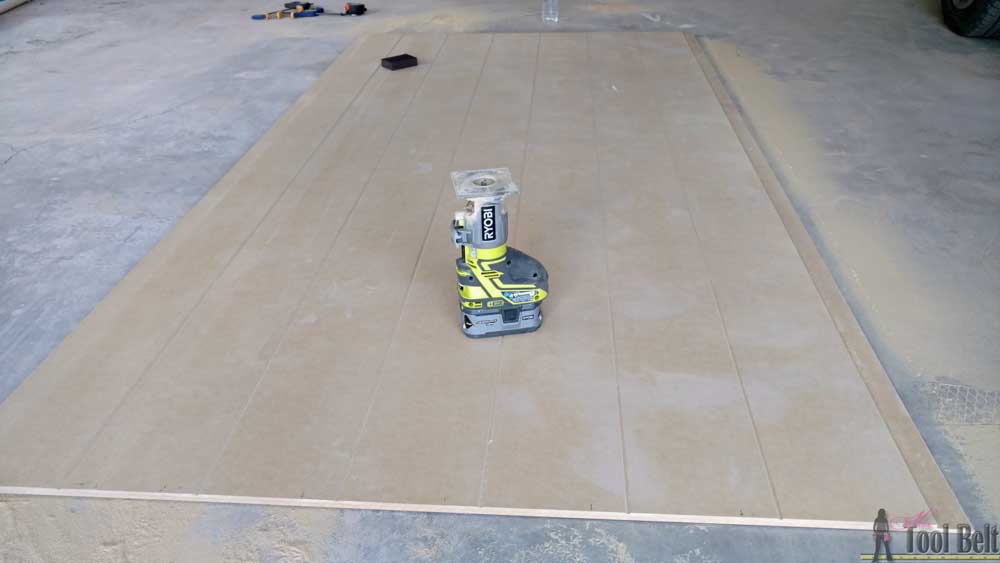
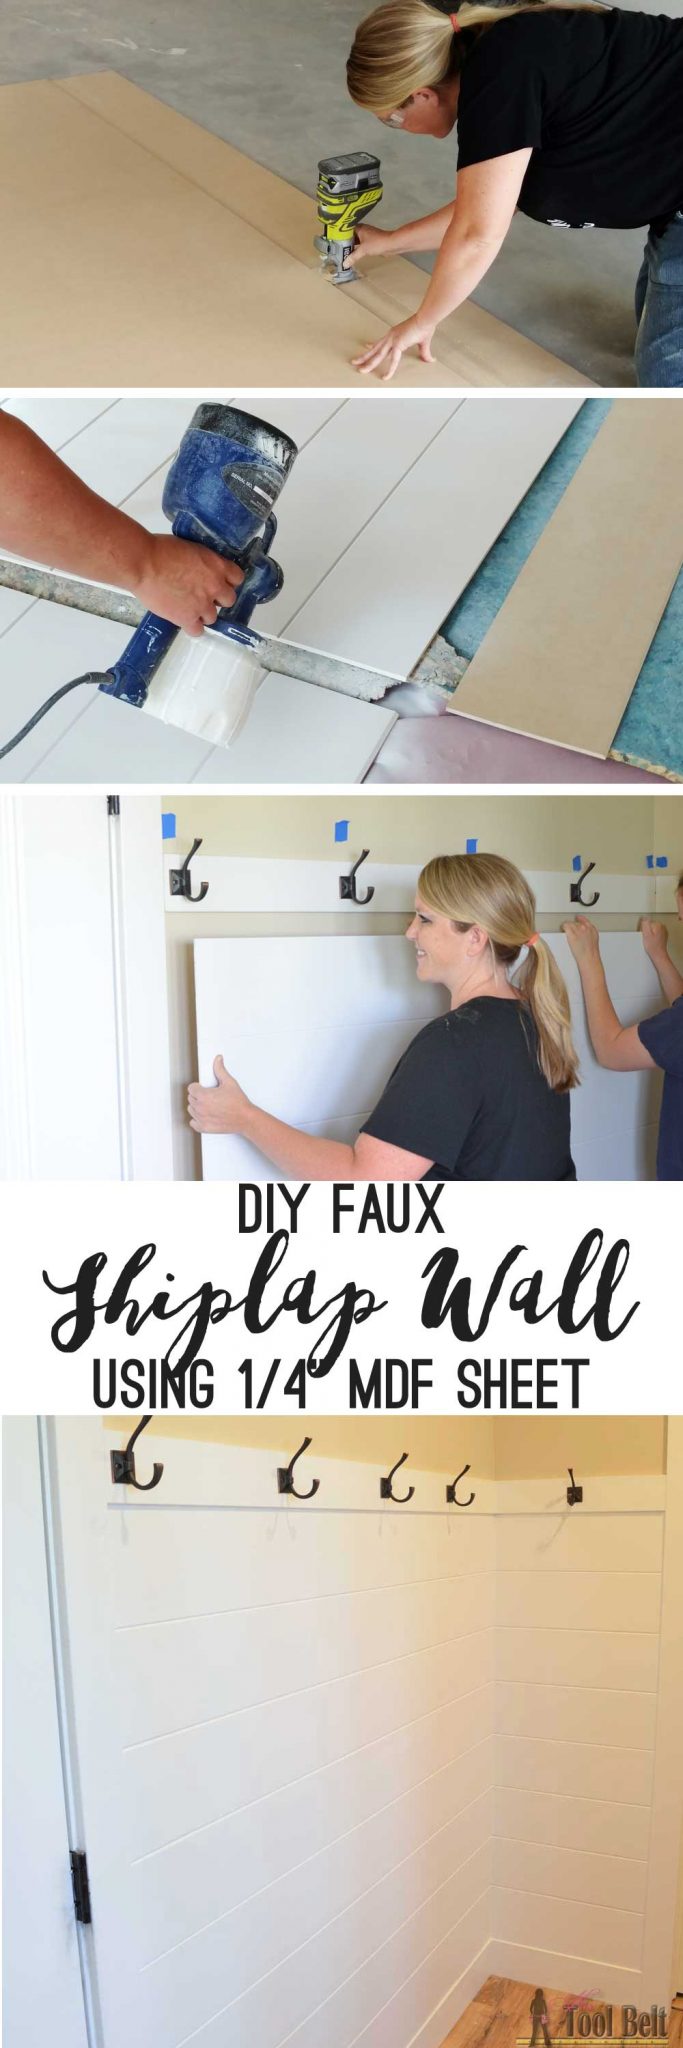
Love the look of a shiplap wall but don't want the gaps between the planks. Problem solved, route grooves in a plywood sheet for the shiplap 'planked' wall look! Set by step guide and tips.

Routing the lines

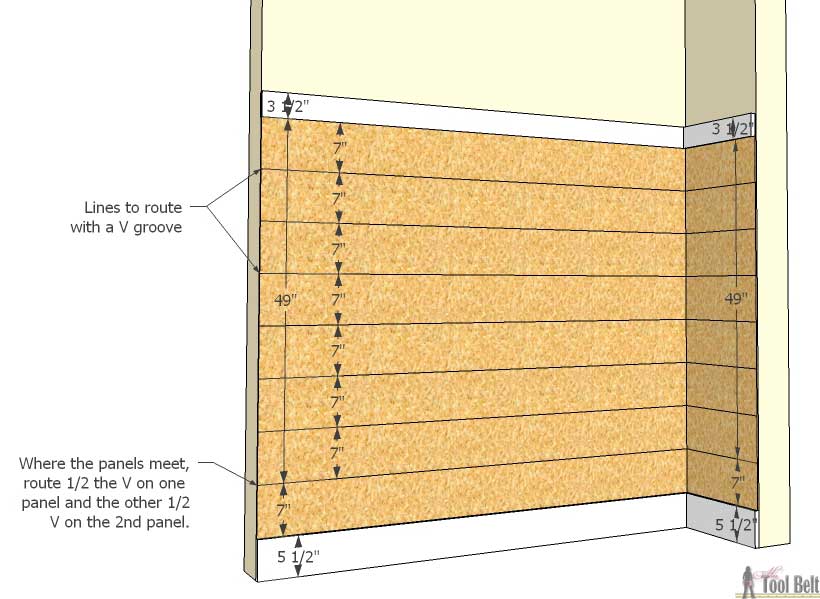
Routing the lines in the MDF is really easy. We marked every 7″ down the sides of the panel (on both ends).

Love the look of a shiplap wall but don't want the gaps between the planks. Problem solved, route grooves in a plywood sheet for the shiplap 'planked' wall look! Set by step guide and tips.

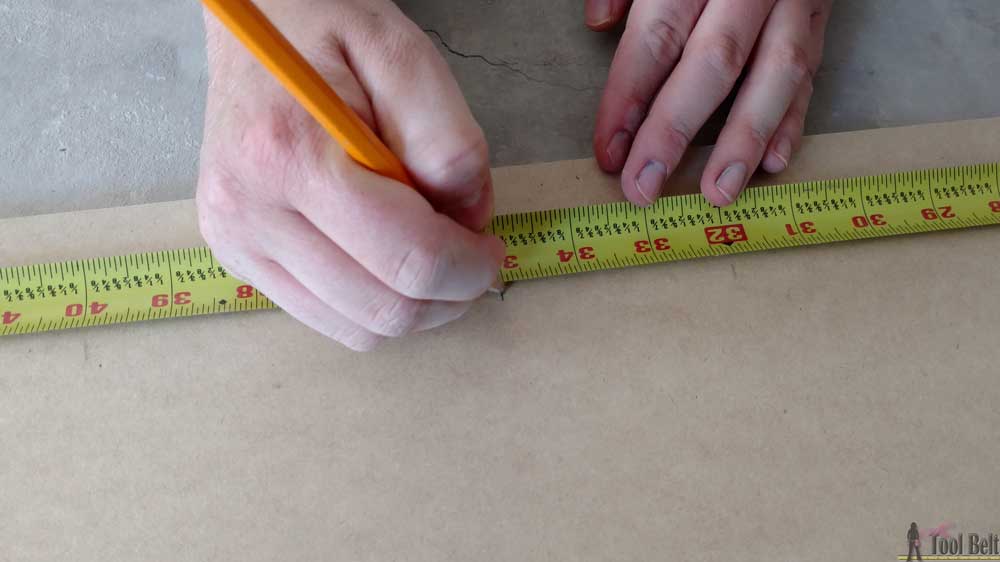
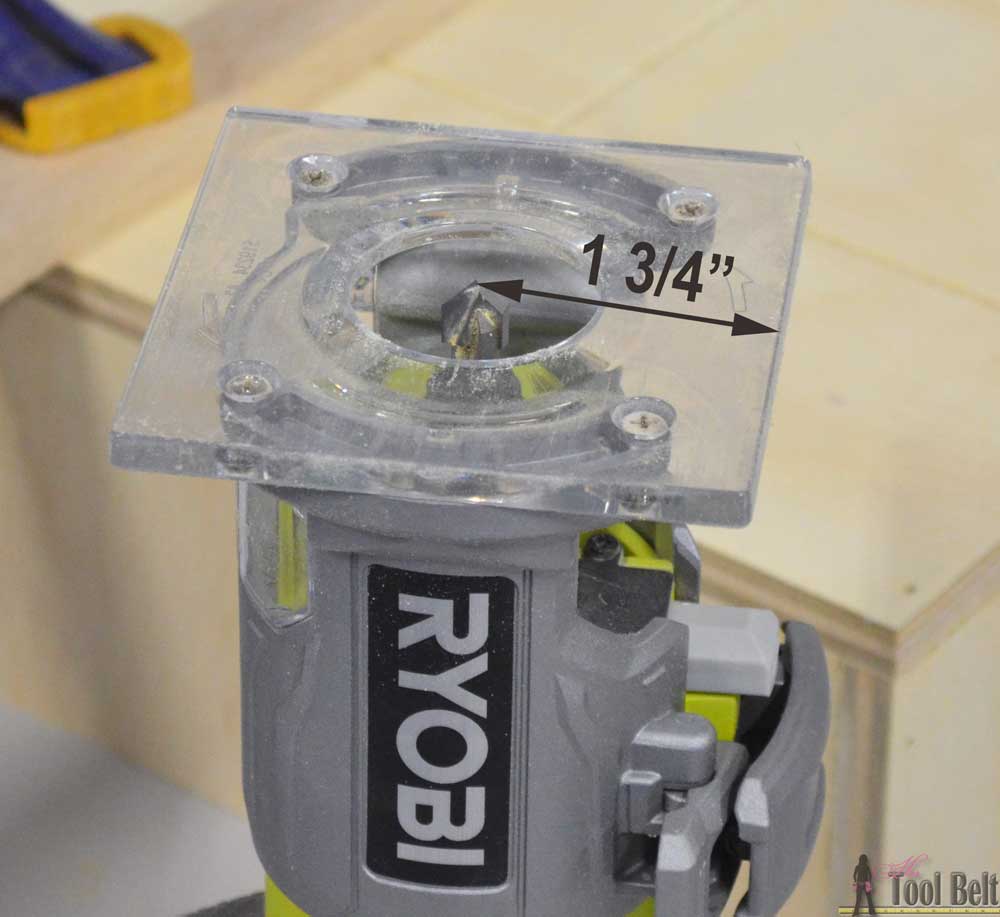
Note: the router side guide is 1 3/4″ from the center of the router bit, so we offset the markings by 1 3/4″, so the first mark is at 8 3/4″. Then after routing, the actual groove will be on 7″.

Love the look of a shiplap wall but don't want the gaps between the planks. Problem solved, route grooves in a plywood sheet for the shiplap 'planked' wall look! Set by step guide and tips.

We used the 2nd panel as the straight edge for the router and clamped it down so it wouldn’t move.

Love the look of a shiplap wall but don't want the gaps between the planks. Problem solved, route grooves in a plywood sheet for the shiplap 'planked' wall look! Set by step guide and tips.

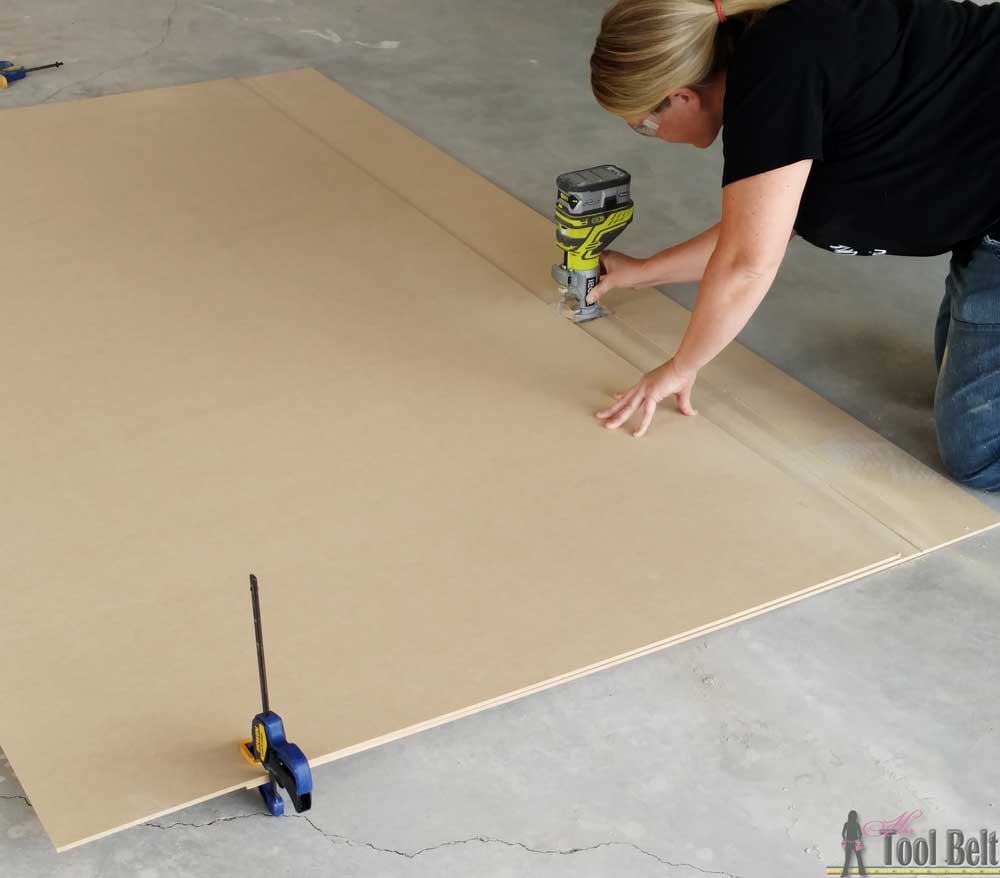
We adjusted the height of the V groove bit, so it would only cut 1/8″ deep. (You don’t want to cut all the way through the MDF). 🙂  Make sure to keep fingers away from the router bit.

Love the look of a shiplap wall but don't want the gaps between the planks. Problem solved, route grooves in a plywood sheet for the shiplap 'planked' wall look! Set by step guide and tips.

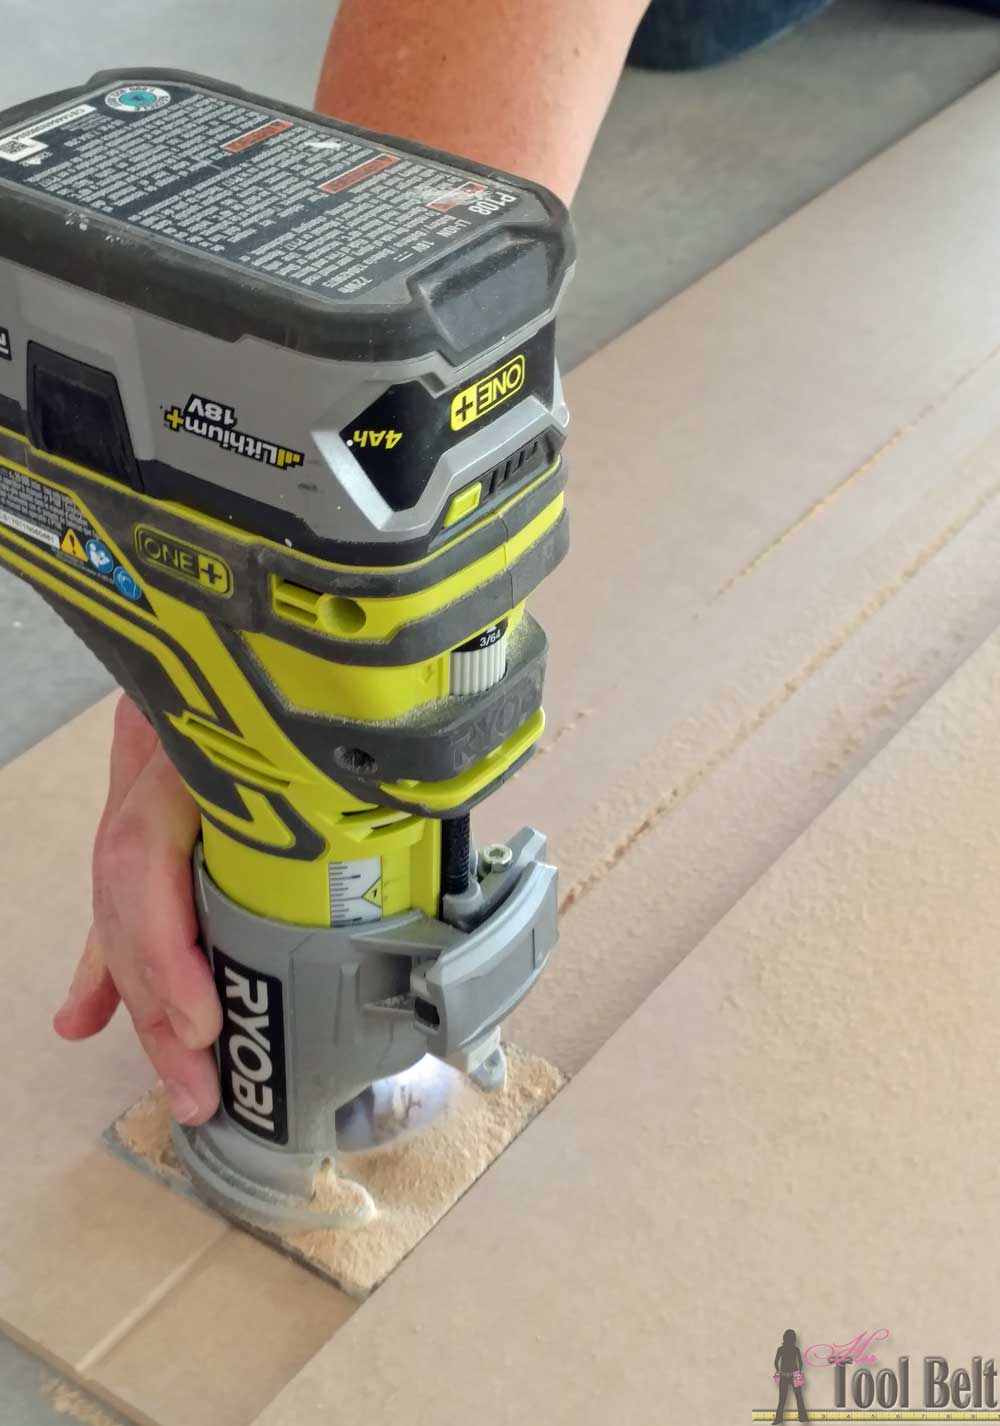
We found that we had best results if we took our time and tried to route as smoothly as possible.  On the bottom of the panel, we did a 1/2 groove to meet up with the 1/2 groove on the extra 7″ piece. The second sheet of MDF only needed a 1/2 V groove on the top because we only needed one 7″ ‘plank’.

Love the look of a shiplap wall but don't want the gaps between the planks. Problem solved, route grooves in a plywood sheet for the shiplap 'planked' wall look! Set by step guide and tips.

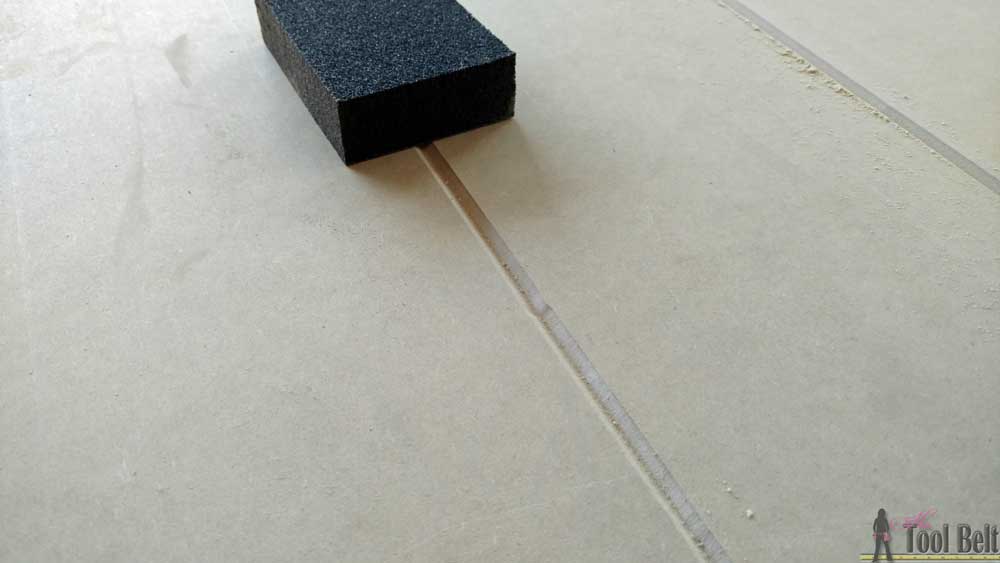
We had an occasional Oops with the router, but these easily sanded out with a sanding sponge or block. Hold the sponge at a 45 and sand the grooves smooth. Any big oops, we fixed with spackle.

Love the look of a shiplap wall but don't want the gaps between the planks. Problem solved, route grooves in a plywood sheet for the shiplap 'planked' wall look! Set by step guide and tips.

Cutting the shiplap panels

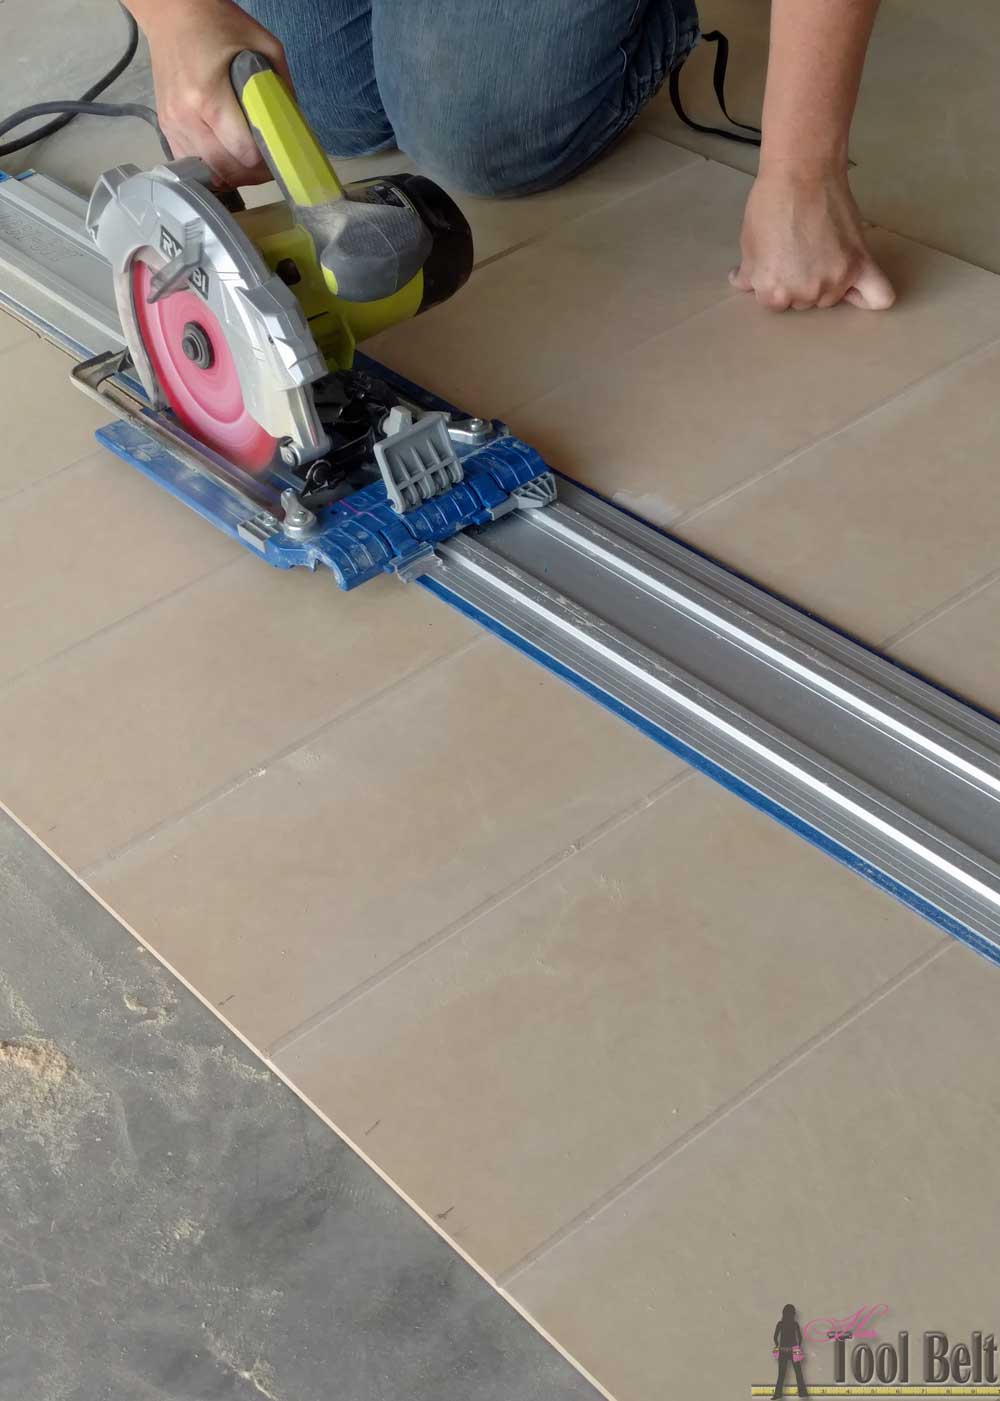
I used the new Kreg Accu-cut to cut the width of the panels.  Cutting a straight line with just the circular saw is always hard for me, this made it very easy to get a straight line without fancy equipment.

Love the look of a shiplap wall but don't want the gaps between the planks. Problem solved, route grooves in a plywood sheet for the shiplap 'planked' wall look! Set by step guide and tips.

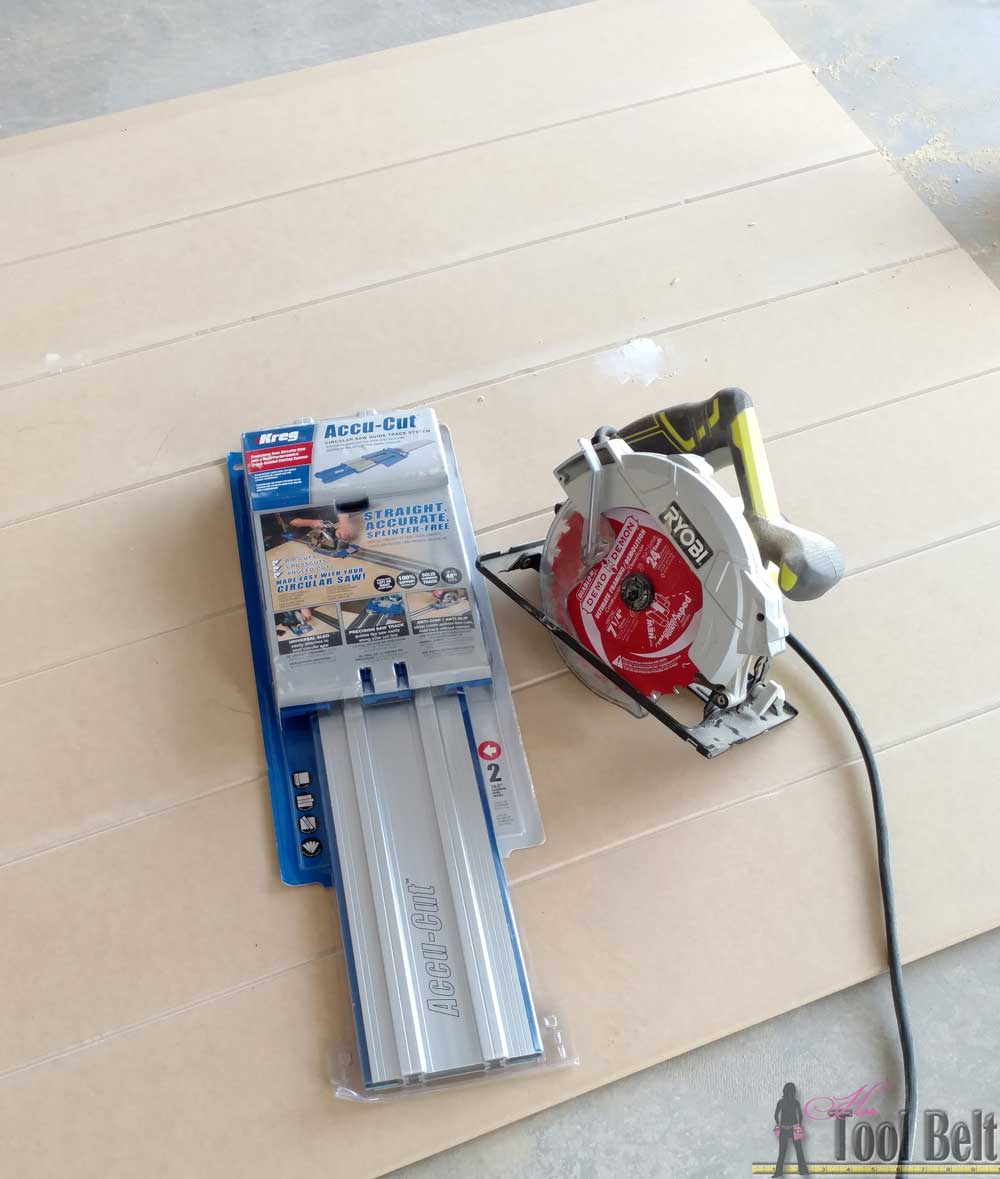
I set up the Accu-cut track and placed the trolley thing on the circular saw, easy peasy.  Note: I adjusted the height of my saw blade to cut just beyond the 1/4″ mdf and I do have a piece of scrap wood under to make sure I don’t hit the garage floor.

The first piece is cut to 70″ long and the second to 18″.  The wall in the mudroom wasn’t completely straight, so I did have to trim down the 18″ piece to fit.

Love the look of a shiplap wall but don't want the gaps between the planks. Problem solved, route grooves in a plywood sheet for the shiplap 'planked' wall look! Set by step guide and tips.

To cut the long pieces for the bottom 7″ planks, I used the Kreg rip cut and set it to 7″. It’s nice that the trolley thing works for both the accu-cut and rip-cut so you don’t have to change it out.

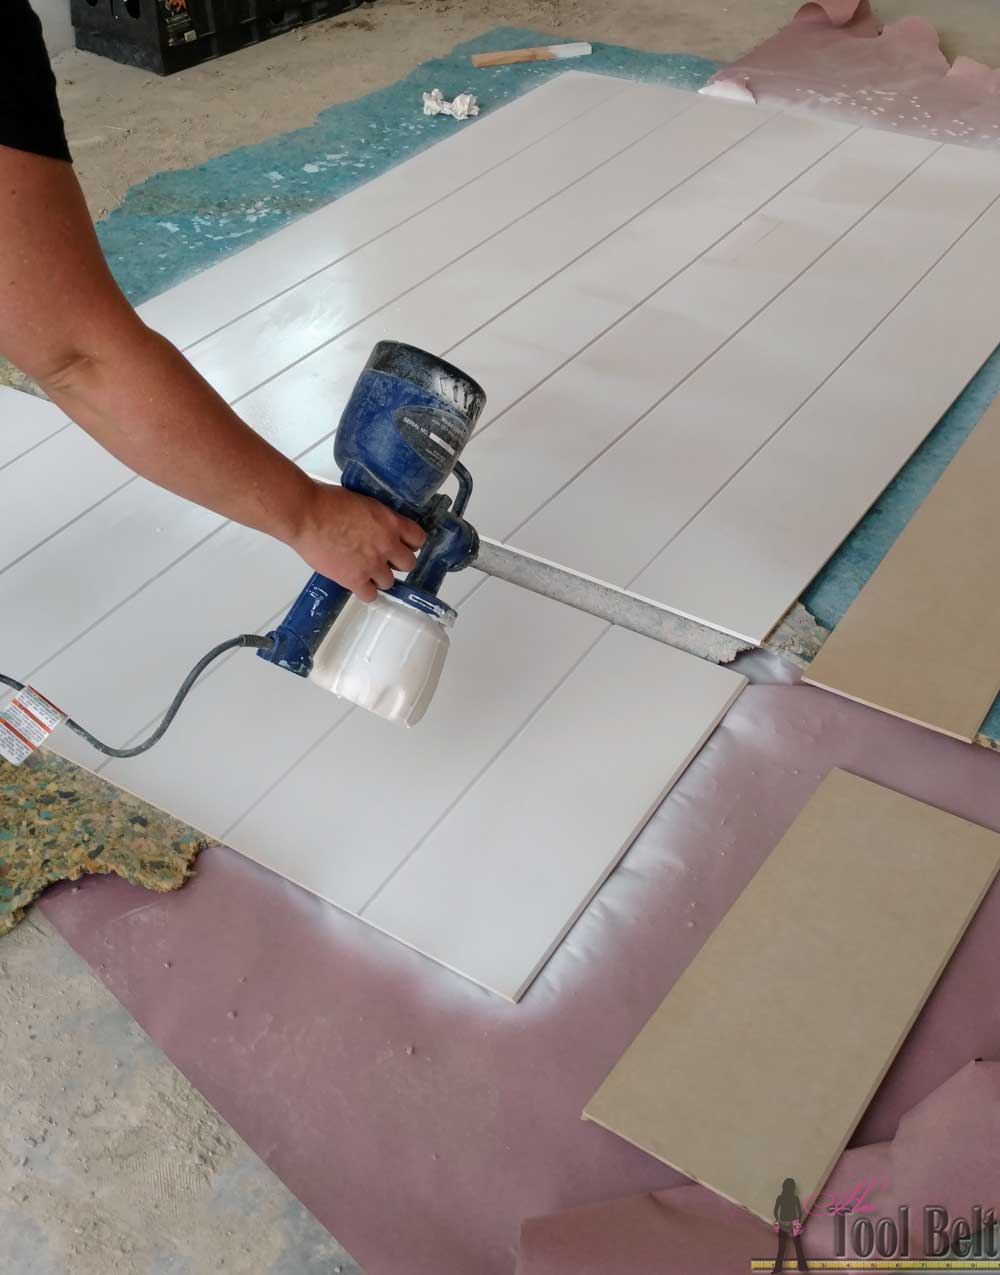
Paint the shiplap wall panels

Once all of the shiplap wall panel pieces were cut, we primed the panels. Whenever working with MDF, you HAVE to PRIME and preferably a couple of coats. In my experience you can’t get a decent finish on MDF unless primed really well, it just keeps soaking up the paint and it’ll be somewhat blotchy. In between each coat of paint, lightly sand the panels for a smooth finish.  After the primer is dry, apply 1-2 coats of paint and let that dry.

Love the look of a shiplap wall but don't want the gaps between the planks. Problem solved, route grooves in a plywood sheet for the shiplap 'planked' wall look! Set by step guide and tips.

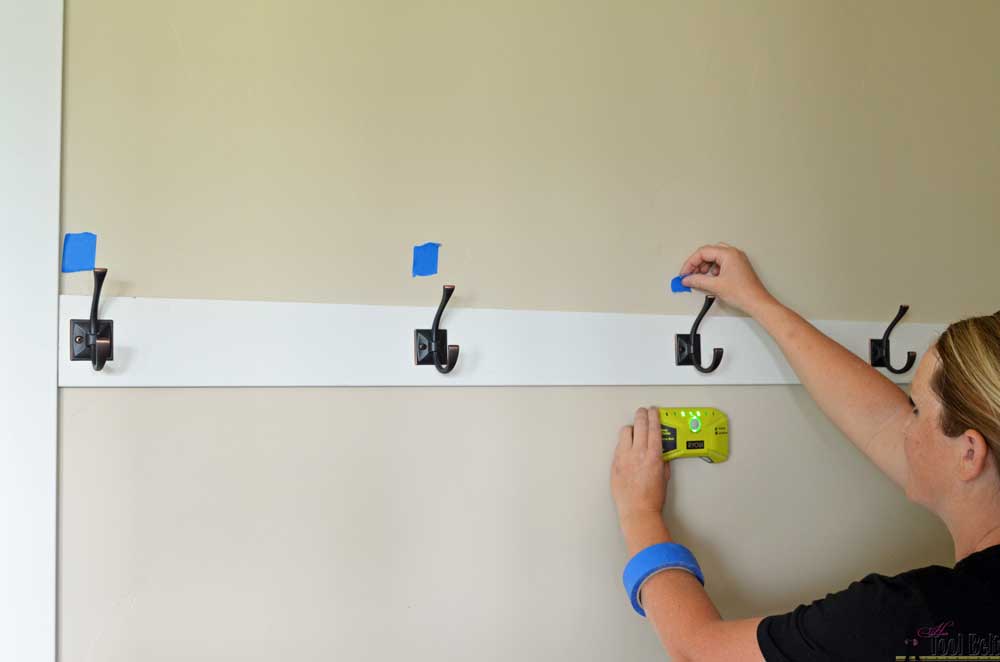
Installing the shiplap wall panels

While the paint is drying on the shiplap wall panels, we used a stud finder to mark the locations of the studs in the walls. When installing the panel, you want your brad nails to be in studs, otherwise it’s not very strong. I like to mark the studs with painters tape so it’s easy to remove later.

Love the look of a shiplap wall but don't want the gaps between the planks. Problem solved, route grooves in a plywood sheet for the shiplap 'planked' wall look! Set by step guide and tips.

After the paint on the shiplap wall panels completely dried, we lifted the panels into place.

Love the look of a shiplap wall but don't want the gaps between the planks. Problem solved, route grooves in a plywood sheet for the shiplap 'planked' wall look! Set by step guide and tips.

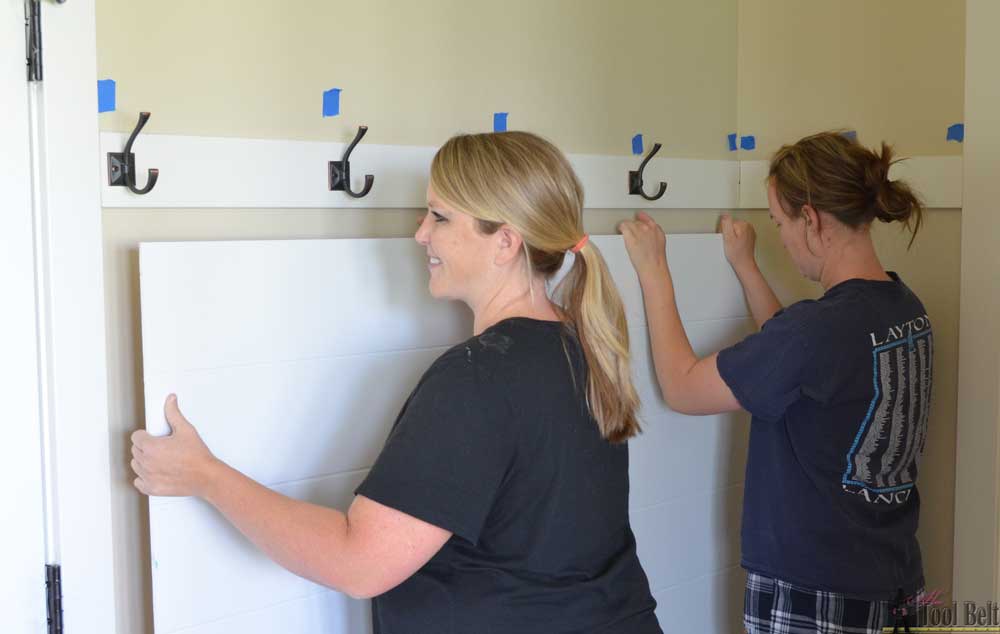
While I held the panel in place at the bottom, my sister-in-law used 2″ brad nails and the Airstrike to secure the faux shiplap wall panels to the wall.

Love the look of a shiplap wall but don't want the gaps between the planks. Problem solved, route grooves in a plywood sheet for the shiplap 'planked' wall look! Set by step guide and tips.

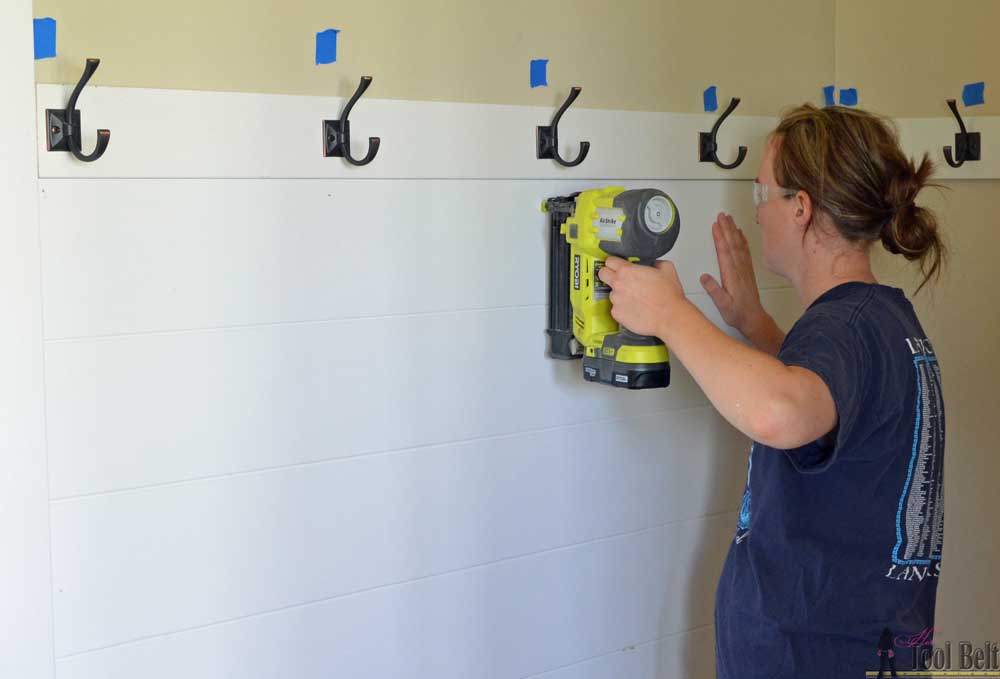
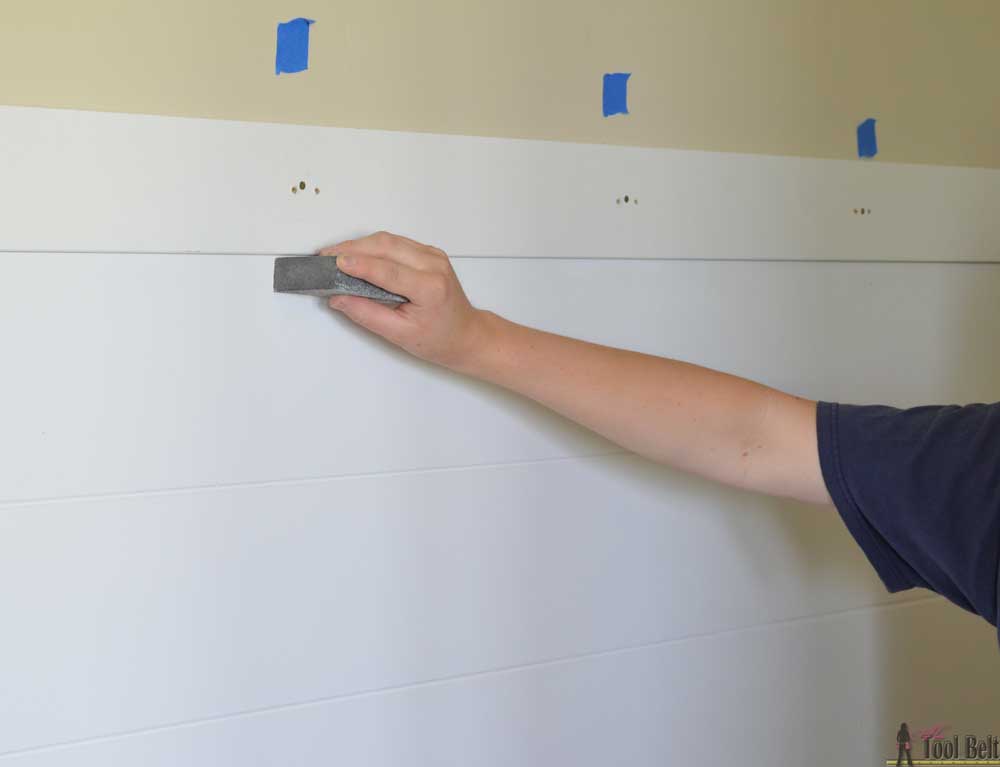
The brad nailer will sometimes leave bumps in the panel that can easily be sanded smooth with a sanding block. Then we used a little spackle to fill all of the nail holes.

Love the look of a shiplap wall but don't want the gaps between the planks. Problem solved, route grooves in a plywood sheet for the shiplap 'planked' wall look! Set by step guide and tips.

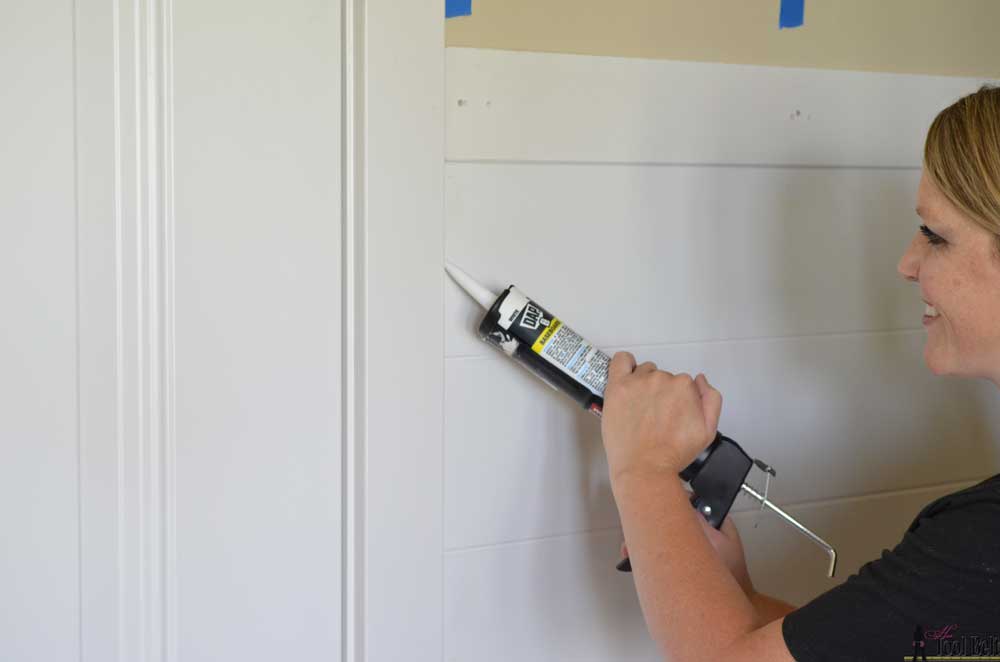
Around the outside of the shiplap wall panels and the joint between panels, I ran a bead of caulk for a seamless look. Tip: For a smooth caulk look, wet your finger and rub over the bead of caulk, repeat as needed.

Love the look of a shiplap wall but don't want the gaps between the planks. Problem solved, route grooves in a plywood sheet for the shiplap 'planked' wall look! Set by step guide and tips.

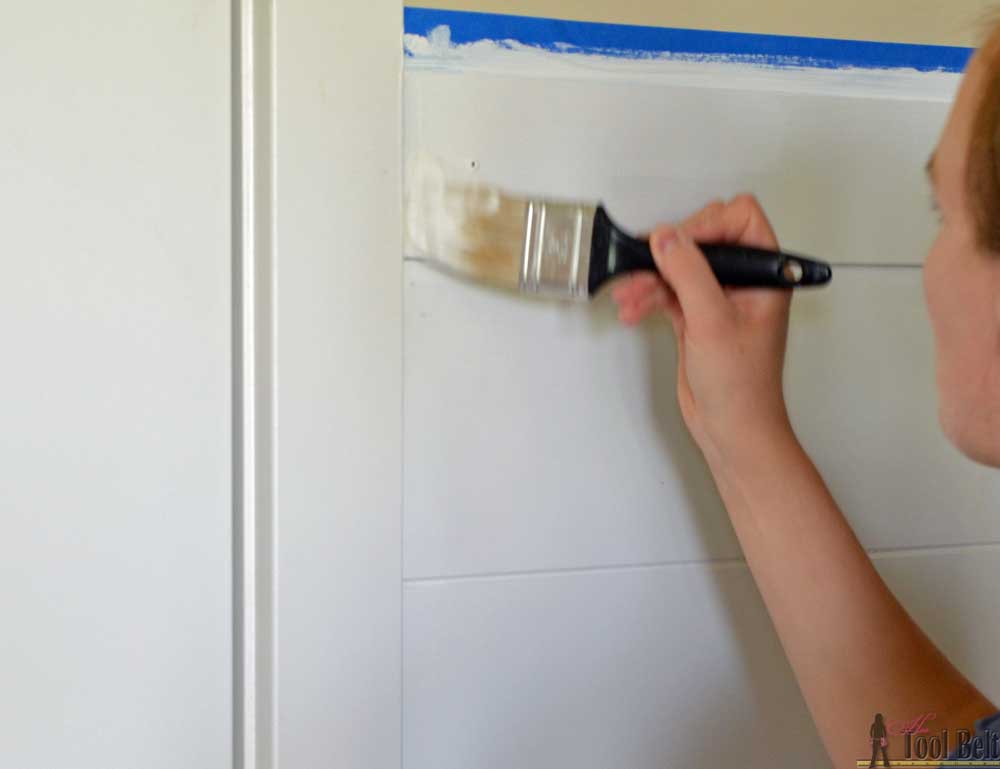
After the caulking and spackle dried, we sanded the spackle smooth.  We touched up the paint on the panel as needed, and painted that molding for the hooks. Another check off the to-do list!

Love the look of a shiplap wall but don't want the gaps between the planks. Problem solved, route grooves in a plywood sheet for the shiplap 'planked' wall look! Set by step guide and tips.

It really turned out awesome!

Love the look of a shiplap wall but don't want the gaps between the planks. Problem solved, route grooves in a plywood sheet for the shiplap 'planked' wall look! Set by step guide and tips.

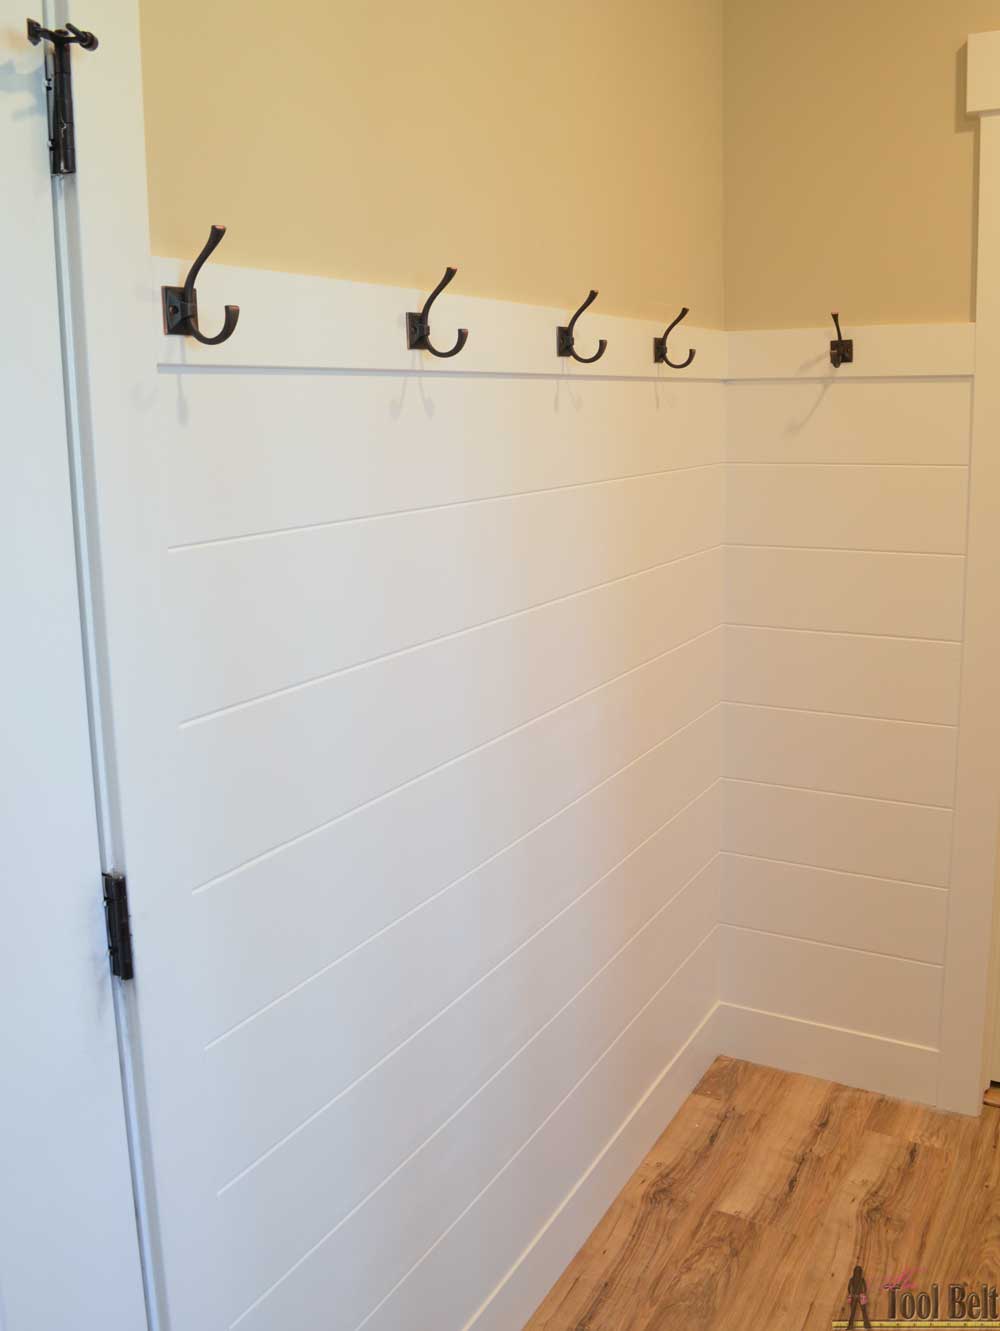
My sister-in-law couldn’t be happier! The DIY shiplap wall adds so much to the look of the mudroom, and she doesn’t have to worry about mud/dirt in between the planks.

Love the look of a shiplap wall but don't want the gaps between the planks. Problem solved, route grooves in a plywood sheet for the shiplap 'planked' wall look! Set by step guide and tips.

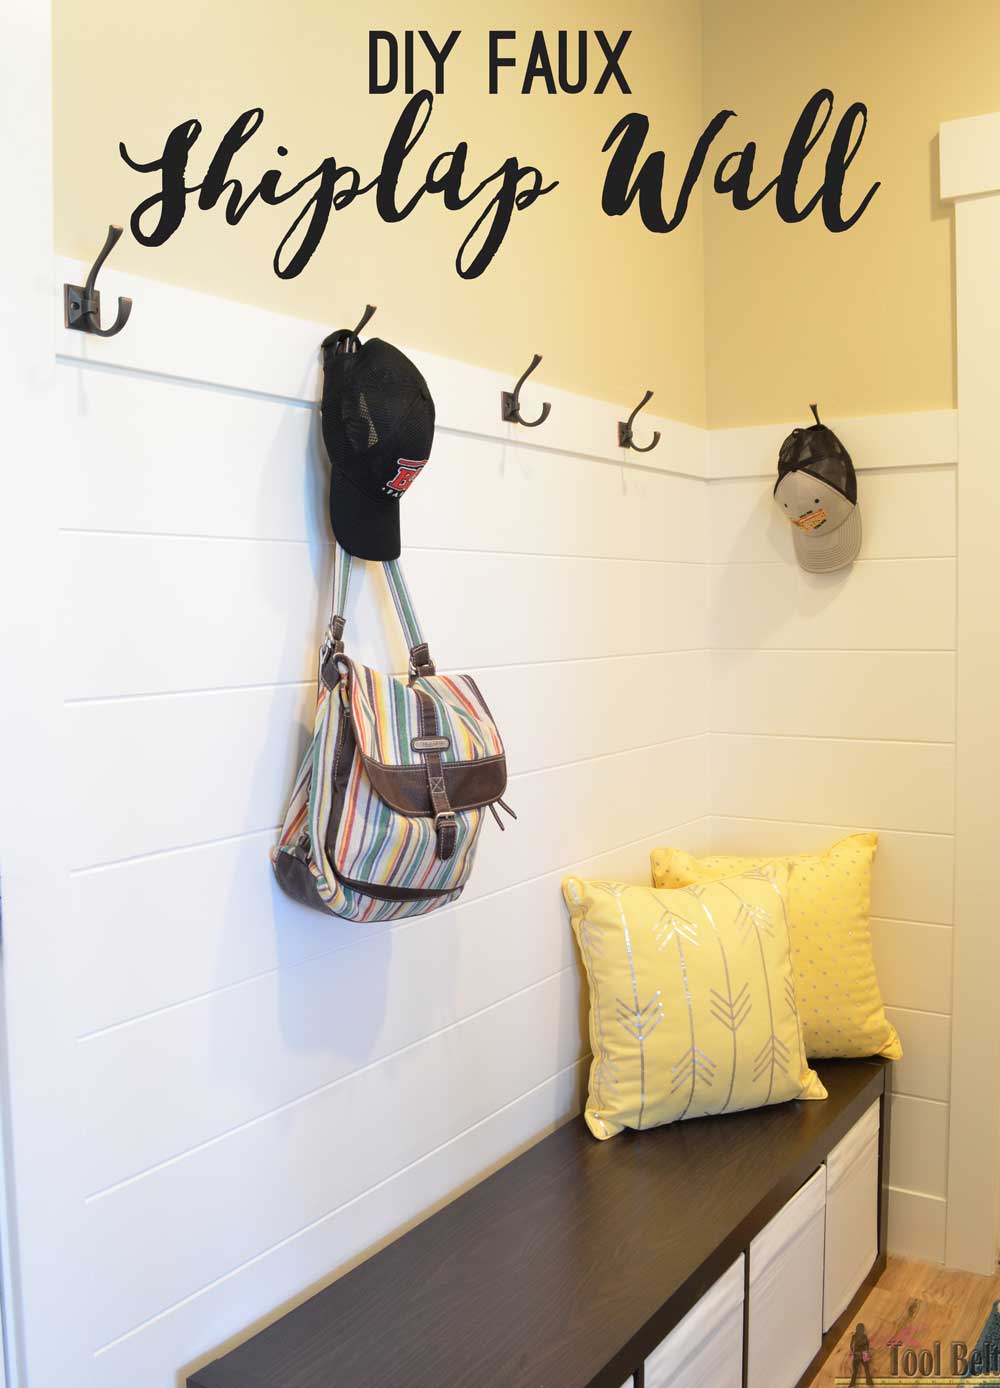
Up close of the grooves making the planked wall look.

Love the look of a shiplap wall but don't want the gaps between the planks. Problem solved, route grooves in a plywood sheet for the shiplap 'planked' wall look! Set by step guide and tips.

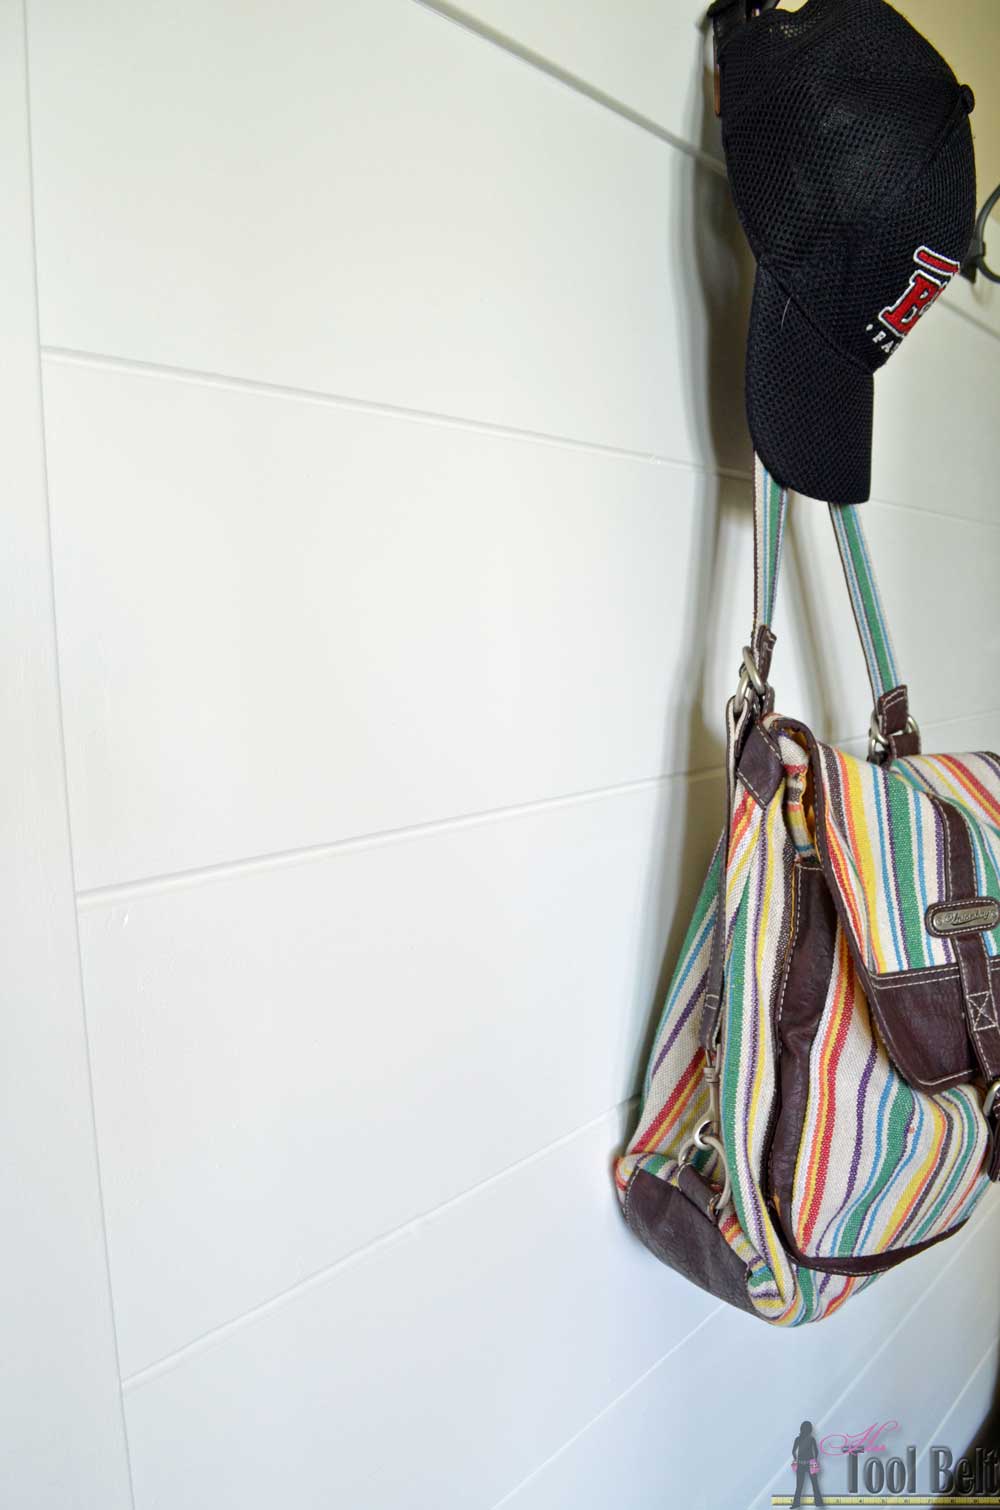
The cute hooks are Liberty Ruavista and the cubby bench is the IKEA Kallax.

I am going to do this! Get the 'planked' wall look without all of those gaps.

Thanks for pinning.

Love the look of a shiplap wall but don't want the gaps between the planks. Problem solved, route grooves in a plywood sheet for the shiplap 'planked' wall look! Set by step guide and tips.

Related

Filed Under: Home Improvement, Projects Tagged With: farmhouse style, home improvement, shiplap

Attention: Any do-it-yourself project involves risk of some sort. Your tools, materials, and skills will vary, as will the conditions at your work site. Hertoolbelt LLC will not assume any responsibility or liability for damages or losses sustained or incurred in the course of your project or in the use of the item you create. Always follow the manufacturer's operating instructions in the use of tools, check and follow your local building codes, and observe all commonly accepted safety precautions.

Comments

  1. Jessica says

    July 29, 2017 at 8:54 pm

    So this would not be possible to do with plywood? Because it might splinter? Or do you think sanding it after using the router would take care of that?

    Reply
    • Amy says

      July 30, 2017 at 7:57 pm

      I think it is possible to do on plywood. I’d try it on a practice piece first to make sure it looks good. Sometimes plywood will have voids in the layers, but you could fill that with spackle or wood filler.

      I used the V-groove bit to make the details on these LEGO totes in 1/2″ plywood, but I didn’t make the groove go as deep. It worked great. https://www.ryobitools.com/nation/projects/diy-portable-lego-tote_9553

      Reply
  2. SHARON CLERC says

    March 23, 2018 at 3:56 pm

    I’m just wondering, if instead of using a router to make the MDF look like planks…why not just use a 4x 8 ft piece of paneling that already looks like planks and install it horizontally?

    Reply
    • Amy says

      March 26, 2018 at 1:23 pm

      Great idea, we’ll have to try that.

      Reply

Leave a Reply Cancel reply

Your email address will not be published. Required fields are marked *

This site uses Akismet to reduce spam. Learn how your comment data is processed.

Search Her Tool Belt

Follow Me!

  • Bloglovin
  • Email
  • Facebook
  • Instagram
  • Pinterest
  • RSS
  • Twitter
  • YouTube

Top Posts & Pages

Left Offset Bathroom Vanity

Check out more projects

Copyright

Thank you for wanting to share my work! No need for my permission to pin my work or to feature 1 or 2 pictures with full watermarks intact that link back to the original project. Please do NOT copy tutorials.

Disclosure & Privacy Policy

Disclaimer

Copyright © 2025 · Magazine Pro Theme on Genesis Framework · WordPress · Log in

This website uses cookies to improve your experience. We'll assume you're ok with this, but you can opt-out if you wish.Accept Read More
Privacy & Cookies Policy

Privacy Overview

This website uses cookies to improve your experience while you navigate through the website. Out of these, the cookies that are categorized as necessary are stored on your browser as they are essential for the working of basic functionalities of the website. We also use third-party cookies that help us analyze and understand how you use this website. These cookies will be stored in your browser only with your consent. You also have the option to opt-out of these cookies. But opting out of some of these cookies may affect your browsing experience.
Necessary
Always Enabled
Necessary cookies are absolutely essential for the website to function properly. This category only includes cookies that ensures basic functionalities and security features of the website. These cookies do not store any personal information.
Non-necessary
Any cookies that may not be particularly necessary for the website to function and is used specifically to collect user personal data via analytics, ads, other embedded contents are termed as non-necessary cookies. It is mandatory to procure user consent prior to running these cookies on your website.
SAVE & ACCEPT