Hi and welcome to the Home Depot DIY Workshop (Do it yourself) Virtual Game Party! My kids are beyond excited about today’s project. They have been very eager to help build this project! Before we get to my project, this is the fun Father’s Day Football Toss project for June’s DIY workshop at your local Home Depot on Saturday, June 18 from 10-11:30 am.
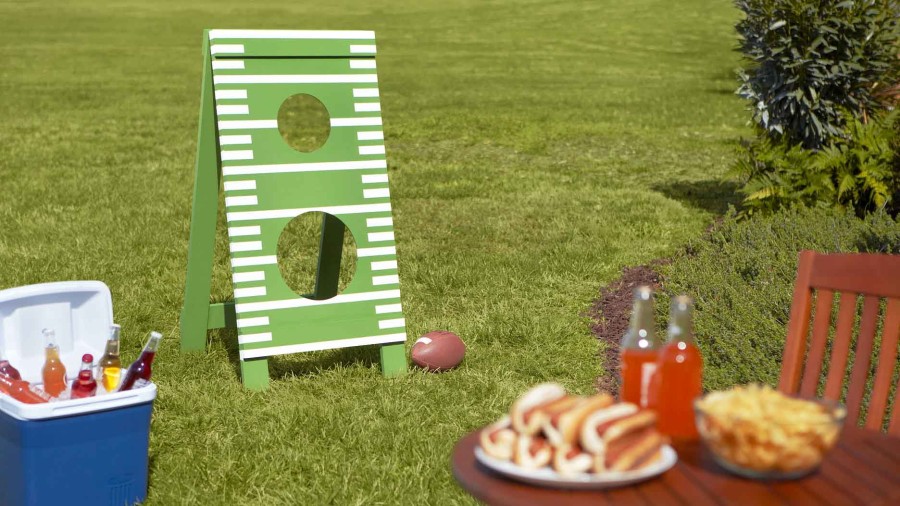
Here is what you’ll learn at the free demonstrative workshop: Learn to build an outdoor football toss game. Join our workshop and learn to properly measure and accurately cut wood; safely operate both circular and reciprocating saws and a drill; and paint or stain your project like a champ with grid lines straight from the gridiron. The end result will be the skills to craft an outdoor game that will keep your family entertained all summer long.
The Home Depot offers free workshops at all of their locations for do-it-yourselfer’s of all ages and experience levels.
- There are three types of Workshops offered – Do-It Yourself (DIY), Do-It-Herself (DIH) and Kids.
- Customers can learn how to build décor projects, how to make easy home repairs and how to operate tools through demonstrations and step-by-step instructions.
- Visit http://workshops.homedepot.com to learn more.
Register for the Workshop – June 18 at 10 am
Make sure to get registered to attend the free workshop at your local Home Depot on Saturday, June 18 at 10 am! ——> Register Here
Share your project creations with hashtag #DIYWorkshop
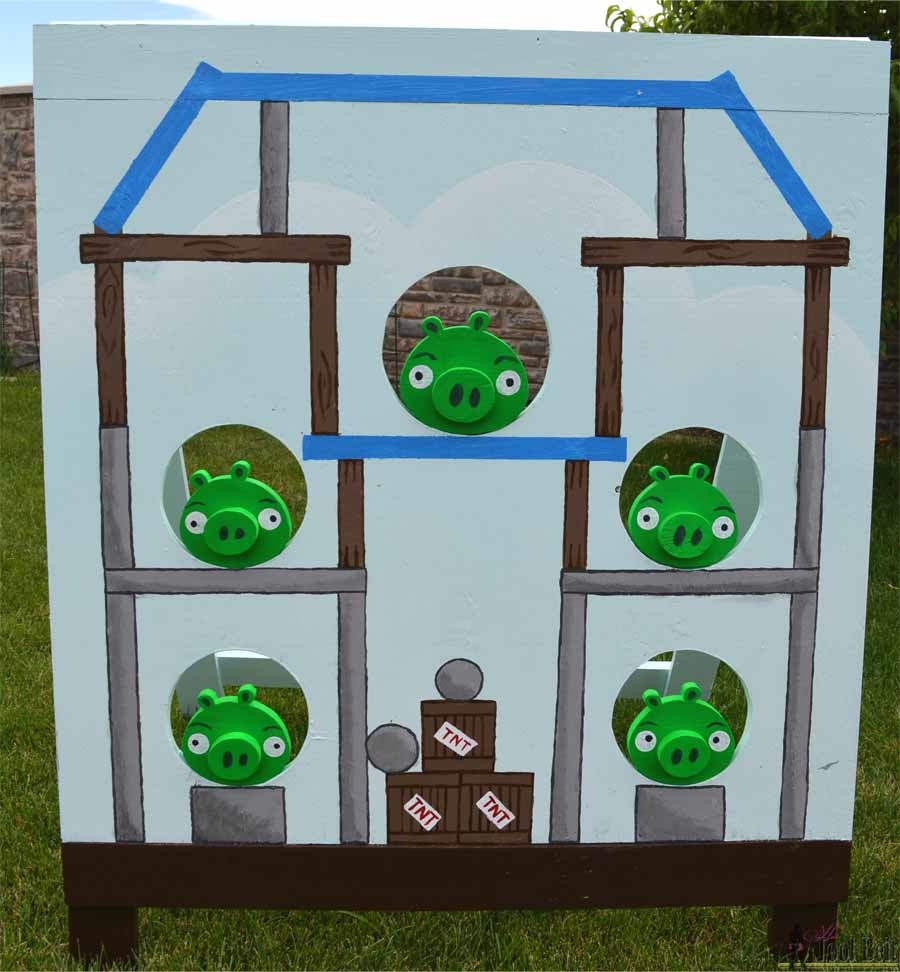
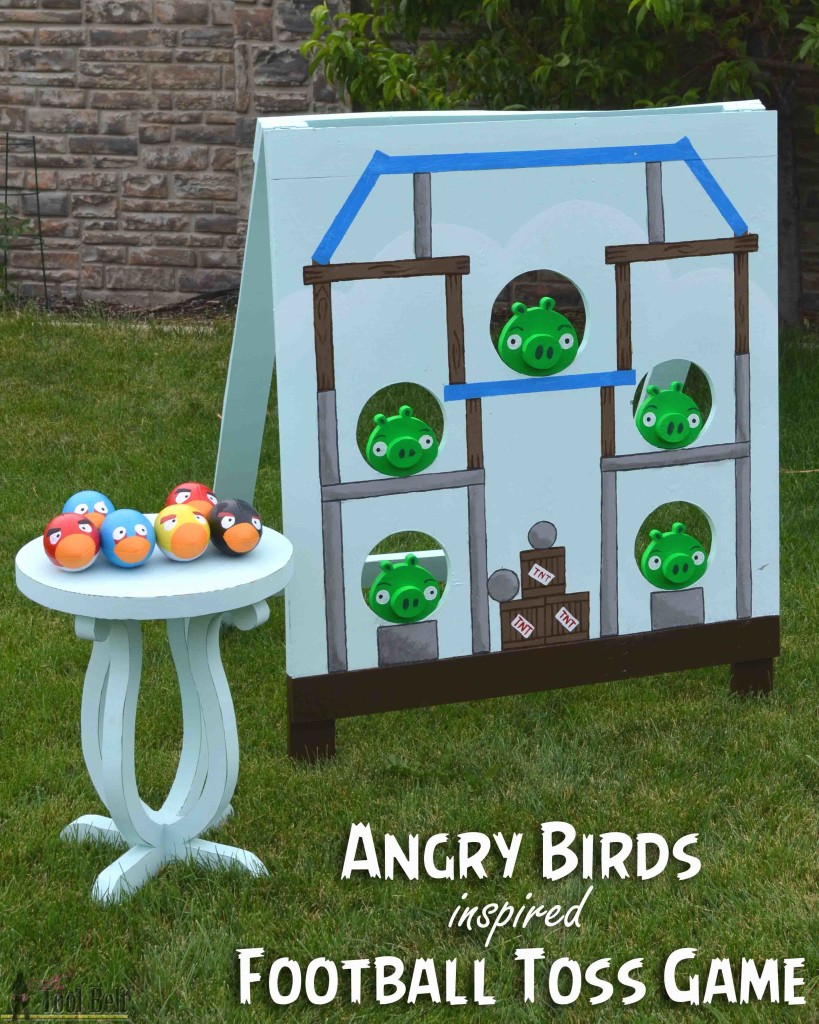
Like many kids (and grown up kids 😉 ), my kids love those little angry birds and bad piggies! When I saw little foam footballs at The Home Depot, inspiration struck. I thought it would be fun to make an Angry Bird inspired, ‘angry football’ toss game.
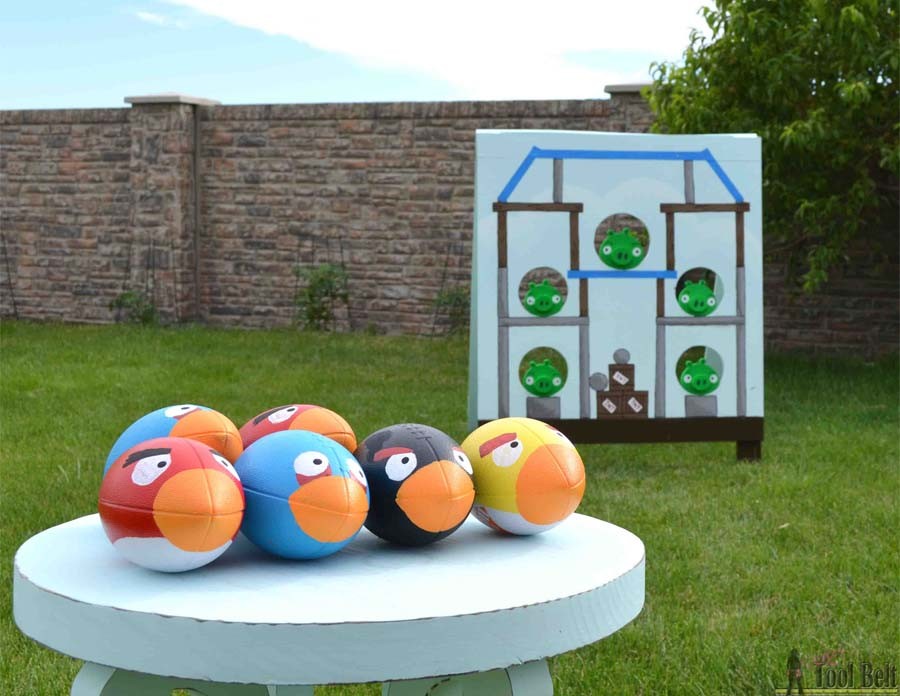
How to make an Angry Birds Inspired Football Toss Game
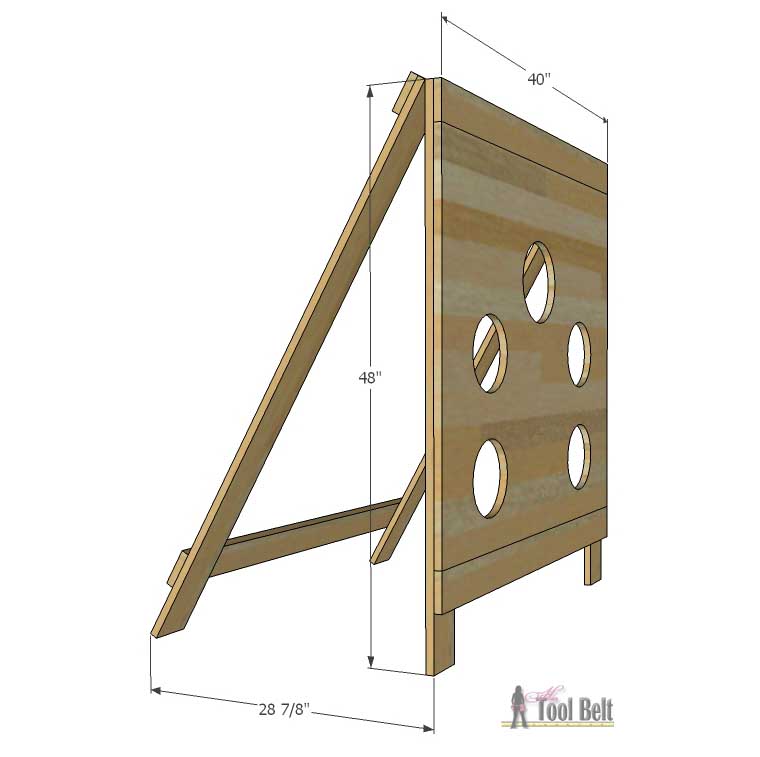
If you are making the Home Depot Father’s Day Football toss, here are a few modification I made from the original plan. To be honest, I knew we needed something a little closer to the broad side of a barn 🙂 and made our football toss game wider. I substituted 3/4″ plywood for 1/2″ plywood because the pigs are attached with hinges and didn’t want screws poking out (although I think you can probably get away with 1/2″). I also made the back stand longer so the front panel will stand vertical, I was worried about the pigs falling back without being hit if the front panel was on an angle.
Materials
- 4 – 1″ x 4″ x 8′ boards
- 1/2 sheet 3/4″ plywood
- 1 1/4″ screws
- 2 – 2 1/2″ narrow utility hinges
- 5 – 1″ utility hinges
- wood glue
- sand paper
- paint primer
- paint
- 6 foam footballs
- 1 1/4″ brad nails
Cut List
- 3/4″ x 40″ x 36″ plywood
- 2 – 3/4″ x 3 1/2″ x 55″ boards
- 2 – 3/4″ x 3 1/2″ x 48″ boards
- 4 – 3/4″ x 3 1/2″ x 40 boards
- 5 pigs and noses from excess plywood
Step 1
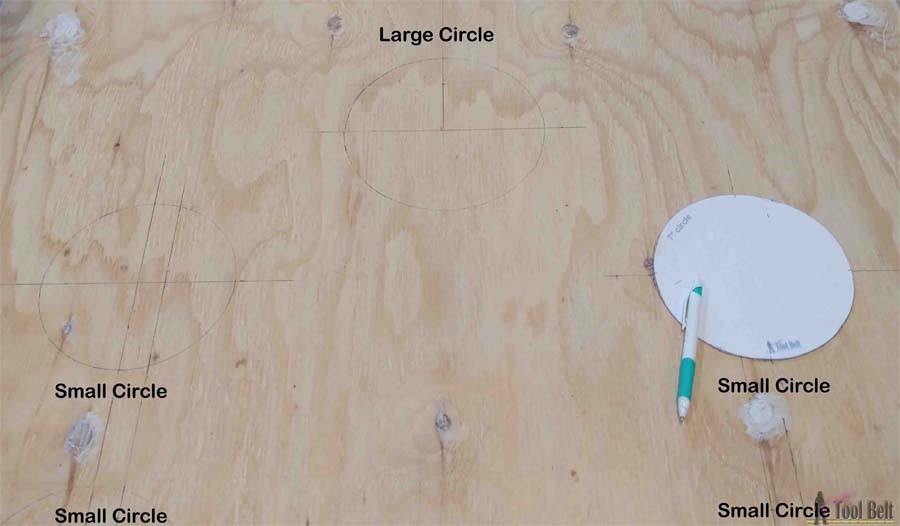
Cut the plywood to size. This game has 2 holes sizes, 8″ and 7″. The top pig is in an 8″ hole and the other 4 pigs are in 7″ holes. I made a quick football toss circle templates to help me draw the circles. I marked the location of the circles on the plywood.
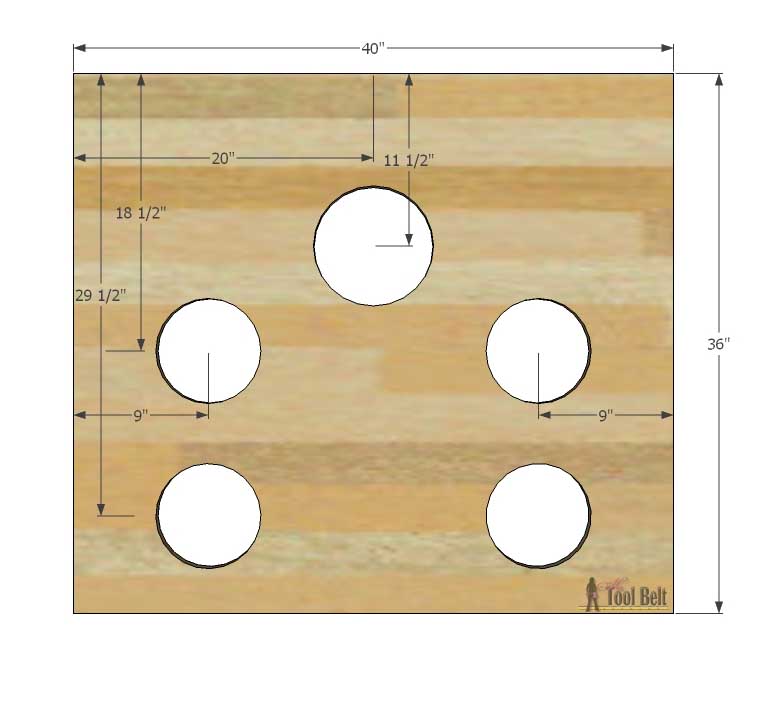
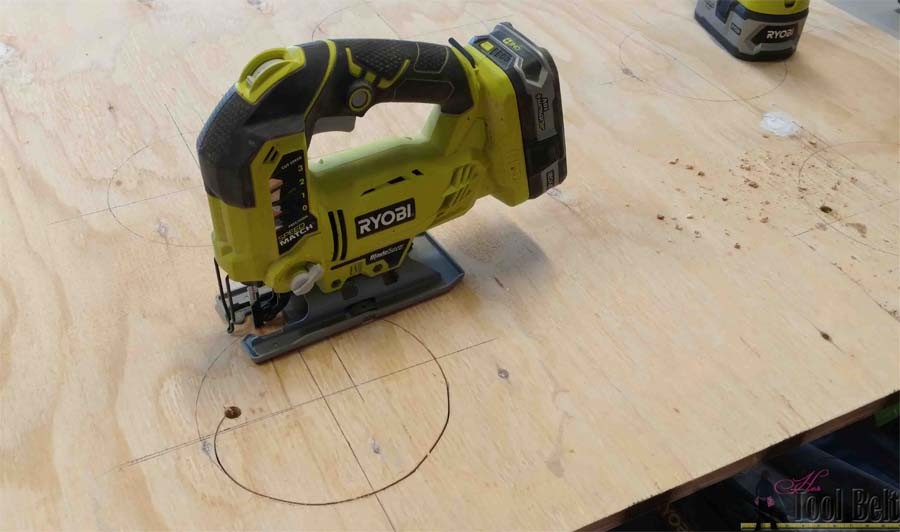
Drill a hole in each circle that will fit a jig saw blade and cut out the circles. Sand the plywood as necessary
Step 2
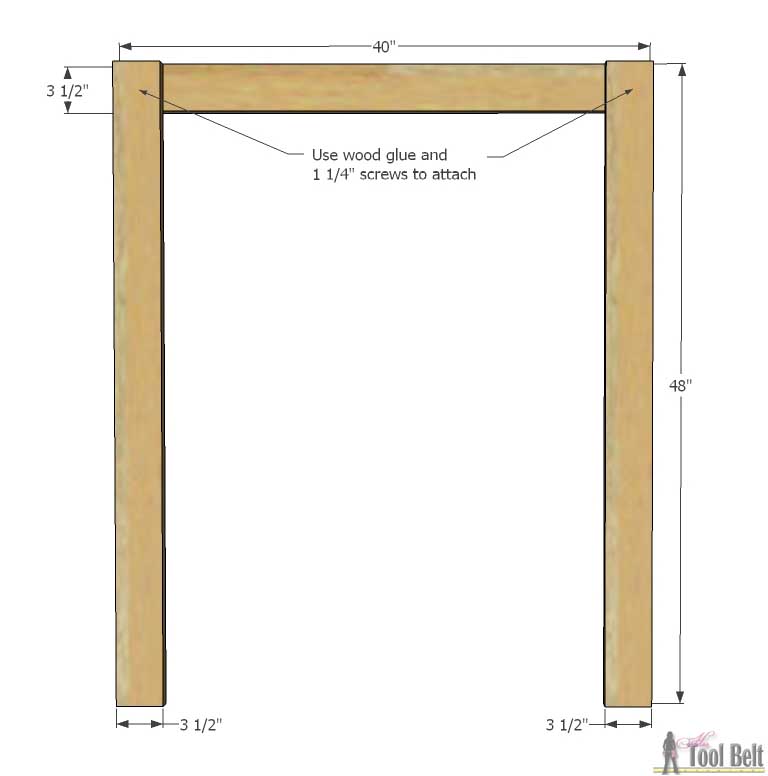
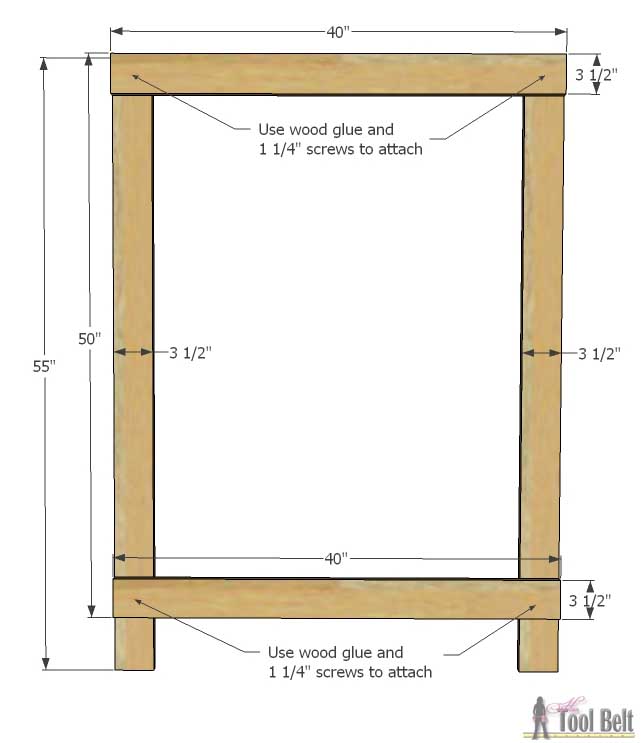
Cut the 1×4 pieces for the stands. Place a 40″ board flat and place 2- 48″ boards flush with the top and both ends of the 40″ board. Use wood glue and 1 1/4″ screws to attach the 48″ boards to the 40″ board.
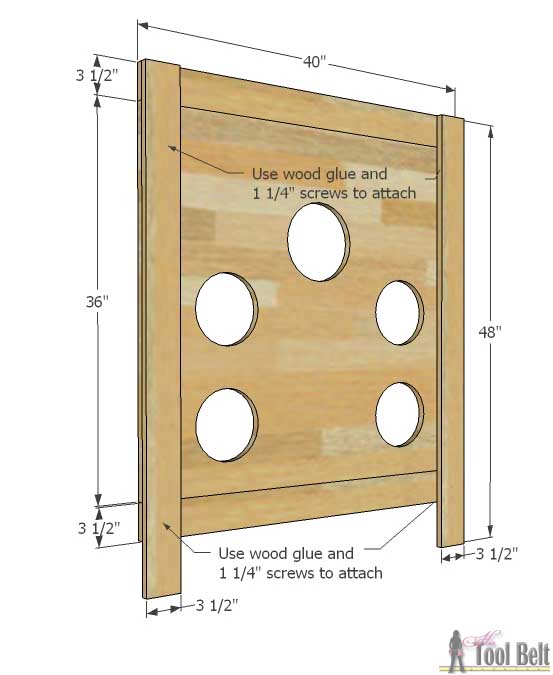
Under the 48″ boards, place the plywood panel then another 40″ board at the bottom. Use wood glue and 1 1/4″ screws to attach the 48″ boards to the plywood panel and bottom 40″ board. (This way all of the screw heads are on the backside of the panel.)
Assemble the back stand similarly. Place down 2- 55″ boards with a 40″ board flush with the tops, use wood glue and 1 1/4″ screws to attach the top 40″ board to the 55″ legs. At approximately 5″ from the bottom of the legs, attach another 40″ board with wood glue and 1 1/4″ screws.
Step 3
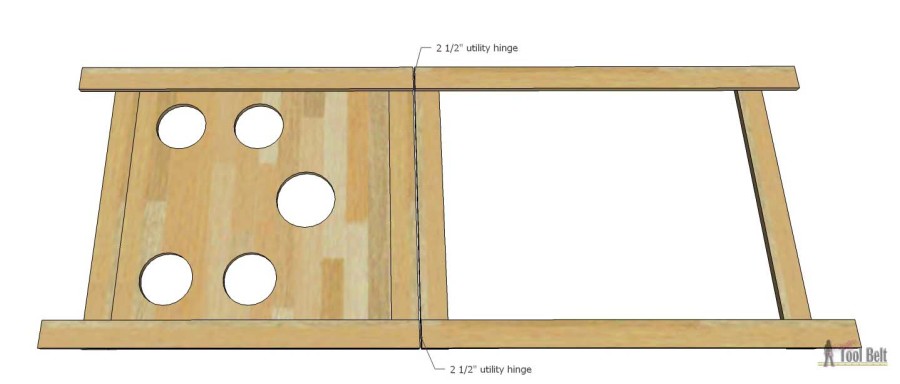
Lay the front panel and back stand face down with the top to the top. Separate the tops by about 1/4″. Mark and pre-drill holes for a hinge on each side. Install 2 1/2″ utility hinges.
Sand the panel and stand as needed.
Step 4
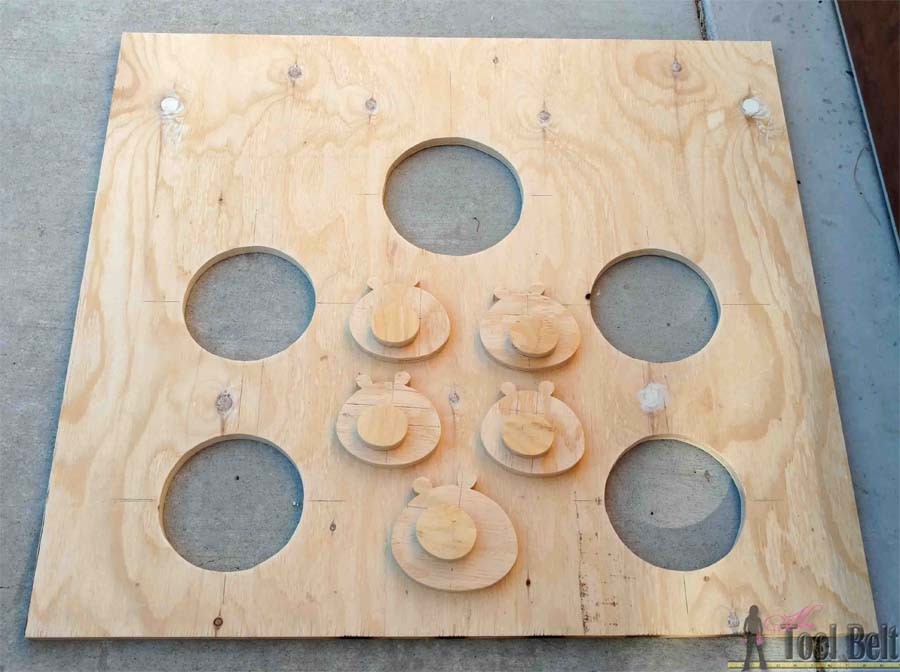
I used the wood from the circle cut outs and excess plywood to cut out some little piggies. Here is a template for both a large pig and small pigs. football toss pig outlines Trace the pigs onto plywood, then cut out the noses and trace them on the plywood. 1 big pig and 4 little pigs. Use a jig saw, band saw or scroll saw to cut out the plywood pigs. Sand as necessary.
Step 5
Here comes the fun part, painting (insert sarcastic tone 🙂 ). I’m not sure what I was thinking when I thought I could paint something like this…my hand painting skills are really lacking. But hey, it’s good enough for my family and my 6 year old was impressed and that’s all that counts!
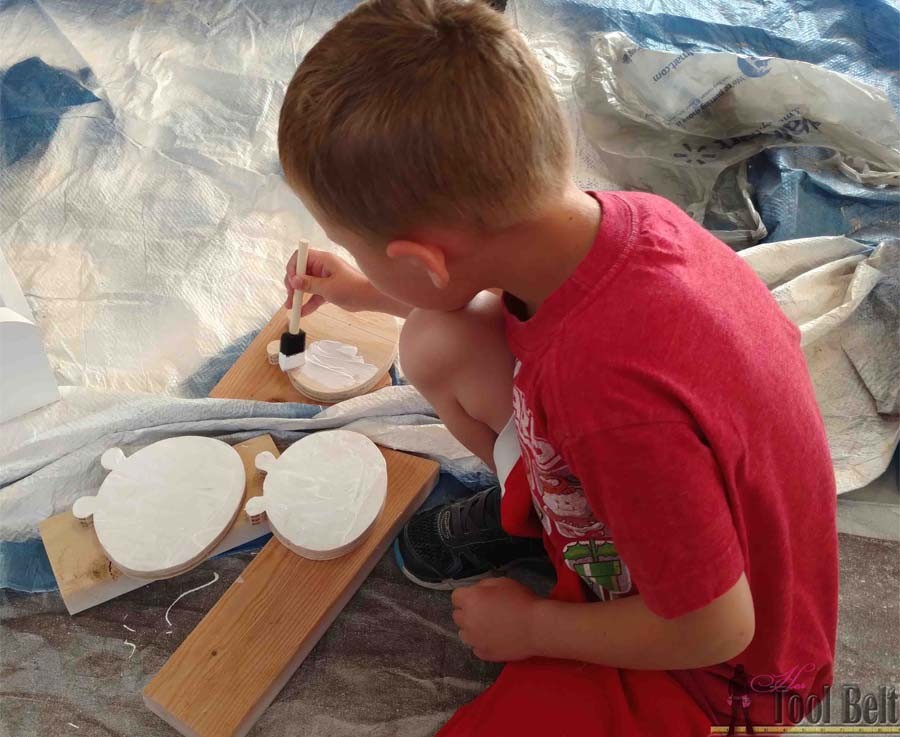
I started off by priming all of the wood and letting it dry with my very excited helper.
I painted the panel and stand in a light aqua color (same one used in my mudroom). From there I used a screen shot of one of the Angry Bird levels to loosely base my background off of. I picked up some brown, gray, blue, etc sample paints for the details, mixing in white to make lighter colors where needed. I used painters tape to create lines for the wood, stone, glass and TNT boxes. After those all tried, I attempted to hand paint the details on.
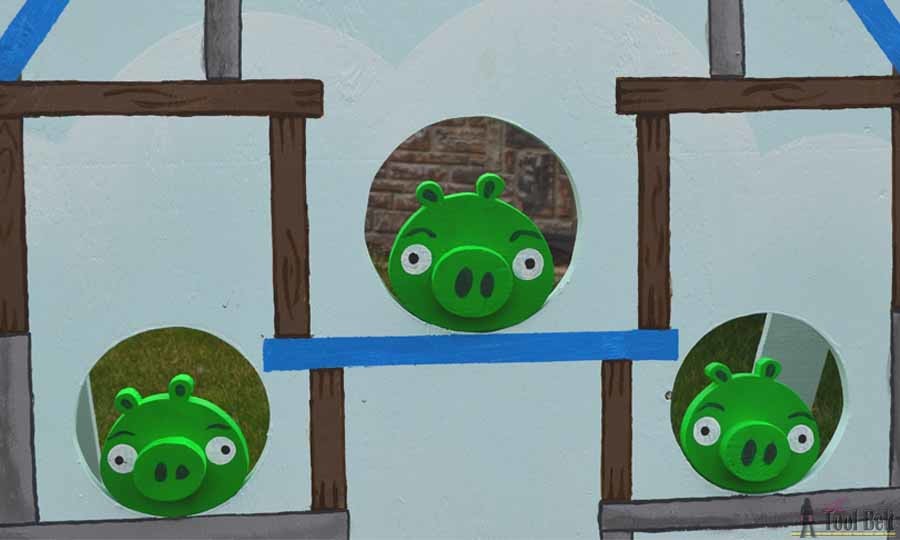
I painted the pigs with Rustoleum Fluorescent green spray paint. I glued the noses on and used 1 1/4″ brad nails to help secure in place.
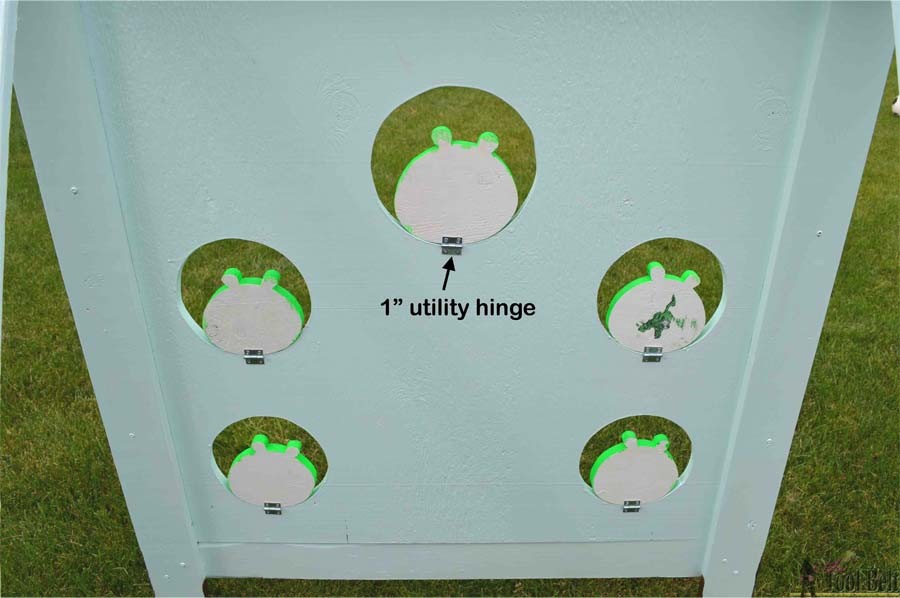
 Once all of the paint dried, I attached the pigs to the back of the panel with a 1″ utility hinge.
Step 6
I started out by painting the foam footballs with spray paint and letting that dry. If the bird had a white belly, then I masked off a belly in the white half off of the football.
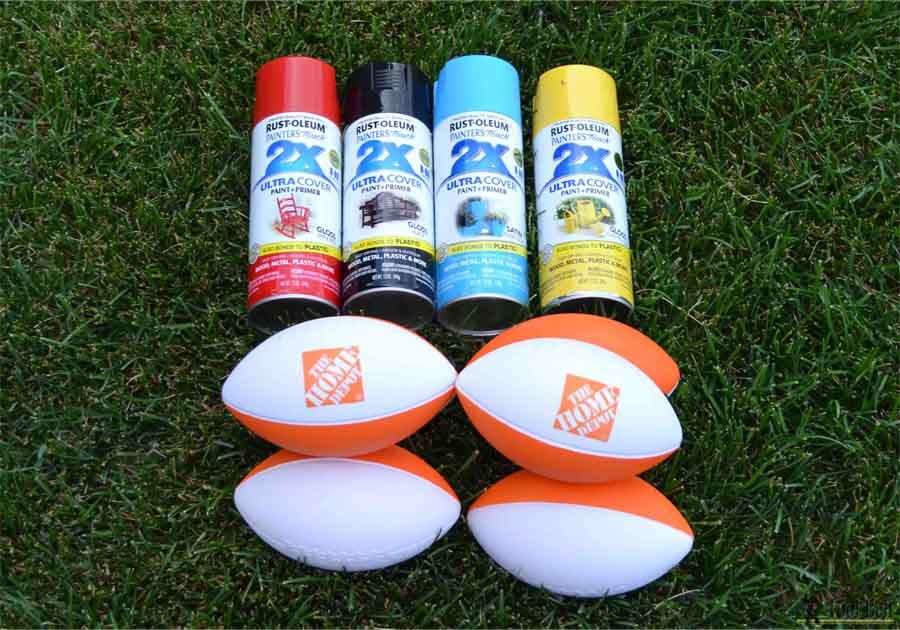
Then I painted beaks with orange paint, eyes white, black pupils and some with red highlights.
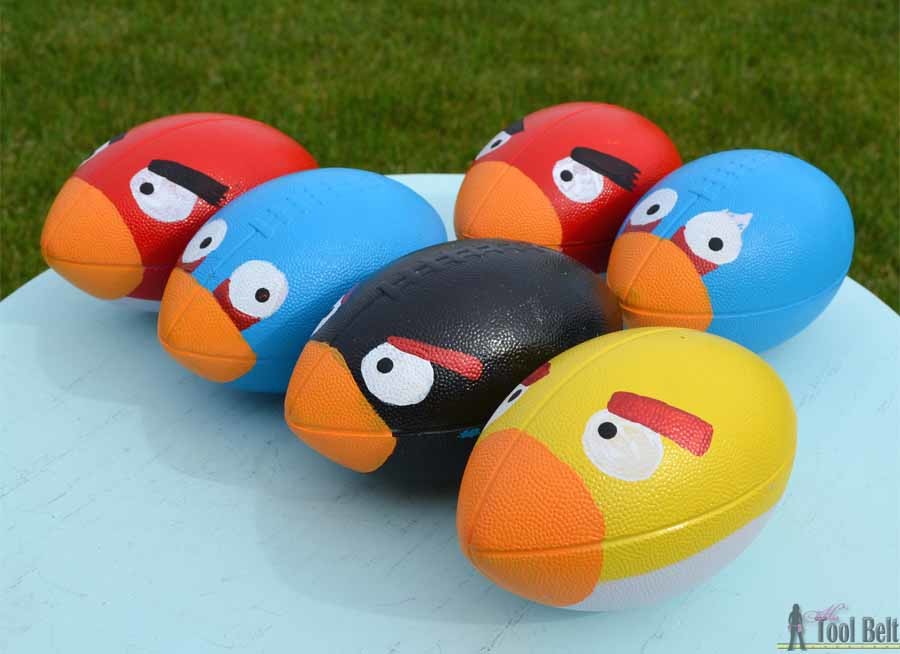
The paint did crack on the footballs, after a while of being thrown at the panel. I’m not sure what the answer is there, but I’ll keep looking.
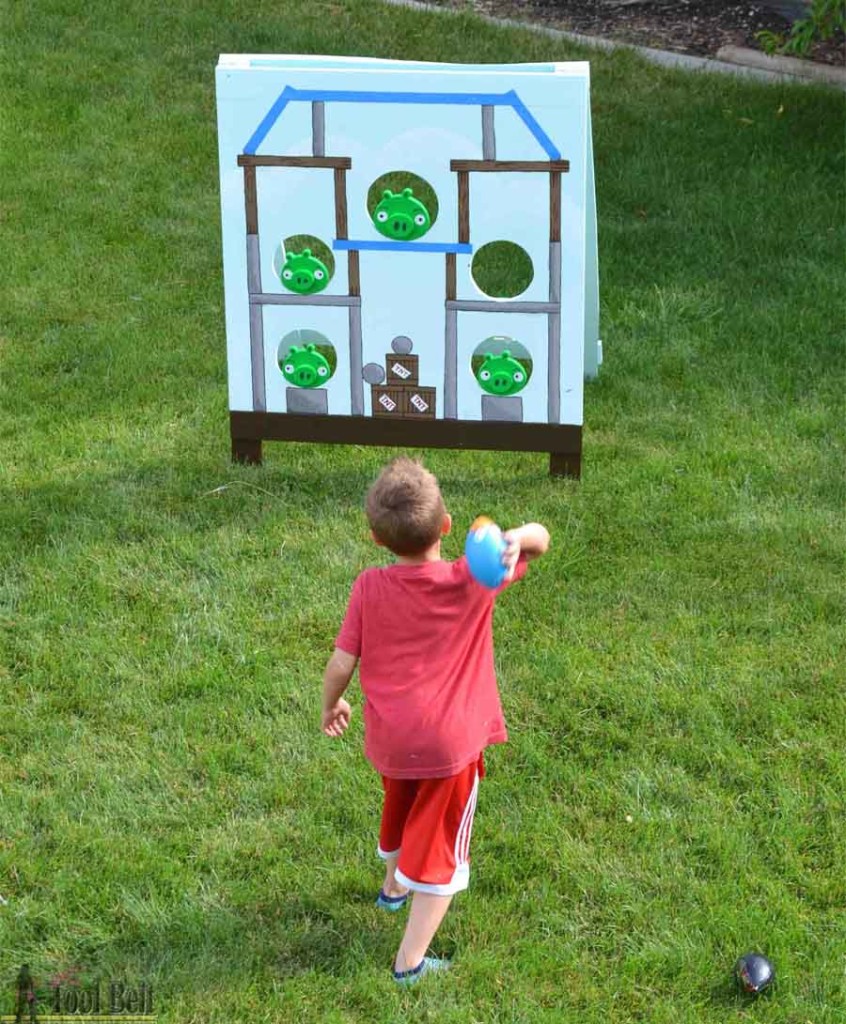
My kids are having a blast playing with the football toss game.
Thanks for pinning!
Check out how 24 others customized their football toss game:
- Fix This Build That
- Field Treasure Designs
- John Malecki
- The Handmade Home
- Rogue Engineer
- Mom 4 Real
- House by Hoff
- Her Toolbelt
- Life On Virginia Street
- Infarrantly Creative
- Cherished Bliss
- Pneumatic Addict
- Here Comes Sun
- Remodelando La Casa
- Build Basic
- House of Wood
- Confessions of a Serial Do It Yourself Blog
- Our Pinteresting Family
- Salvage Sister and Mister
- H2O Bungalow
- That’s My Letter
- Finding Home Farms
- I am a Homemaker
- Reality Daydream
- The Rugged Rooster
This post was sponsored by The Home Depot, all opinions and ideas are my own
Linked up to Link Parties, Remodelaholic, Savvy Southern Style, HomestoriesAtoZ
My kids are going to love this when I show them your version after school. How fun!!
This is the greatest idea! My kids would LOVE this!
I will probably have to make one now…and quite honestly your painting skills are awesome! My kids are going to flip when they see this!
Amy… Are you kidding me? This project is awesome! It makes me want to play too! We know whose house will be popular this summer on your block! Kudos to you, friend, you knocked it out of the ballpark!
This is such a fun version! I want to play it too. 🙂 The crazy birds and piggies are the cutest!
OMG! That is extremely cute and fun. Got to do one for my grandson. Thanks for the idea!