White craftsman mantel and shiplap wall makeover is sponsored by The Home Depot. I have been compensated for my time and provided with product (tools). All ideas and opinions are my own. This post contains some affiliate links for your convenience. Click here to read my full disclosure policy.
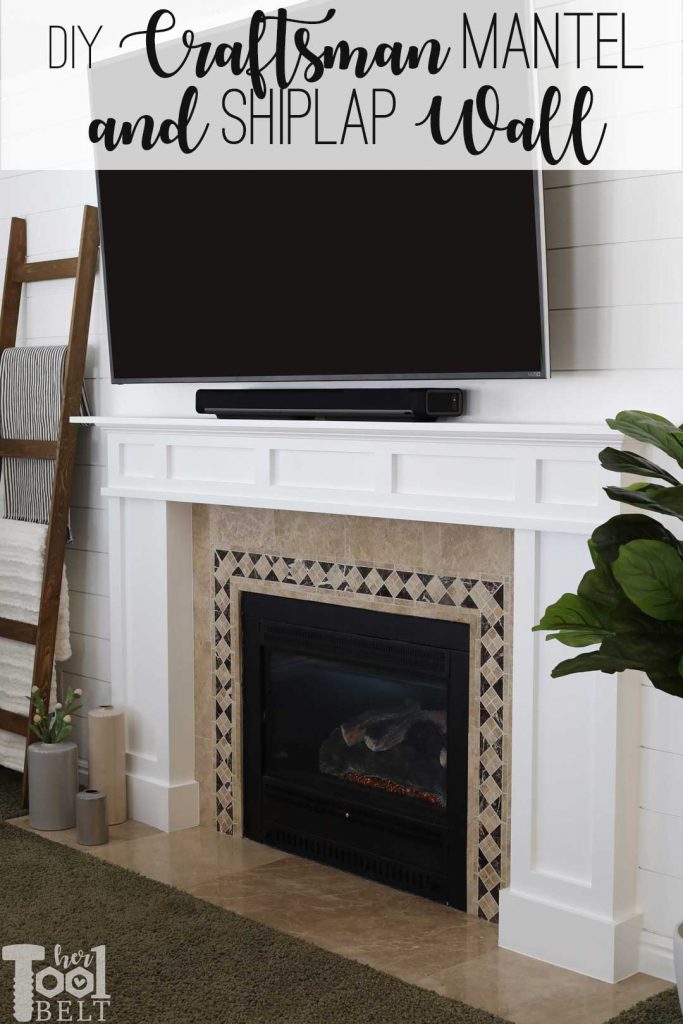
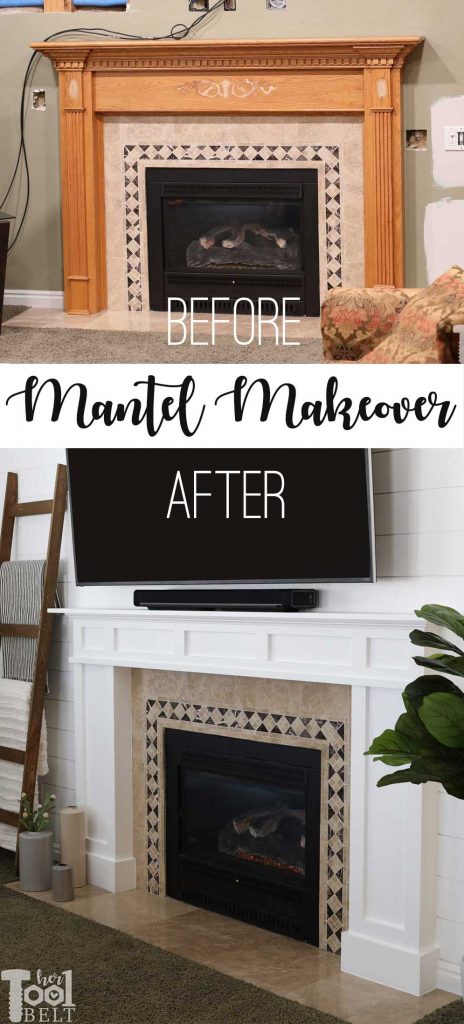
My Aunt’s house was built in the early 90’s, when honey oak was all the rage. She’s had a few updates along the way, but she is ready to get rid of her honey oak mantel and go light and bright with a modern craftsman mantel and shiplap wall. One major goal of this makeover is to mount her large 75″ TV above her fireplace. The current oak mantel is too tall to mount the TV and it is not wide enough to look balanced with the TV.
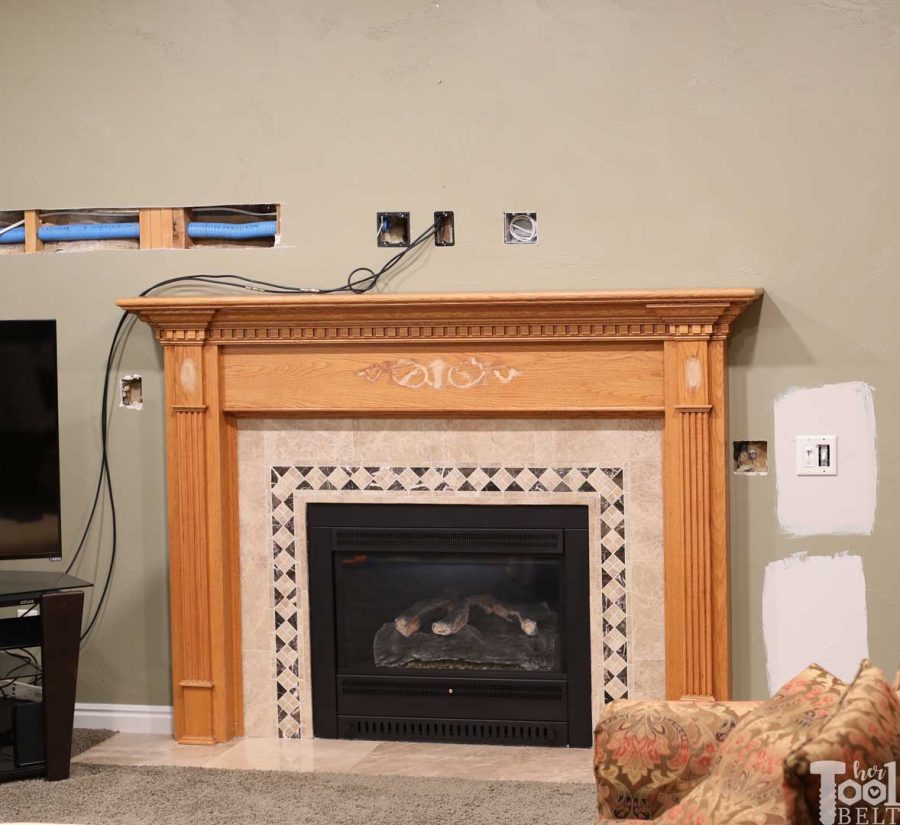
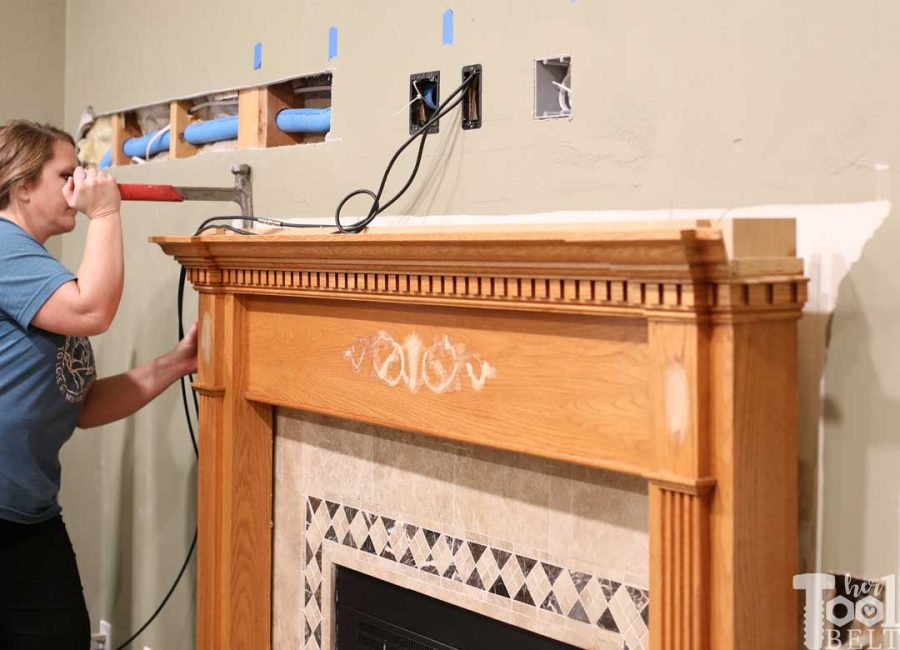
Before I came to help her with the mantel and shiplap wall, she had an electrician come and move some outlets and put a cord tube (blue) in the wall so she won’t have cords showing.
Mantel Before
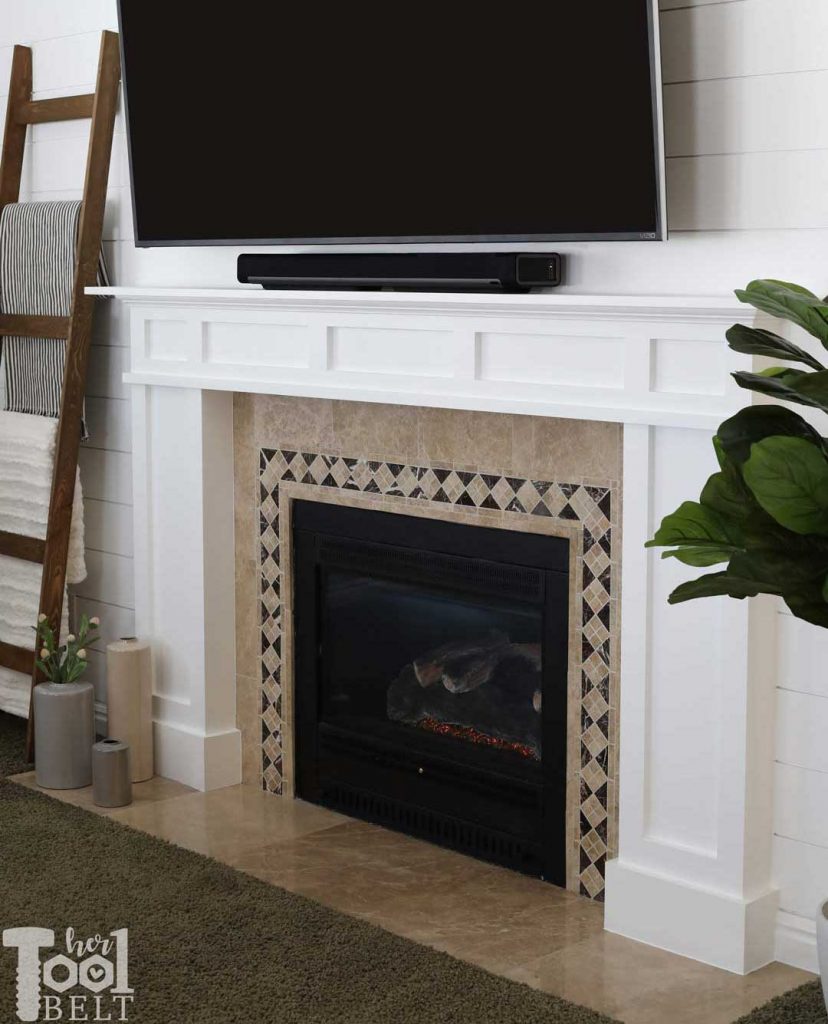
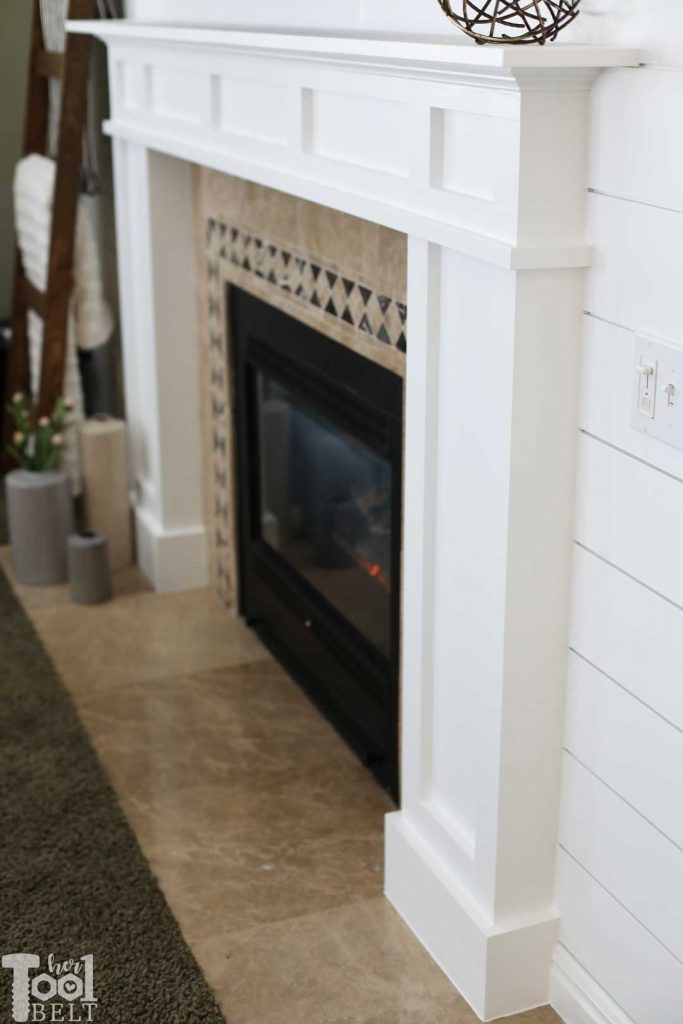
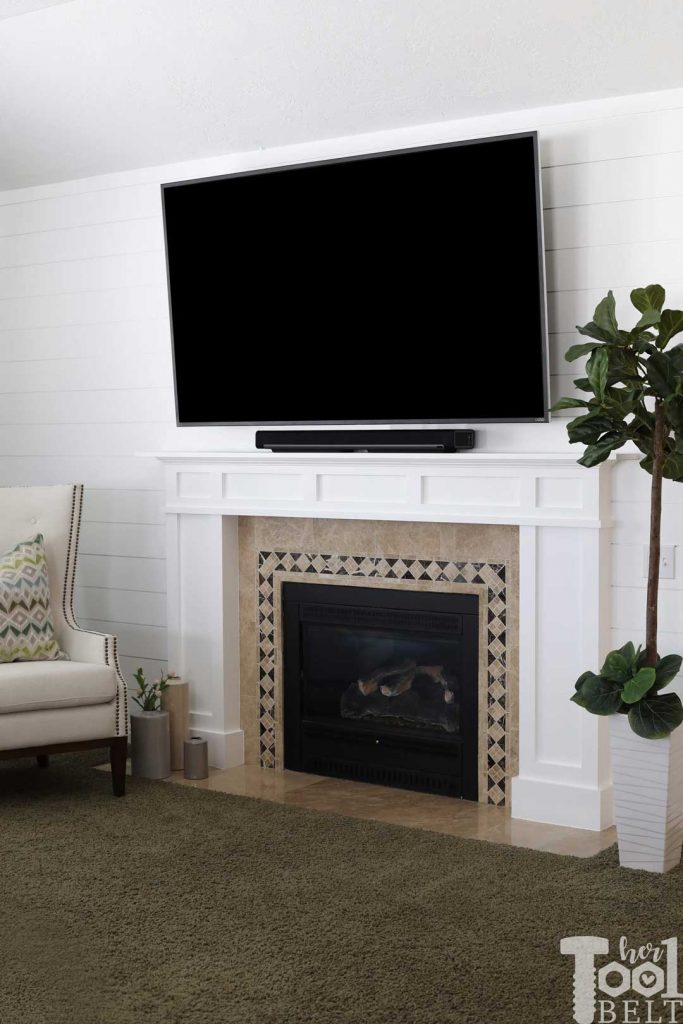
Mantel After
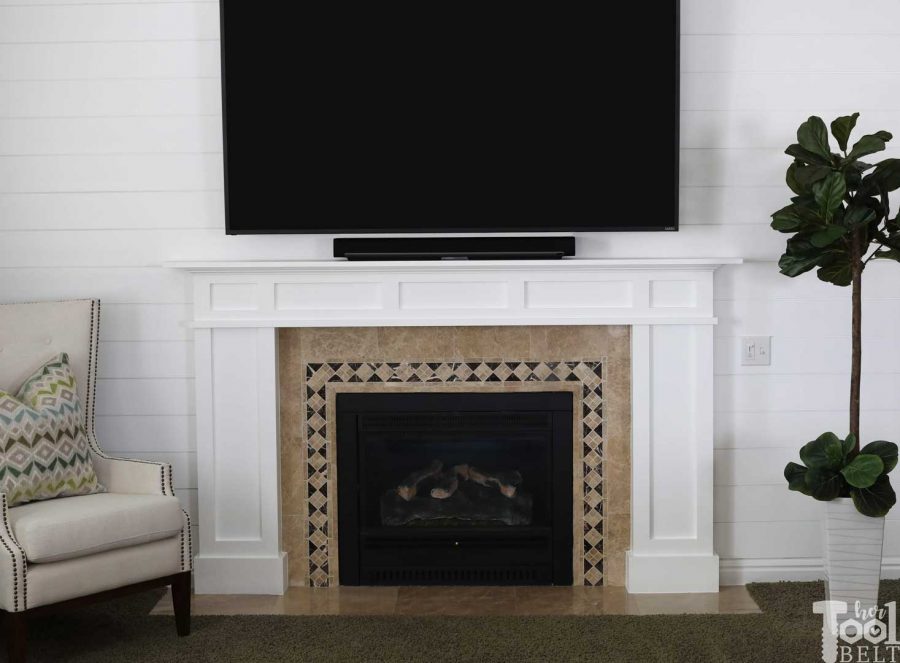
She is LOVING the new look and having the TV mounted and out of the corner of the room. The bright white really lightens up the space up!
This post will show how I built the mantel from a $32 sheet of MDF and some 2×4’s. This whole wall makeover with the shiplap, mantel, paint, supplies etc came in less than $300. It made a huge impact and didn’t cost that much money! yay
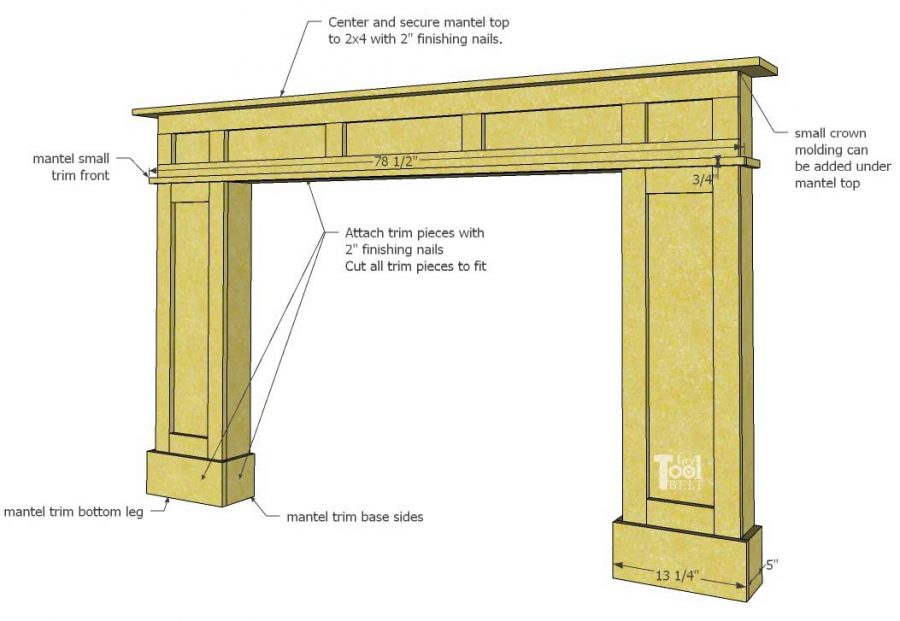
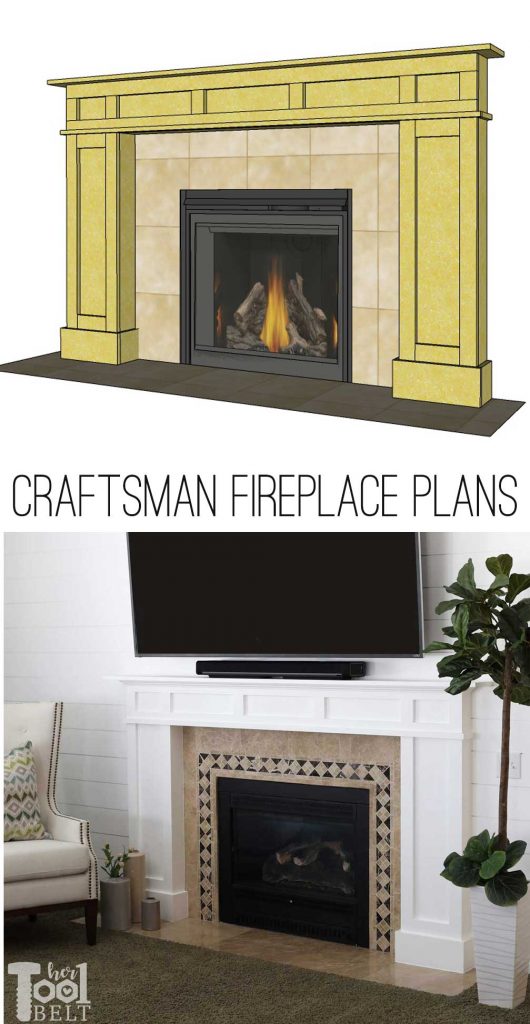
Overall dimensions of the new mantel.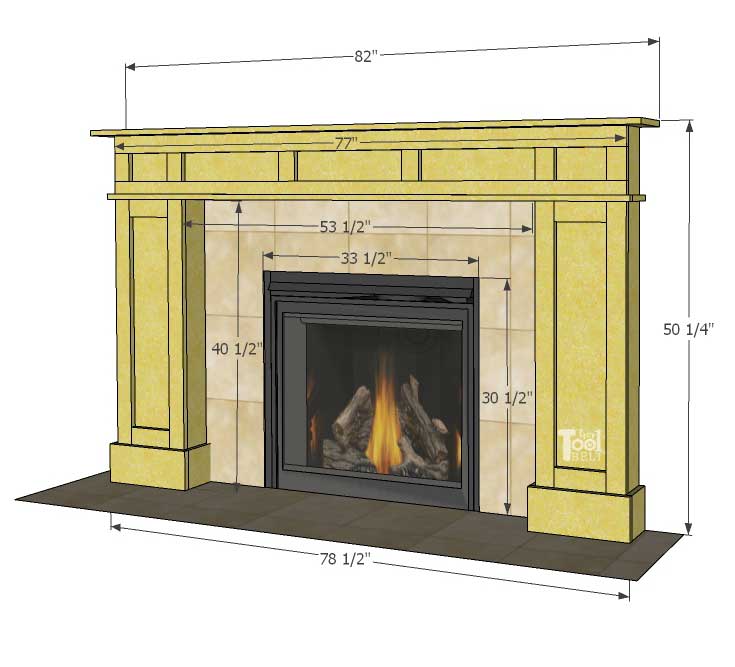
Materials
Mantel
- 1 – 4’x8′ sheet of 3/4″ MDF
- 4 – 2″x4″ x 8′ boards
- 1 – crown molding
- 3″ construction screws
- 2″ finish nails (brad nails could be used)
- spackle
- caulk
- paint primer
- white paint
- sandpaper
Shiplap Wall
- 25 – 8′ pieces of pre-primed mdf shiplap
- 2″ finish nails (brad nails could be used)
- 1 – corner molding – this wasn’t a perfect solution but it worked out
- spackle
- caulk
- paint primer
- white paint
- painters tape
Tools Used
- Ridgid Finish Nailer
- Ridgid Miter Saw
- Ridgid NXT Shop Vacuum
- Dewalt Circular Saw
- with Kreg Rip cut
- Bosch laser distance measurer
- Measuring tape
- Putty knife
- Caulk gun
- Ryobi Drill
- Ryobi multi-tool
- Stud Finder
- 3/8″ drill bit
Cut List – Mantel only
MDF
- 2 – 3/4″ x 2 1/2″ x 6 3/4″ – trim horiz
- 4 – 3/4″ x 2 1/2″ x 40 1/2″ – trim front vert
- 2 – 3/4″ x 4 1/4″ x 49 1/2″ – out-sides
- 2 – 3/4″ x 4 1/4″ x 41 1/4″ – in-sides
- 1 – 3/4″ x 3/4″ x 78 1/2″ – small trim front
- 2 – 3/4″ x 3/4″ x 5″ – small trim sides
- 2 – 3/4″ x 2 1/2″ x 77″ – trim top
- 6 – 3/4″ x 2 1/2″ x 4″ – trim small top
- 1 – 3/4″ x 7″ x 82″ – mantel top
- 2 – 3/4″ x 10 1/4″ x 41 1/4″ – front sides
- 2 – 3/4″ x 5 1/2″ x 13 1/4″ – trim base front
- 1 – 3/4″ x 8 1/4″ x 75 1/2″ – front top
- 1 – 3/4″ x 4 1/4″ x 53 1/2″ – top inside
- 4 – 3/4″ x 5″ x 5 1/2″ – trim base sides
- 2 – 3/4″ X 6 3/4″ x 8″ – trim bottom legs
2×4
- 4 – 1 1/2″ x 3 1/2″ x 48″ – frame legs
- 1 – 1 1/2″ x 3 1/2″ x 75 1/2″ – frame top
- 2 – 1 1/2″ x 3 1/2″ x 7 1/4″ – frame bottom
- 1 – 1 1/2″ x 3 1/2″ x 55″ – frame support
Cut Diagram
We are trying to get the most out of the MDF, if possible follow the cut # order.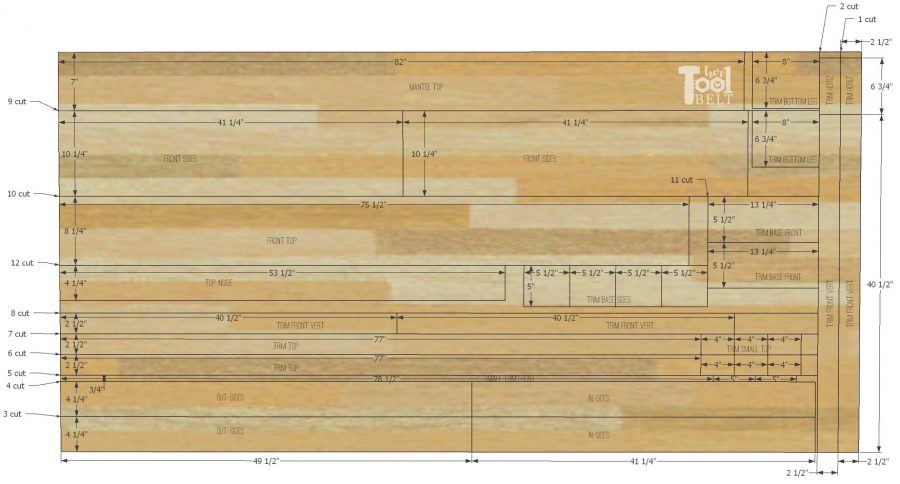
Planning for the Shiplap Wall
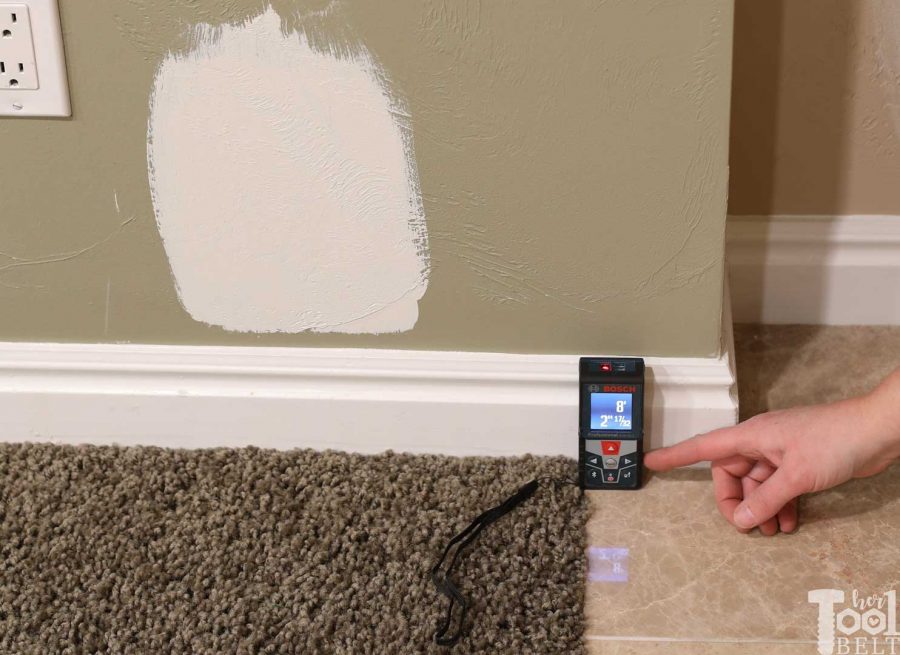
Before I started on fireplace makeover, I took measurements to plan out the space. I used the Bosch laser distance measurer to measure the floor to ceiling height. The ship lap pieces are about 5 3/4″ tall, so divide your height in inches by 5 3/4″ and round up. For this wall 98″/5.75″ = ~17 shiplap pieces high
Then the length of the wall. The shiplap pieces come in 8′ (96″) or 12′ (144″), you can decide which length works best for your space.
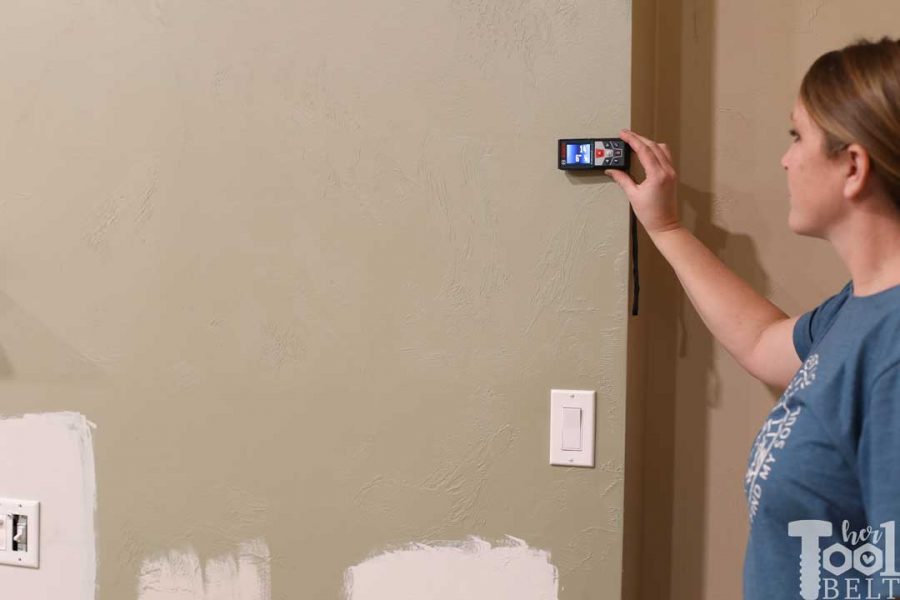 This laser measurer is cool, you can even measure and it will calculate area for you. I use this information to determine how many pieces of shiplap needed and how much paint to buy!
Out with the Old – Mantel
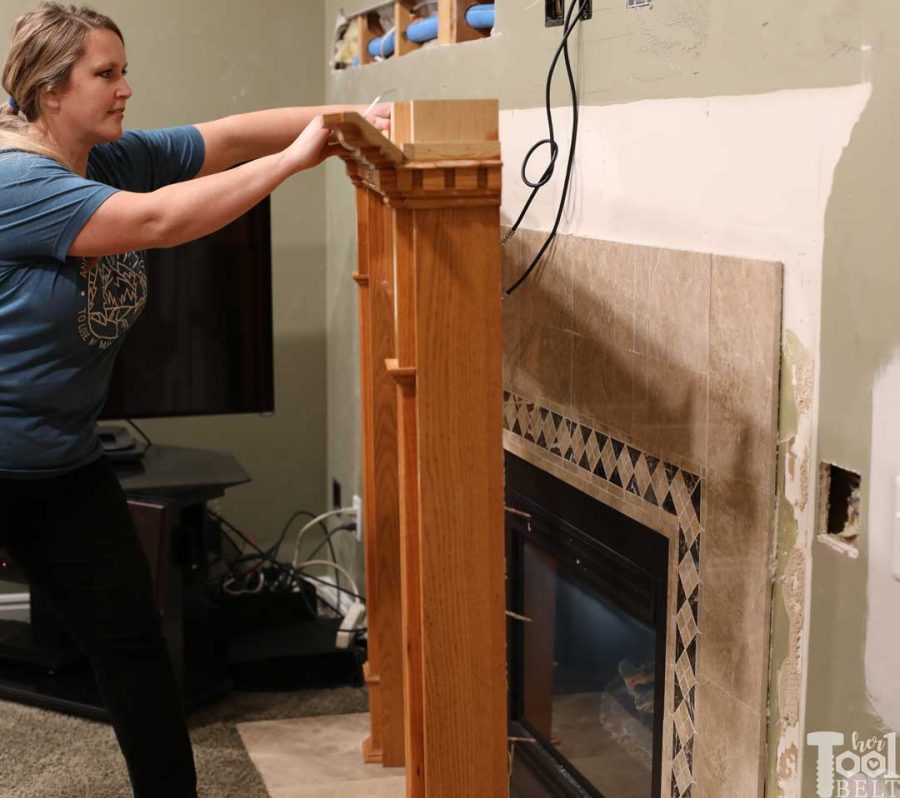
There isn’t a lot of grace to removing this old mantel. I removed any surrounding trim (quarter round) and popped off the mantel top. Then I used the hammer to pry the mantel off of the wall.
Luckily it came off pretty easily and mostly in one big piece.
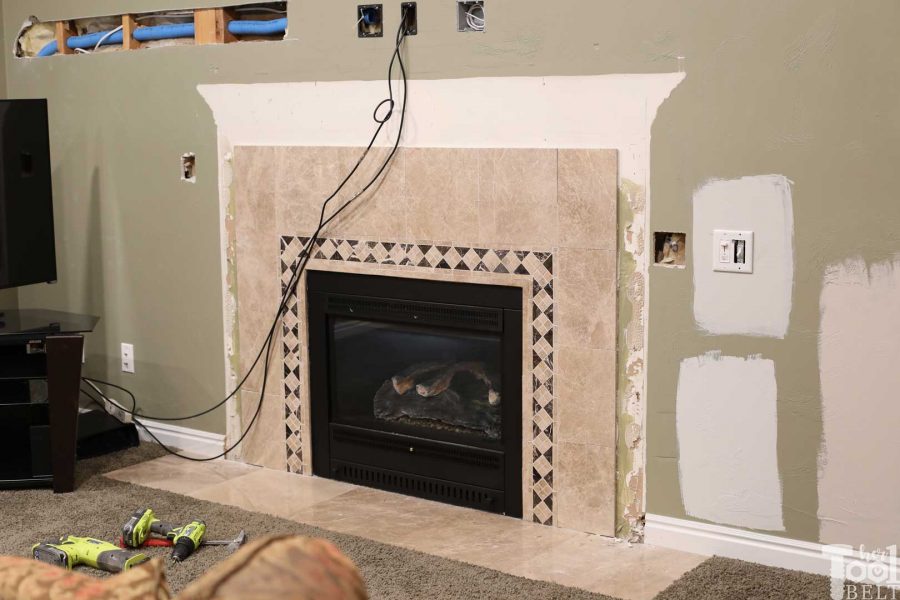
Unfortunately when I removed the mantel, I found out the tile extended 4″-5″ further than I expected. But it’s ok, it’ll just take a little finagling with the mantel frame.
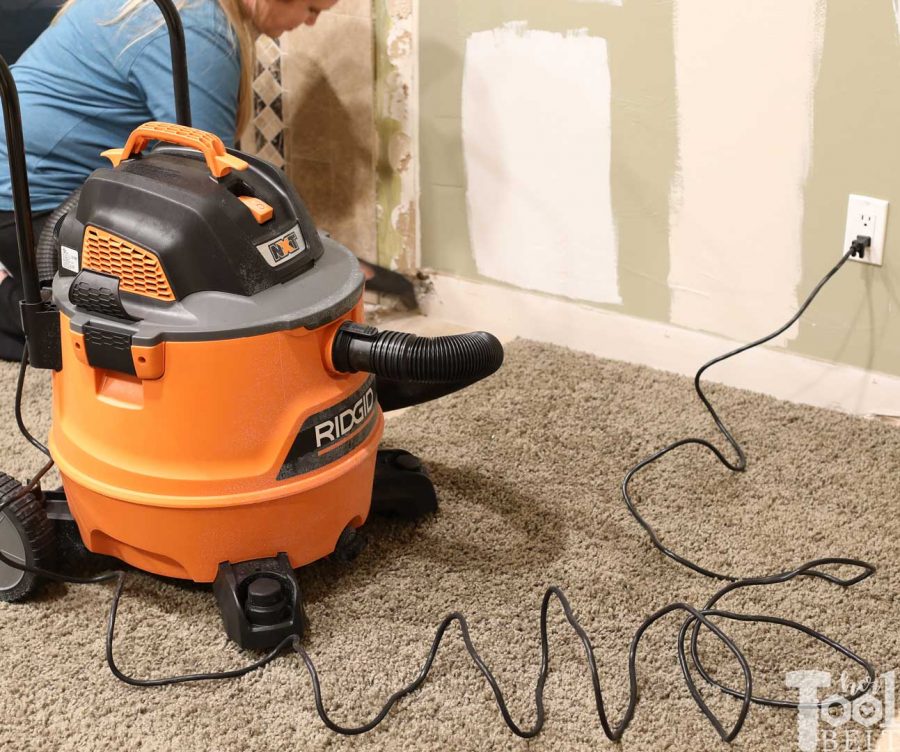
Now that the big demo mess was made, time to clean up. Thank goodness for shop vacs. This is the new 16 gal NXT model. It has more power over the previous model and lots of new features. I love the large wheels and the ‘cart’ feature for moving around. It also has a muffler that you can plug into the air out port. It comes with a fine particle filter. The only thing I need is the brush attachment and I’m all set.
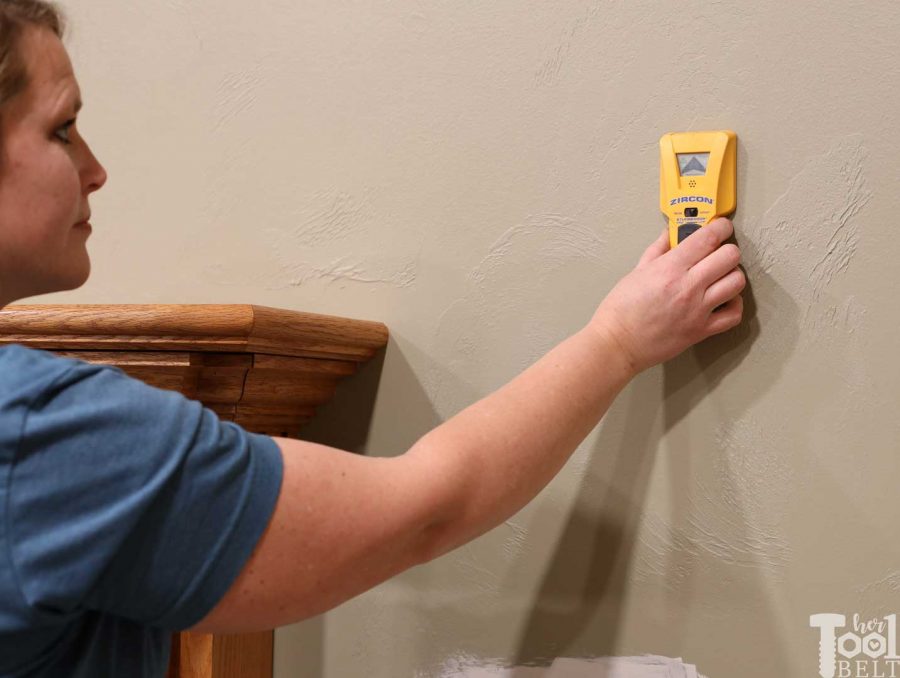
The last step before starting to build the new mantel is marking all of the studs in the wall. I like to use painters tape to mark the studs, it’s easy and comes off clean.
Mantel Frame
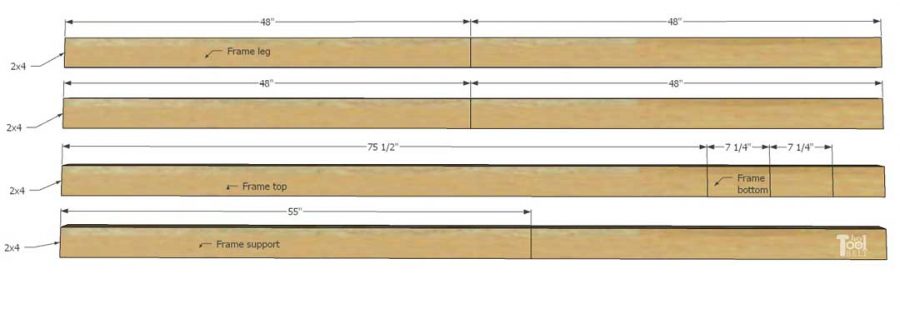
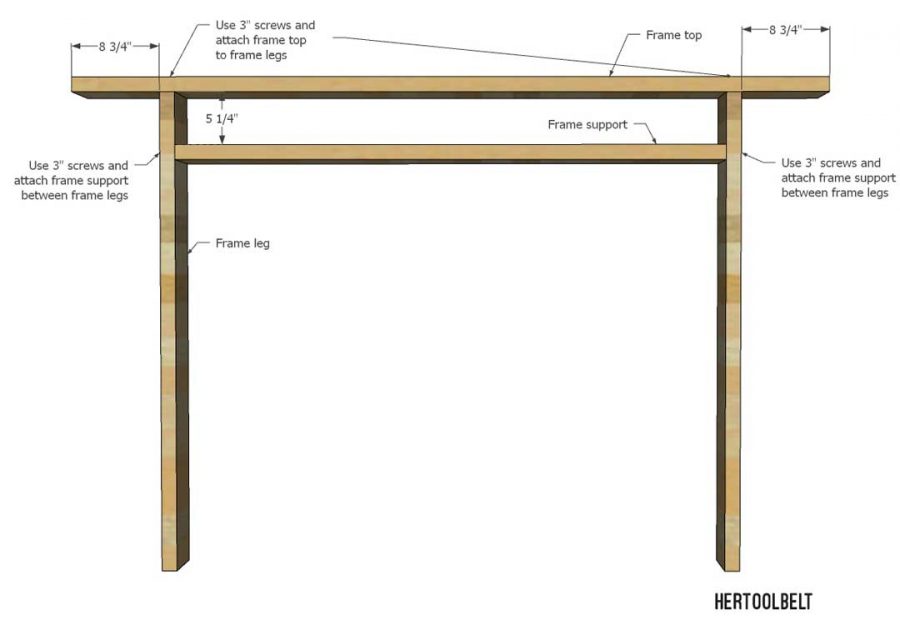
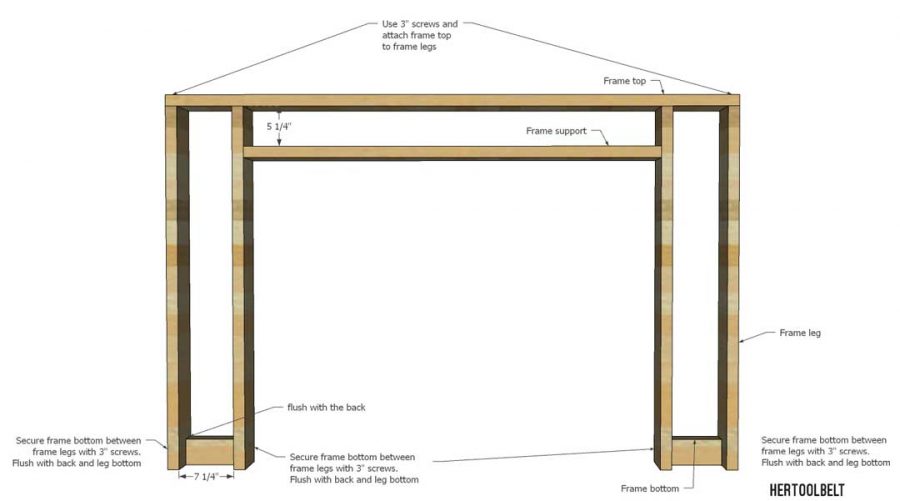
The mantel frame is a simple 2×4 frame that will attach to the wall and provide some depth to build off of.
Cut List – Mantel Frame
2×4 pieces
- 4 – 1 1/2″ x 3 1/2″ x 48″ – frame legs
- 1 – 1 1/2″ x 3 1/2″ x 75 1/2″ – frame top
- 2 – 1 1/2″ x 3 1/2″ x 7 1/4″ – frame bottom
- 1 – 1 1/2″ x 3 1/2″ x 55″ – frame support
On the frame top mark over 8 3/4″ from each side. On two of the frame legs, mark down 5 1/4″. Attach the frame support piece to the inside of two legs at 5 1/4″ down from the leg tops with 3″ screws. Then attach the two frame legs to the frame top at 8 3/4″ from each side with 3″ screws.
Then line up frame legs with the end of the frame top and secure with 3″ screws. Finally attach a frame bottom piece between each leg group, secure with 3″ screws. The frame bottom pieces should be flush with the back and bottom of the legs.
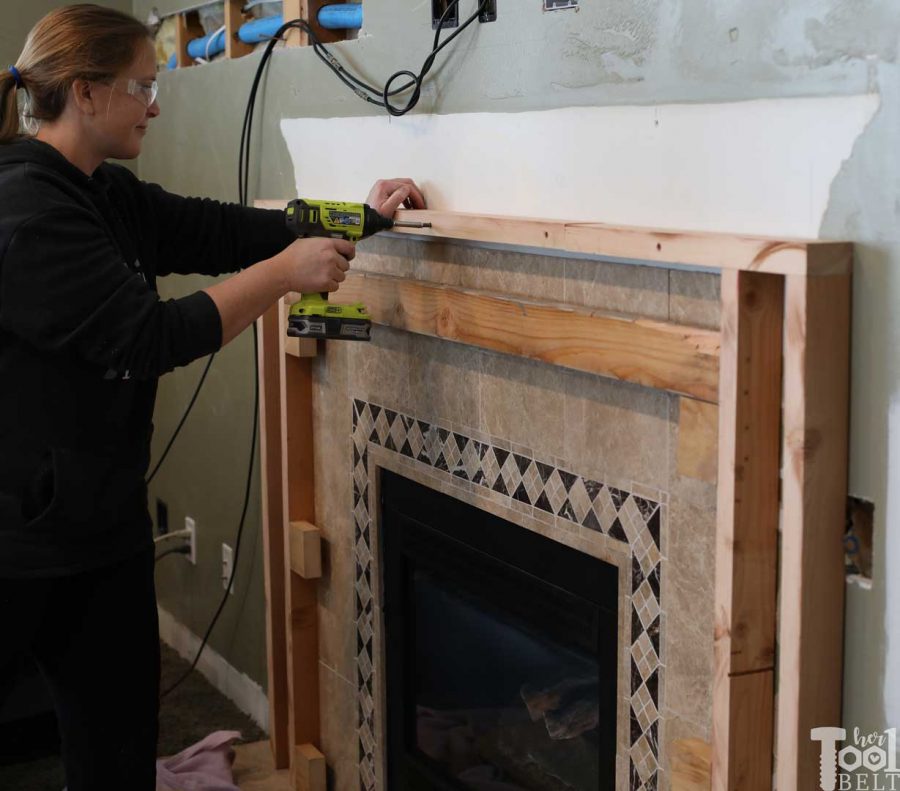
Center the 2×4 mantel frame over the fireplace. Level the frame so the legs are vertical and the top is level. Secure the frame to the wall bottom through the frame bottom pieces with 3″ screws. Locate the wall studs along the frame top. Drill 3/8″ holes into the frame top about 2 1/2″ deep. Secure the frame top to the wall with 3″ screws.
Note: My frame had to be a different configuration because of the existing tile.
Building the Mantel MDF
Cut List – Mantel only
MDF
- 2 – 3/4″ x 2 1/2″ x 6 3/4″ – trim horiz
- 4 – 3/4″ x 2 1/2″ x 40 1/2″ – trim front vert
- 2 – 3/4″ x 4 1/4″ x 49 1/2″ – out-sides
- 2 – 3/4″ x 4 1/4″ x 41 1/4″ – in-sides
- 1 – 3/4″ x 3/4″ x 78 1/2″ – small trim front
- 2 – 3/4″ x 3/4″ x 5″ – small trim sides
- 2 – 3/4″ x 2 1/2″ x 77″ – trim top
- 6 – 3/4″ x 2 1/2″ x 4″ – trim small top
- 1 – 3/4″ x 7″ x 82″ – mantel top
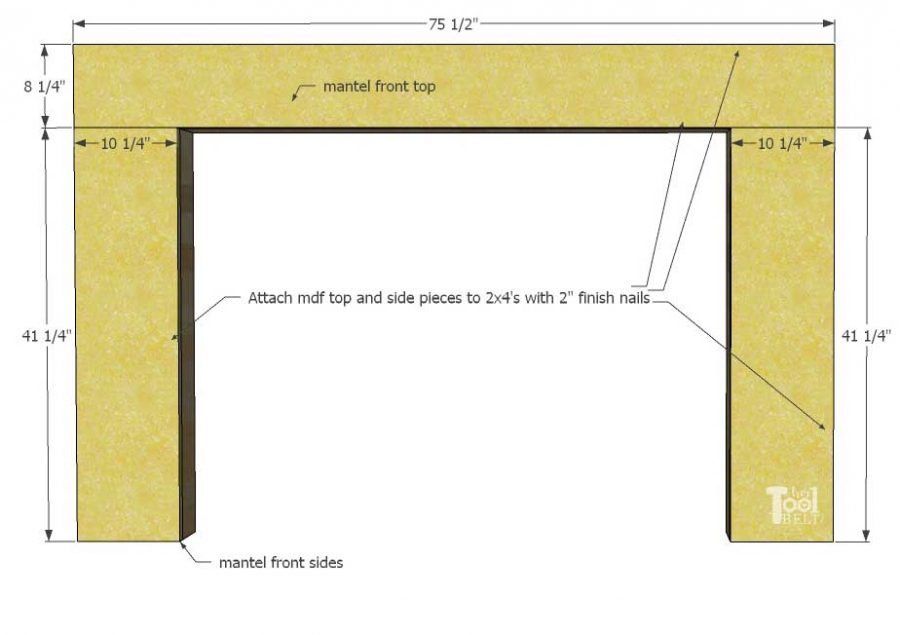
- 2 – 3/4″ x 10 1/4″ x 41 1/4″ – front sides
- 2 – 3/4″ x 5 1/2″ x 13 1/4″ – trim base front
- 1 – 3/4″ x 8 1/4″ x 75 1/2″ – front top
- 1 – 3/4″ x 4 1/4″ x 53 1/2″ – top inside
- 4 – 3/4″ x 5″ x 5 1/2″ – trim base sides
- 2 – 3/4″ X 6 3/4″ x 8″ – trim bottom legs
I wish this cut diagram was cleaner, but I used almost all of the MDF to make the mantel. If you follow the cut # orders, it should all work out good. I used a circular saw with the Kreg Rip cut to make the cuts (once the pieces were manageable, I used the miter saw.)
Mantel Assembly
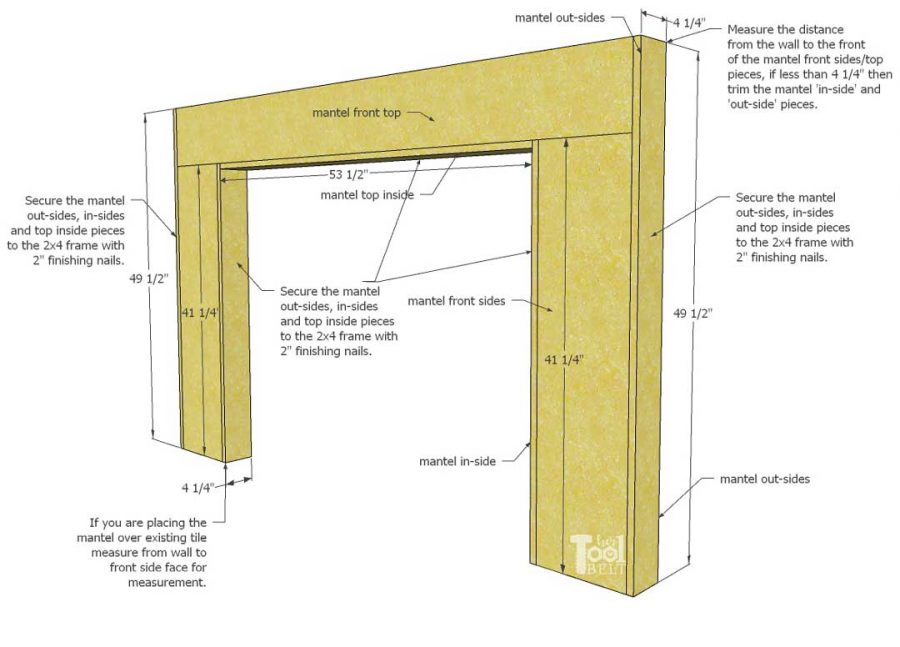
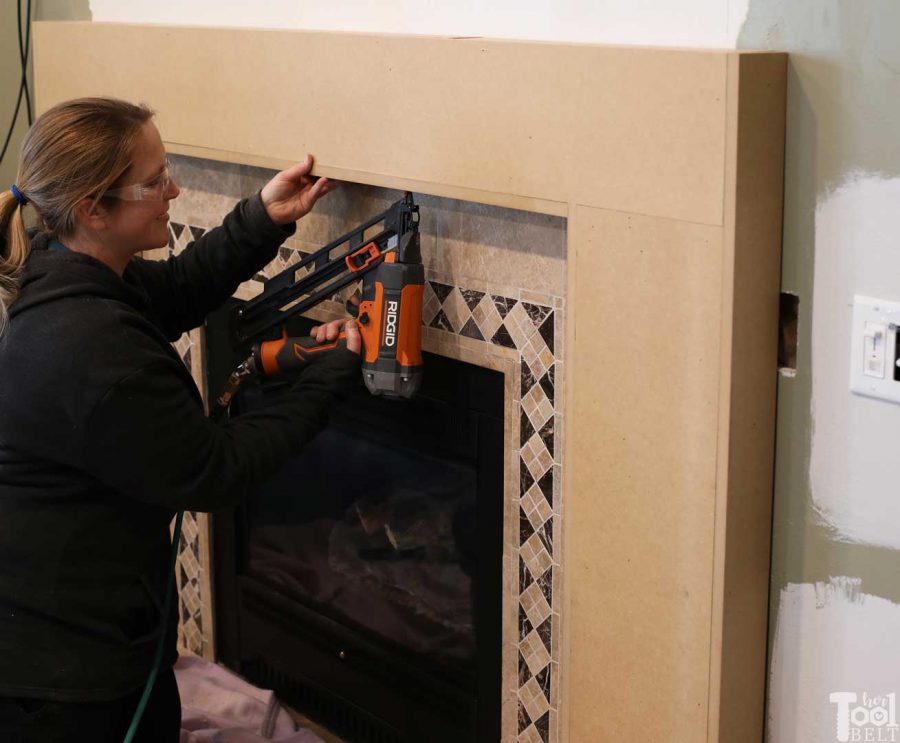
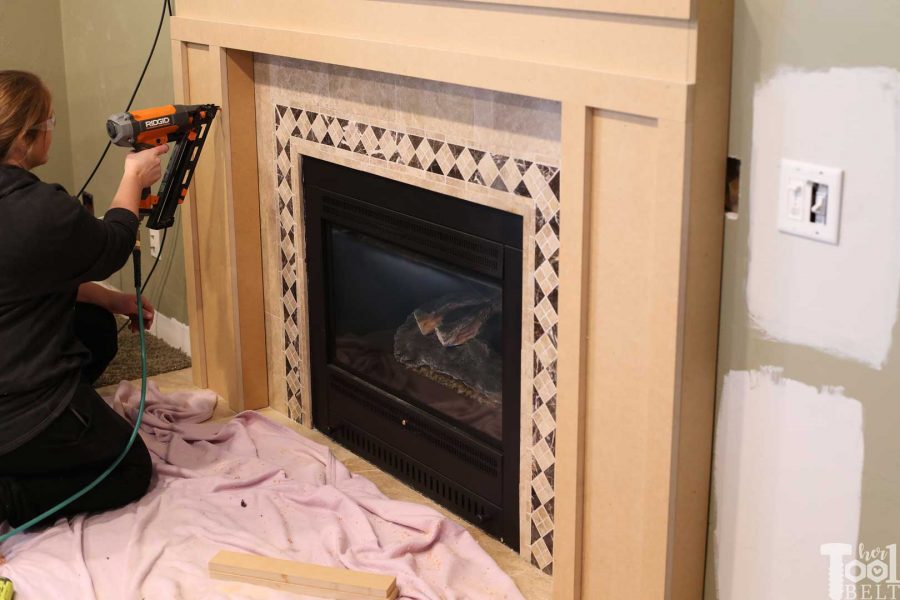
Attach the mantel front sides to the legs of the frame with 2″ finish nails. Then attach the mantel front top to the frame with 2″ finish nails.
Measure the distance from the wall to the front face of the ‘mantel front sides’. If this is less than 4 1/4″, then trim down the out-side pieces to fit. Do the same for the ‘in-side’ pieces, since I was mounting the ‘in-side’ pieces over tile, mine were around 3 7/8″.
All of the side pieces should be flush with the front face of the front side and front top pieces.
Secure the ‘out-sides’, ‘in-sides’ and top inside to the frame with 2″ finishing nails.
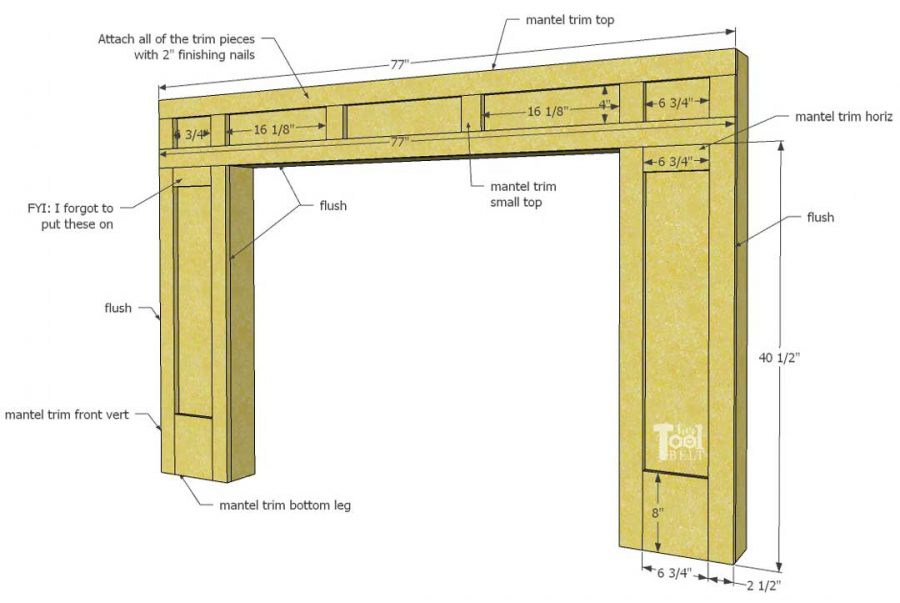
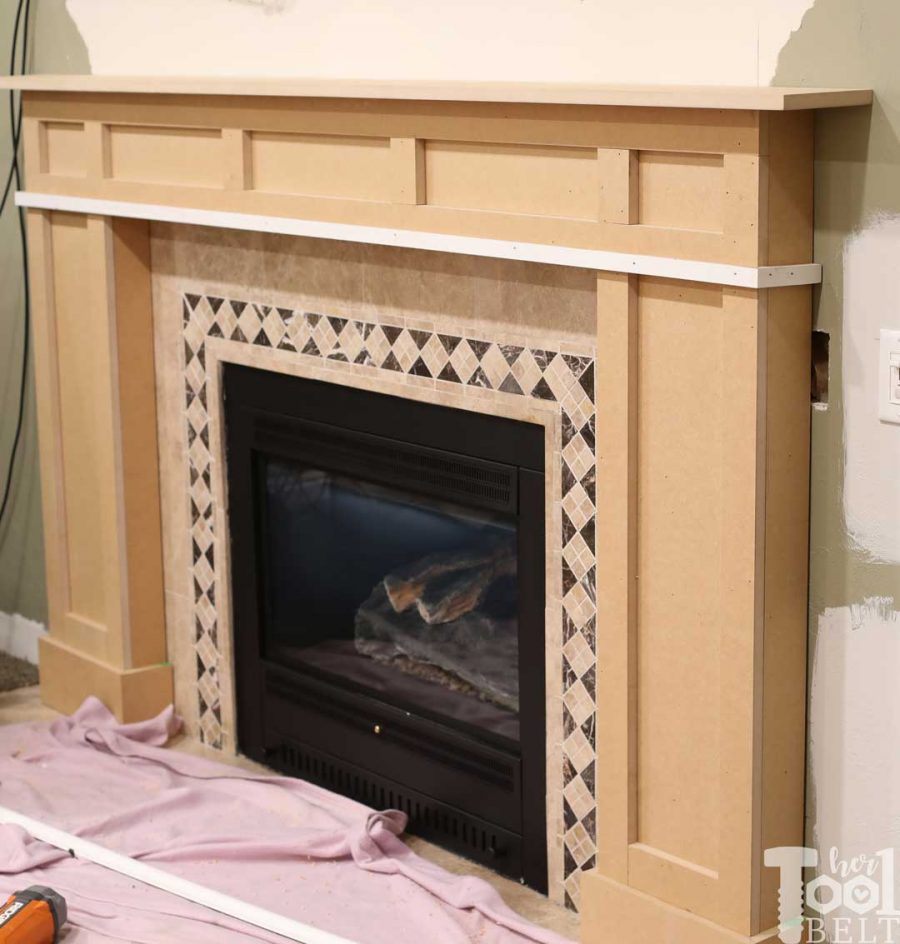
Attach the mantel trim top flush with the top of the mantel, and another flush with the ‘mantel top inside’ piece. Attach with 2″ finishing nails. Trim the ‘mantel trim small top’ and ‘mantel trim front vert’ pieces to fit, then secure with 2″ finishing nails. Add the ‘mantel trim horiz’ (which I forgot to add on my Aunt’s mantel) and the mantel trim bottom leg pieces, secure with 2″ finishing nails.
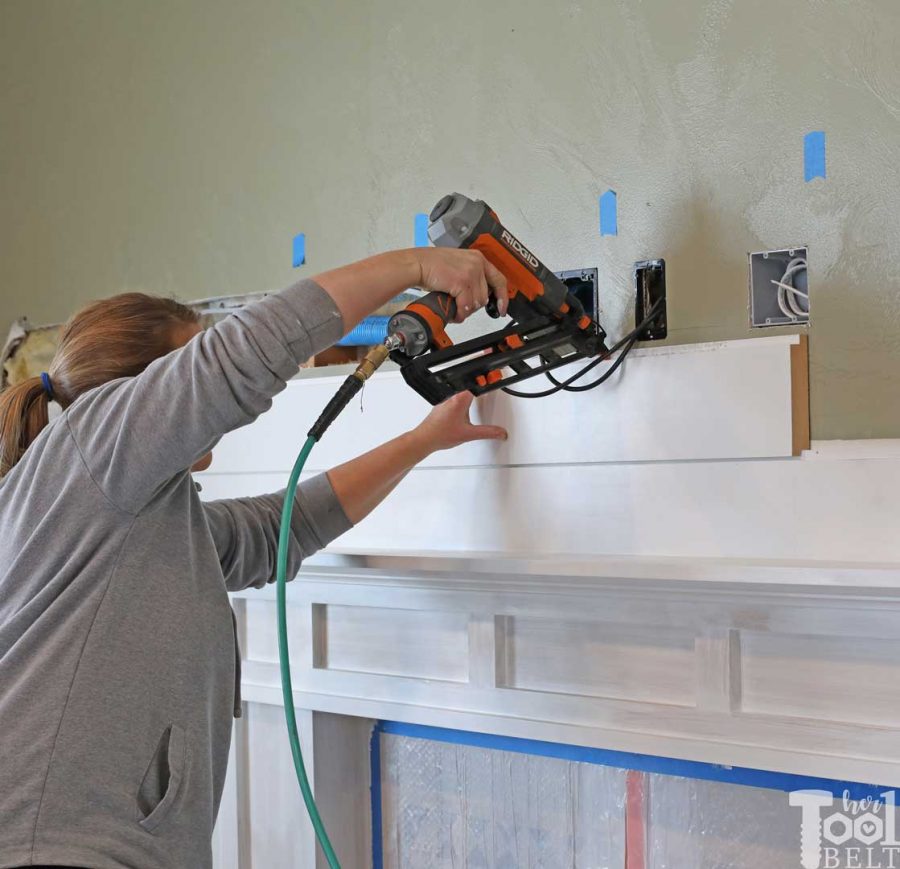
Since I was shiplapping the wall, I attached the mantel top after I put up the shiplap.
I added 3/4″ trim around the mantel and secured it with 2″ finishing nails. Then I wrapped the legs with 5 1/2″ trim (bottom leg and base sides) and secured with 2″ brad nails.
Not shown in the sketch, but I added a small crown molding under the top of the mantel.
Mantel Touch Up
MDF is fabulous for being flat, uniform, cheap and easy to work with. However if it doesn’t get primed really well, then it will continually absorb the paint, making the finish look poor.
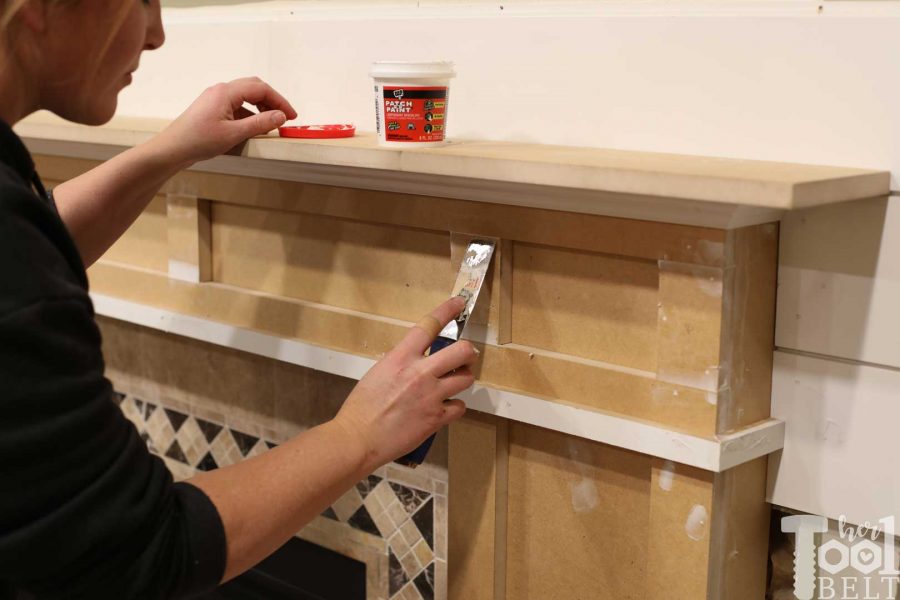
I filled all of the nail holes or cracks with spackle. Then I caulked all around the mantel.
Once the spackle dried, then I sanded the mantel smooth.
Before painting, I vacuumed the mantel to remove any dust. Then I applied 2-3 coats of paint primer, making sure to really prime the mdf edges.
Shiplap Wall
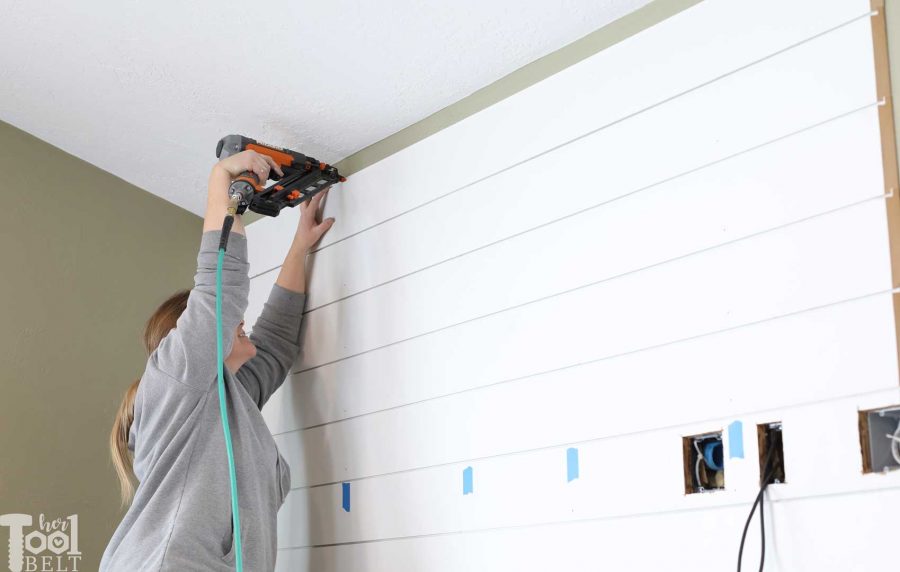
I love using this pre-primed MDF shiplap, it is really simple to put up. It is easiest to start from the bottom and work up. But for this mantel, I wanted a full piece to sit on the mantel frame top. Then I worked down and up from that point.
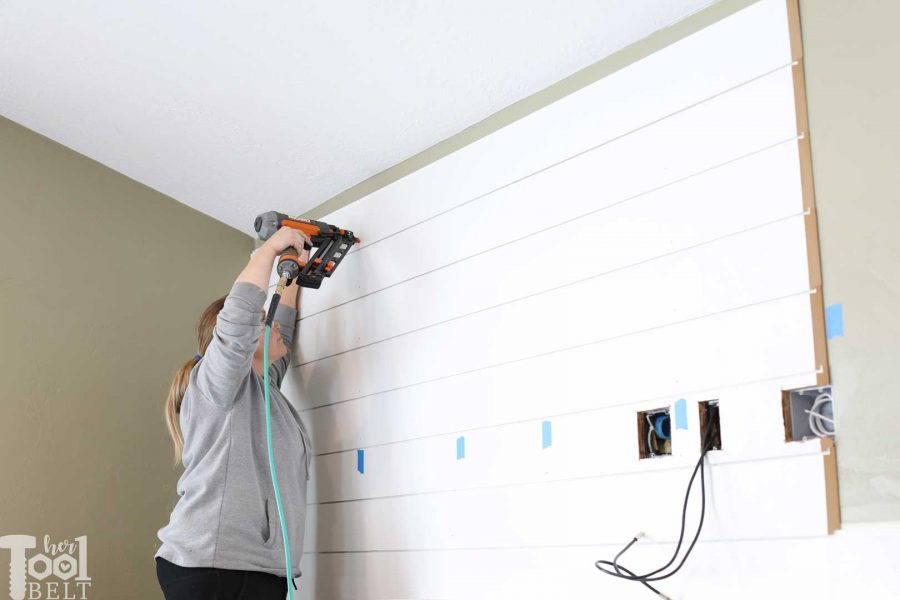
This is the way I install it. I put a 2″ finishing nail through the tongue of the shiplap on every wall stud.
Then every 3 or so wall studs, I put a 2″ nail into the face of the shiplap.
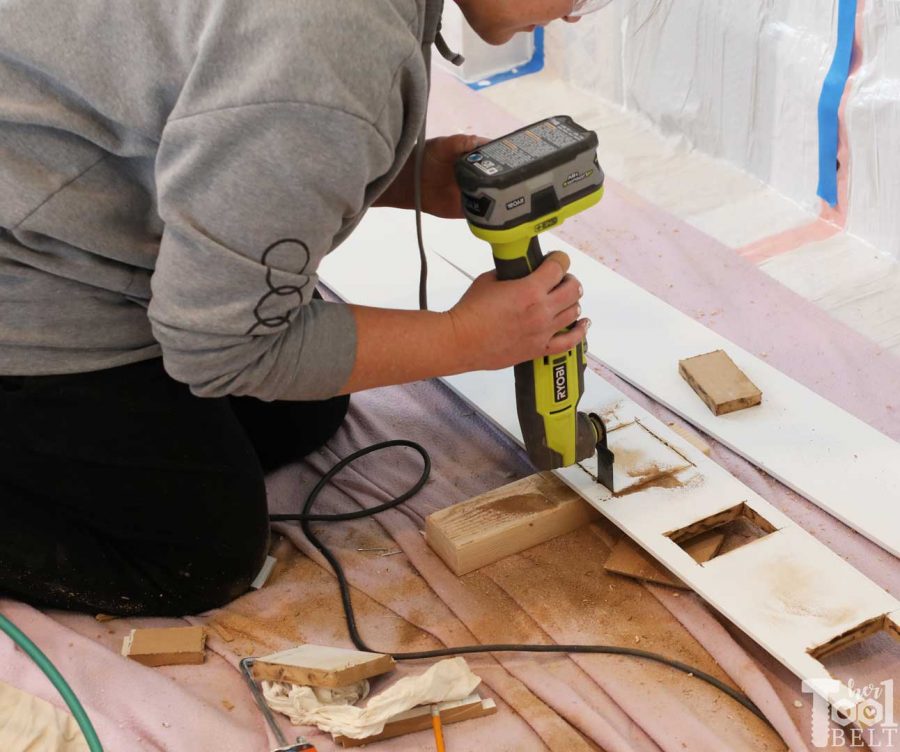
Wherever there are electrical boxes, I just use a multi-tool to cut the shape out.
After the shiplap is hung, I go and spackle all of the nail holes. Then caulk around all of the edges.
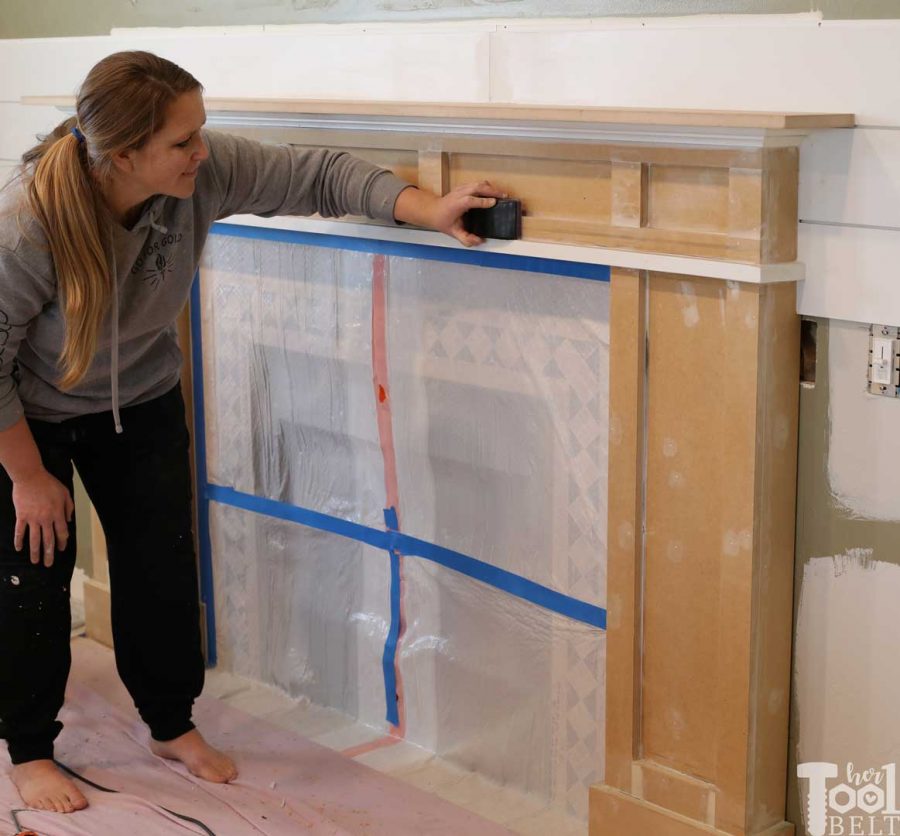
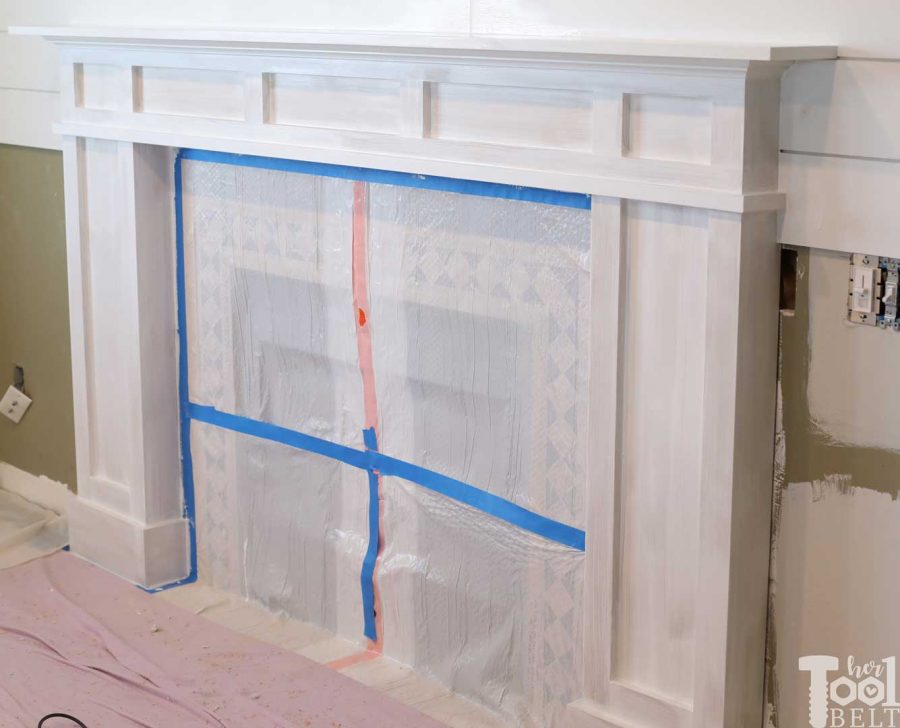
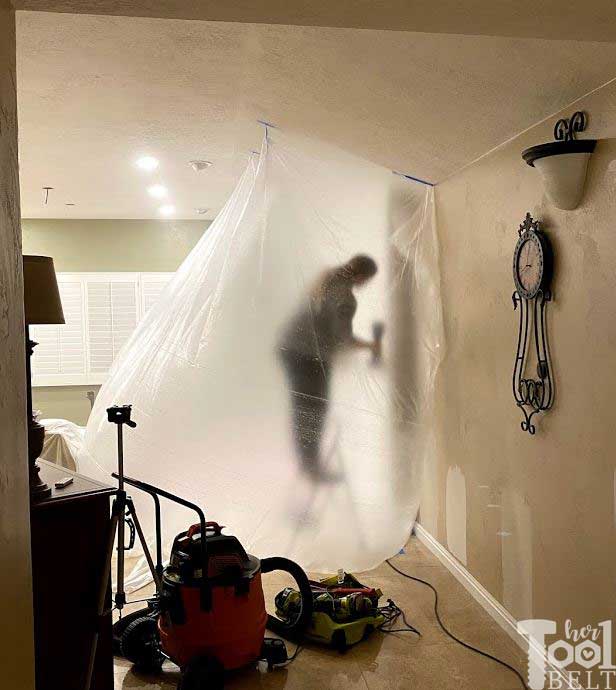
To paint the shiplap and mantel, I created a little tent so I wouldn’t get paint speckles all over her house. Then I used my HomeRight sprayer to paint the wall.
The Result
The MDF mantel turned out great!
My Aunt loves her new space. Her large TV fits perfectly above the fireplace.
Thanks for pinning
“I acknowledge that The Home Depot is partnering with me to participate in the Tool Review Program. As a part of the Program, I am receiving compensation in the form of products and services, for the purpose of promoting The Home Depot. All expressed opinions and experiences are my own words. My post complies with the Word Of Mouth Marketing Association (WOMMA) Ethics Code and applicable Federal Trade Commission guidelines.”


What brand and color of paint did you use? Looks great! And…yes she does love it.
You probably already found this out, but the paint is Behr Ultra Pure White