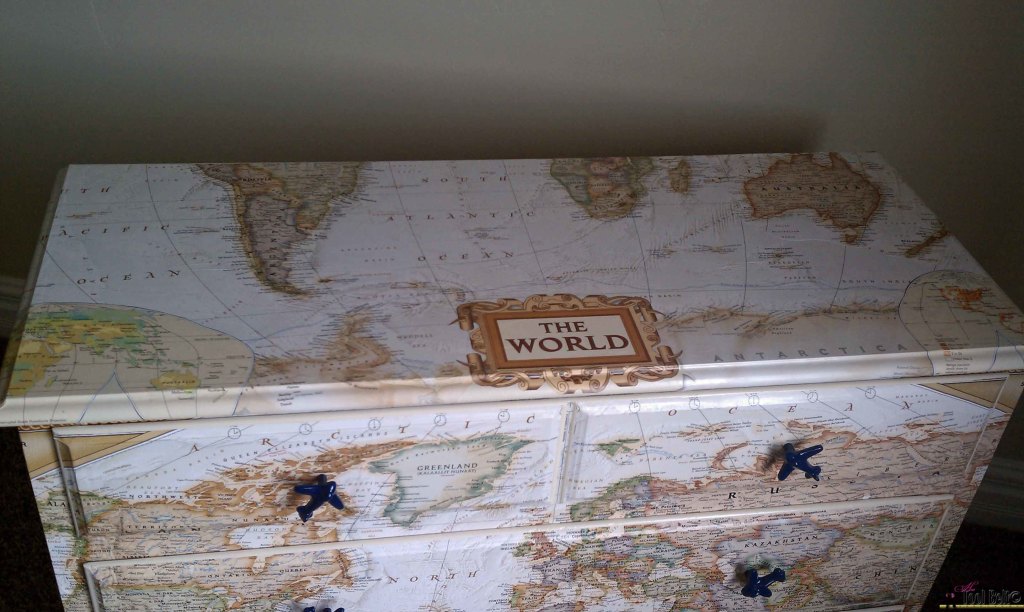
I saw this map dresser on the Nate Berkus show, and I knew that I had to make one for my son’s room. I started looking for cheap dressers on the local (ksl) classifieds and craigslist. There were lots of options, but the cheap/cute ones go fast, some within 15 minutes. I ended up getting a changing table/dresser that my mom was getting rid of…or maybe I just convinced her she was getting rid of it 🙂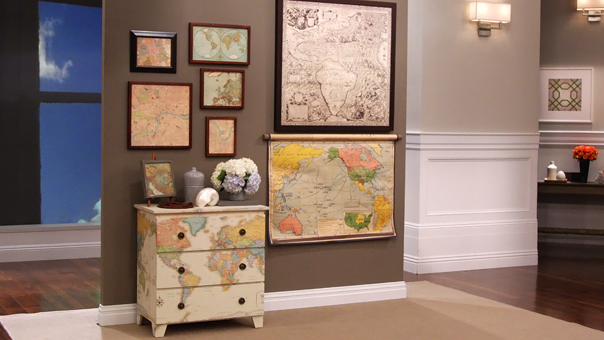
Next you’ll need a map. I picked one up on a sale at http://www.allposters.com/ make sure you go through mrrebates to get it even cheaper. The maps come in various sizes. You’ll have to measure your furniture to decide what is best. I used the 73″x48″ map, it also comes in 46″x30.5″. I decided that it looks nice to have the bulk of the map on the front/vertical portion of you project, like Nate’s. But I had enough map to do the top of the dresser too, which is also cool.
List of supplies needed for this project:
-
Dresser
-
Map
-
wood putty/spackle
-
paint
-
paint brush
-
mod podge
-
polyurethane (I like the spray can version)
-
spatula
-
sand paper
-
screw driver
-
tape
-
razor blade
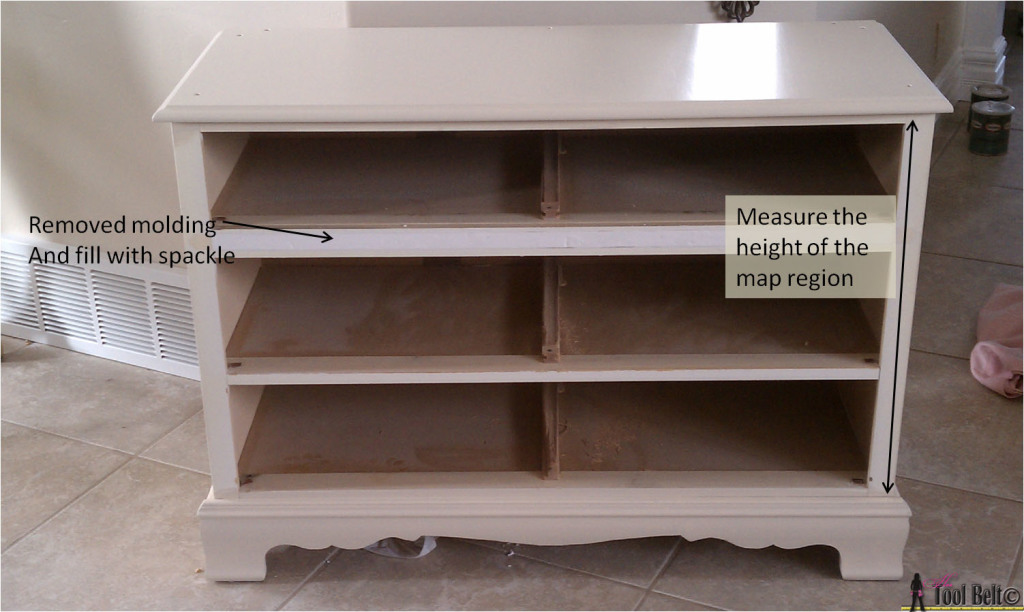
First you’ll want to remove the hardware from the dresser and any unwanted moldings (mine had a piece of molding under the first drawer). Where the map will be applied, fill in any holes, gaps or carvings with spackle. Let the spackle dry for a couple of hours, depending on how much spackle you applied. Once dry, sand the spackle smooth. You’ll want the area that you apply the map as straight and smooth as possible. Measure the vertical region where your map will be applied.
If needed, paint the areas on the dresser that will show. I painted the top and the bottom moldings.
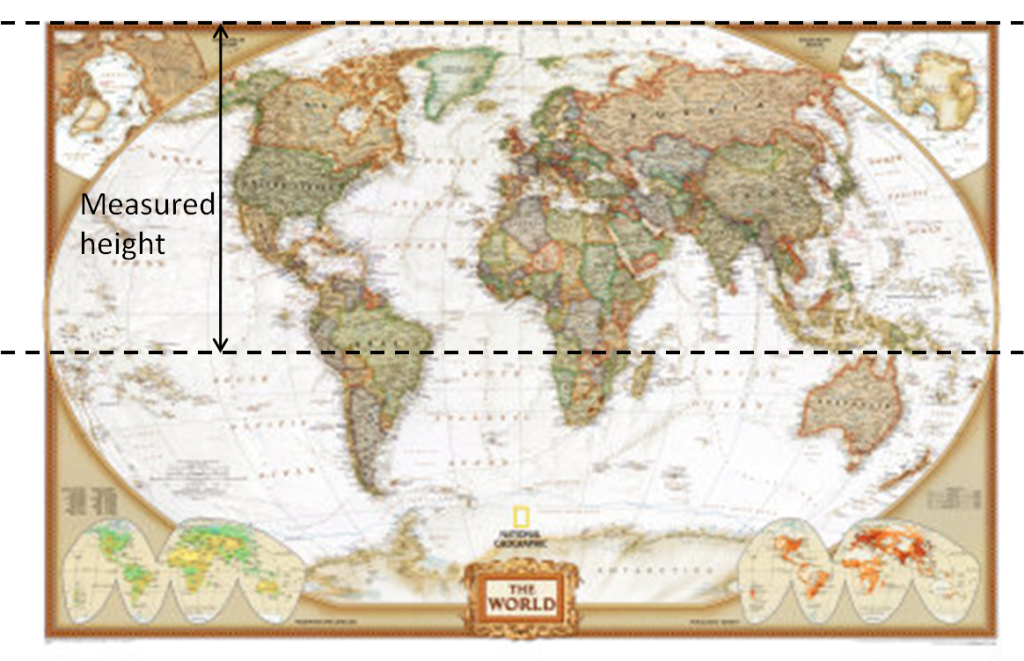
Layout your map and determine what section of the map you want showing in the front. Cut your map across the entire width to the height that you previously measured. Mine was 27″.
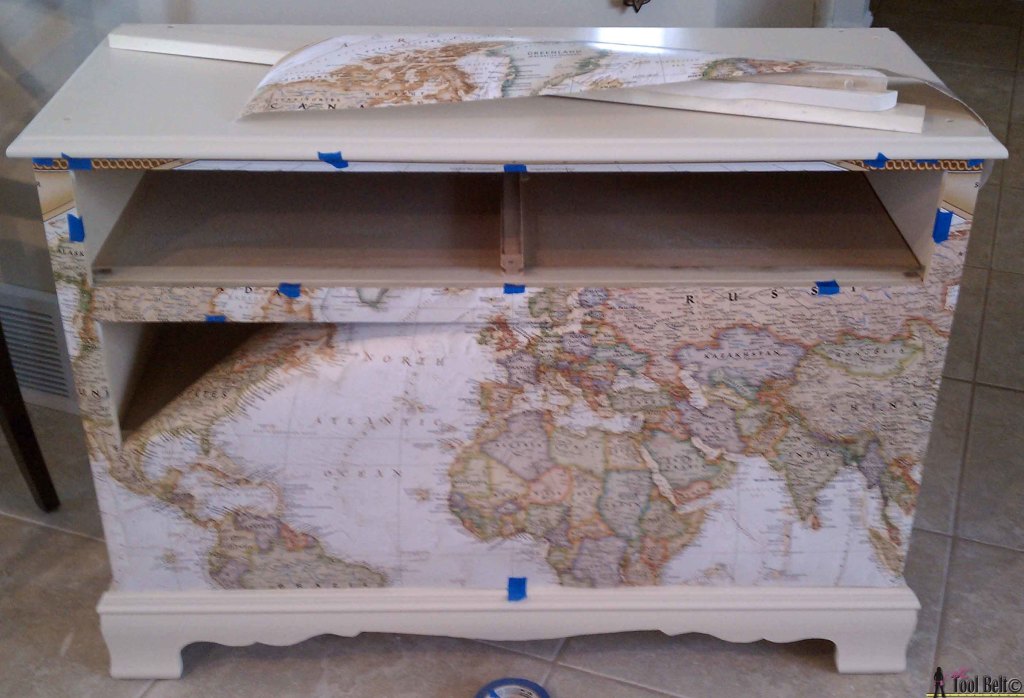
Wrap the cut portion on your map around the dresser and tape it tightly to the dresser where you want it.
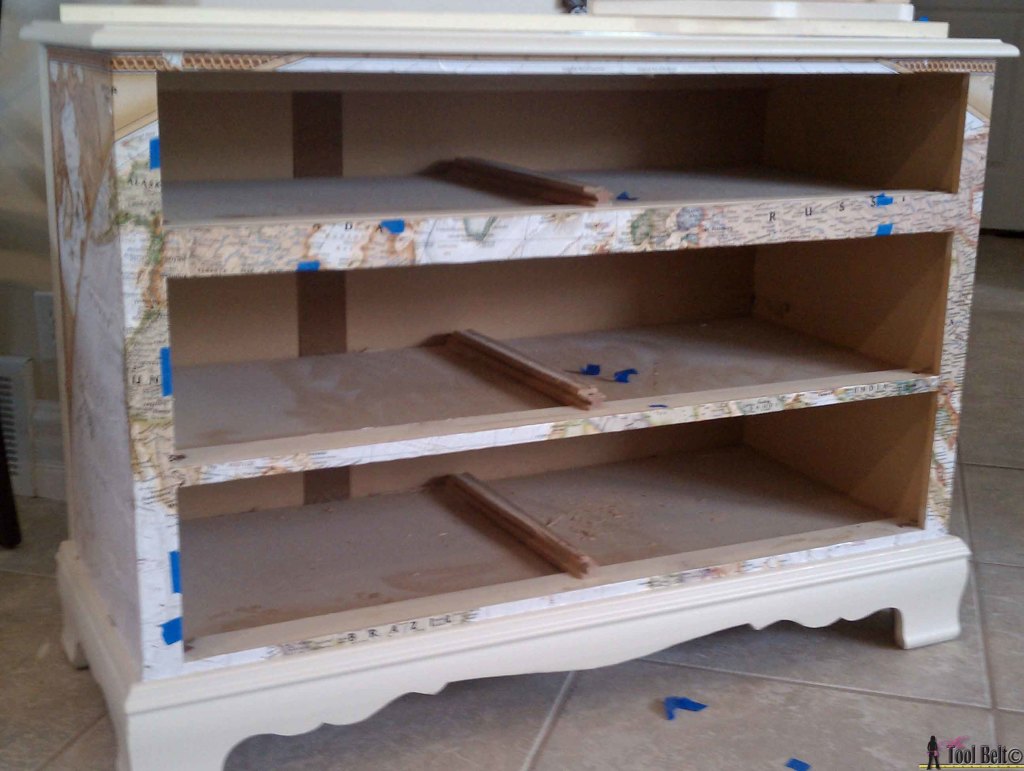
Use your razor blade and trim around the drawer holes. Use caution with your cut-outs since they will be used on the drawer fronts. Tape the map in place as you go. You don’t want the map to move around, because you want the map pieces to line up when installed on the drawer fronts.
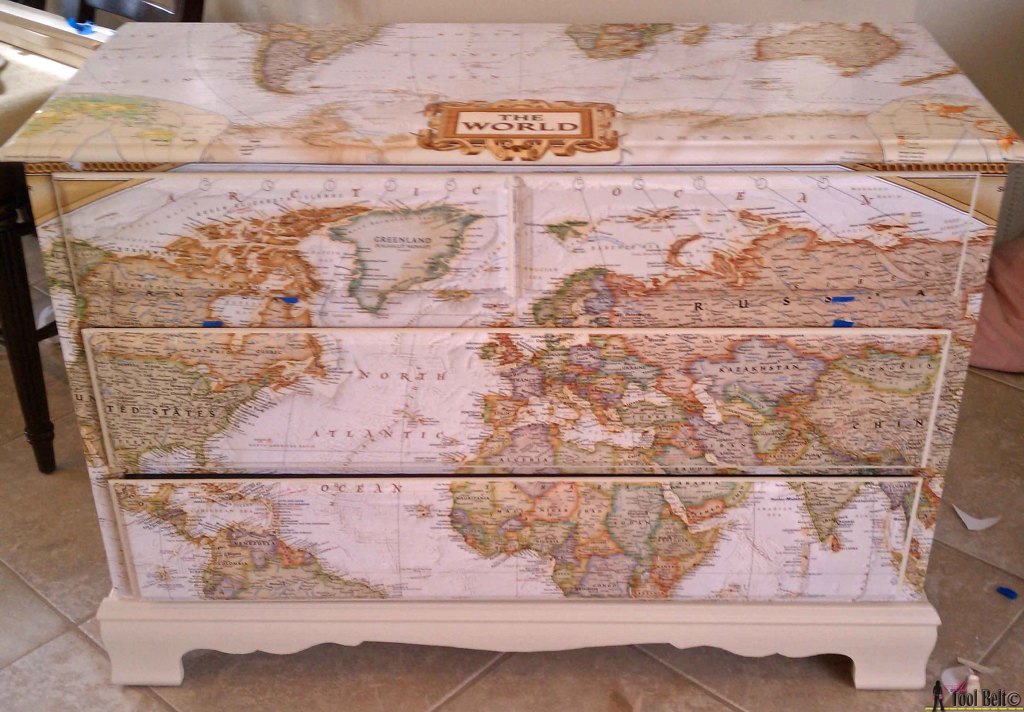
You’ll have to be careful with the little strips, but if they rip that is ok. Mine ripped in a few places and you can’t tell. Next is applying the map to the dresser. I started in front, since that is the most important section. Remove the map and all of the tape from map and dresser. Brush Mod Podge to the dresser and the back of the map. I started on the face frame of the left corner and worked to the right. You’ll want to do smallish areas at a time. Use your spatula to smooth out the map. Make sure the map is lined up straight with the dresser. When the Mod Podge was applied to the map, the map seemed to get stretchy/longer. Line up the edges of the drawer hole cut outs with the drawer holes, any extra in between can be creased down (it’ll look like terrain on the map). Once all of the map is Mod Podged to the front of the dresser, continue around to the sides. You don’t need to Mod Podge on the outside of the map because we will be applying a clear coat later to seal it and give it a good finish. If you have extra map, you can apply it to the top. (I wasn’t going to get Australia on the dresser so I cut it out and put it a little closer to Africa than it should be…but it’s there.) Next take the drawer hole map cut outs and Mod Podge them to your drawer fronts. Let everything dry at least over night.
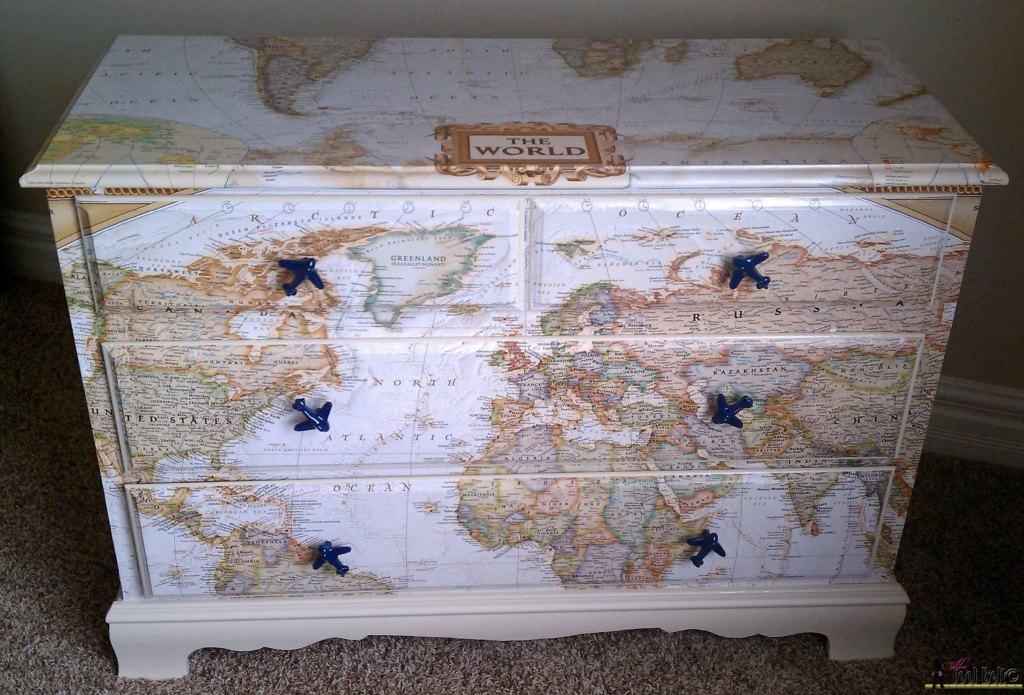
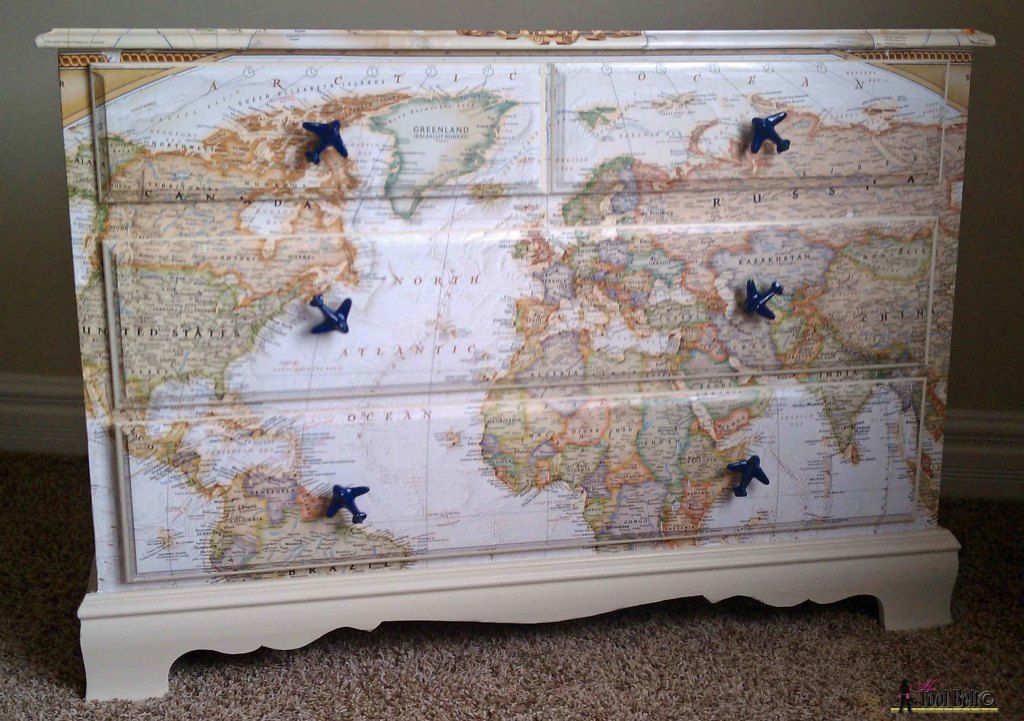
Once the Mod Podge has dried, apply a few coats of polyurethane clear coat. When the clear coat is dry, reinstall your drawer pull/hardware. I found these great airplane drawer pulls on ebay, they go great with the theme in my son’s room.
And there you have it. Pretty much the coolest map dresser around!
Stopping by from Remodelaholic Link Party. LOVE LOVE LOVE this! I have been meaning to do this to my son’s dresser too, but didn’t know where to start. Great tutorial. Motivated to actually get it done now. Thanks for sharing!
Thanks for stopping by. We’ve loved the map dresser, good luck with yours.
Amazing! And those airplane pulls are an excellent find! Great tutorial, too.